HP Scitex LX600 HP Designjet L65500 Printer and HP Scitex LX Printer Family - - Page 48
Caution - service manual
 |
View all HP Scitex LX600 manuals
Add to My Manuals
Save this manual to your list of manuals |
Page 48 highlights
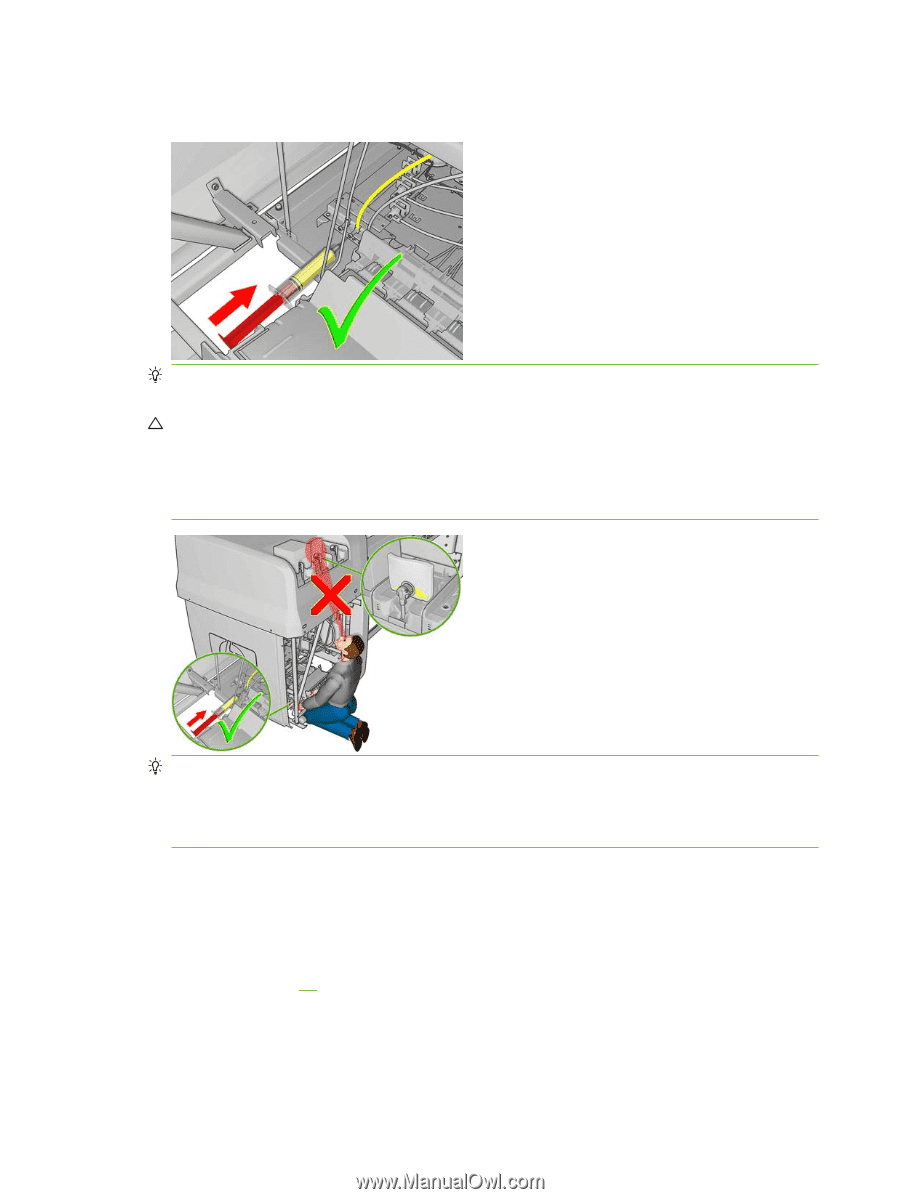
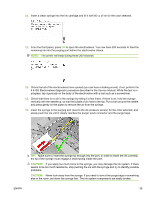
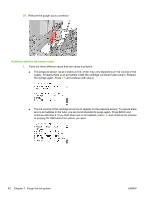
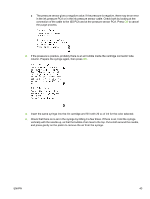
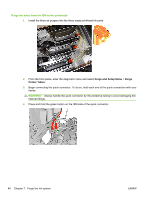
5. Insert the syringe in the purging port (next to the ink pressure sensor) for the color selected, and slowly push the ink until it clearly reaches the quick connector purger and the purge bags. TIP: Make sure to insert the syringe far enough into the port. In order to insert the ink correctly, the tip of the syringe must engage a small spring inside the port. CAUTION: If you apply too much force to the syringe, you may damage the ink system. If there seems to be too much resistance, stop pushing the ink with the syringe and try to identify possible problems. CAUTION: Never look away from the syringe. If you need to look at the purge bags or something else in the room, set down the syringe first. The ink system components are easily broken. TIP: You will notice more resistance than before because the electrovalves are not open. TIP: If you run out of ink in the syringe, you can refill the syringe from the ink cartridge. Keep track of how much ink you remove from the ink cartridge, because you will be asked to report the quantity of ink taken. 6. Remove the syringe from the purge port with a cloth around the needle to prevent spills. 7. Press OK to confirm that you have finished purging the ink tubes for the color selected. 8. Disconnect the purge bag and connect the ink cartridge. If the ink cartridge is connected properly, the ink cartridge LED shows a continuous green. 9. Continue with step 20 in the process of purging the ISM tubes. If the problem is not solved after trying this twice, perform the 4.5 ISS Ink Pressure Sensors diagnostic procedure found in the Service Manual. 44 Chapter 7 Purge the ink system ENWW
-
 1
1 -
2
-
3
-
4
-
5
-
6
-
7
-
8
-
9
-
10
-
11
-
12
-
13
-
14
-
15
-
16
-
17
-
18
-
19
-
20
-
21
-
22
-
23
-
24
-
25
-
26
-
27
-
28
-
29
-
30
-
31
-
32
-
33
-
34
-
35
-
36
-
37
-
38
-
39
-
40
-
41
-
42
-
 43
43 -
 44
44 -
 45
45 -
 46
46 -
 47
47 -
 48
48 -
 49
49 -
 50
50 -
 51
51 -
 52
52 -
 53
53 -
54
-
55
-
56
-
57
-
58
-
59
-
60
-
61
-
62
-
63
-
64
-
65
-
66
-
67
-
68
-
69
-
70
-
71
-
72
-
73
-
74
-
75
-
76
-
77
-
78
-
79
-
80
-
81
-
82
-
83
-
84
-
85
-
86
 |
 |