HP Scitex LX600 HP Designjet L65500 Printer and HP Scitex LX Printer Family - - Page 26
Lower the feet
 |
View all HP Scitex LX600 manuals
Add to My Manuals
Save this manual to your list of manuals |
Page 26 highlights
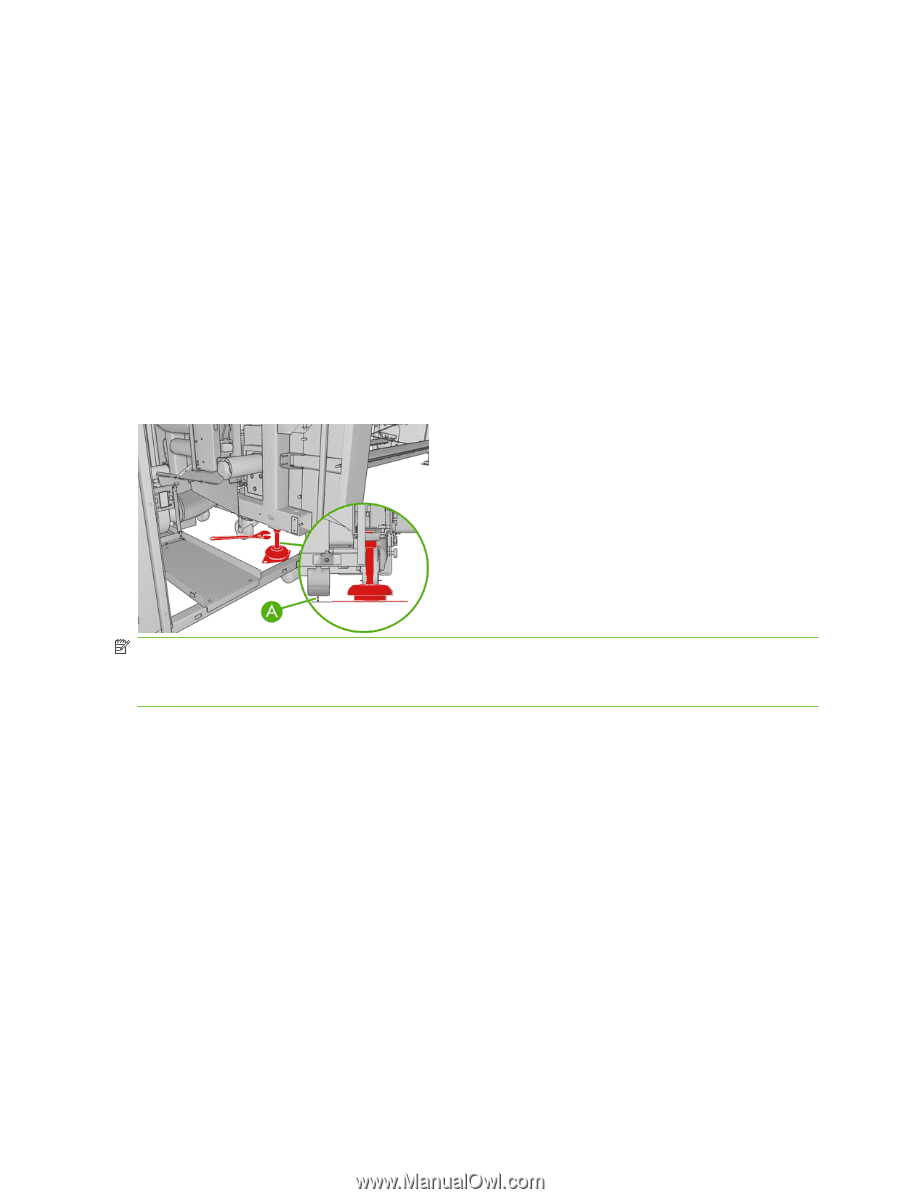
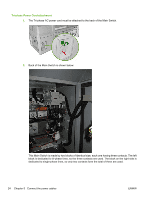
22. Remove 4 plastic ties from the left side cover. 23. Remove plastic ties from the top covers. Lower the feet 1. Use a 30 mm wrench to unlock the nut at the top of the foot. 2. Rotate the nut manually down the bolt. Leave about 0.8 inches (2 cm) of clearance at the bottom between nut and foot. 3. Use a 15 mm wrench to rotate the foot downwards. Use the flat faces at the bottom of the bolt to fit the wrench. 4. Lower the foot as far as the bolt allows. 5. Once the wheels are 15 mm (A) off the ground, tighten the 30 mm locking nut against the printer structure NOTE: The right side of the printer is heavier than the left side. Therefore, the feet on the right side will be more difficult to lower. NOTE: The position of the feet must be parallel with the spindle. 22 Chapter 4 Set up the printer in the final position ENWW
-
 1
1 -
2
-
3
-
4
-
5
-
6
-
7
-
8
-
9
-
10
-
11
-
12
-
13
-
14
-
15
-
16
-
17
-
18
-
19
-
20
-
 21
21 -
 22
22 -
 23
23 -
 24
24 -
 25
25 -
 26
26 -
 27
27 -
 28
28 -
 29
29 -
 30
30 -
 31
31 -
32
-
33
-
34
-
35
-
36
-
37
-
38
-
39
-
40
-
41
-
42
-
43
-
44
-
45
-
46
-
47
-
48
-
49
-
50
-
51
-
52
-
53
-
54
-
55
-
56
-
57
-
58
-
59
-
60
-
61
-
62
-
63
-
64
-
65
-
66
-
67
-
68
-
69
-
70
-
71
-
72
-
73
-
74
-
75
-
76
-
77
-
78
-
79
-
80
-
81
-
82
-
83
-
84
-
85
-
86
 |
 |