HP Scitex LX600 HP Designjet L65500 Printer and HP Scitex LX Printer Family - - Page 40
Purge and Setup Menu, 3ph AC Volt, Setup Menu, Con the voltage
 |
View all HP Scitex LX600 manuals
Add to My Manuals
Save this manual to your list of manuals |
Page 40 highlights
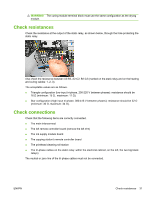
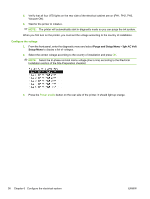
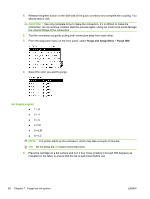
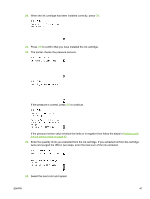
4. Verify that all four LED lights on the rear side of the electrical cabinet are on (PH1, PH2, PH3, Vacuum ON). 5. Wait for the printer to initialize. NOTE: The printer will automatically start in diagnostic mode so you can purge the ink system. When you first turn on the printer, you must set the voltage according to the country of installation. Configure the voltage 1. From the front panel, enter the diagnostic menu and select Purge and Setup Menu > 3ph AC Volt Setup Menu to display a list of voltages. 2. Select the correct voltage according to the country of installation and press OK. NOTE: Select the tri-phase nominal mains voltage (line to line) according to the Electrical Installation section of the Site Preparation checklist. 3. Press the Power enable button on the rear side of the printer. It should light up orange. 36 Chapter 6 Configure the electrical system ENWW
-
 1
1 -
2
-
3
-
4
-
5
-
6
-
7
-
8
-
9
-
10
-
11
-
12
-
13
-
14
-
15
-
16
-
17
-
18
-
19
-
20
-
21
-
22
-
23
-
24
-
25
-
26
-
27
-
28
-
29
-
30
-
31
-
32
-
33
-
34
-
 35
35 -
 36
36 -
 37
37 -
 38
38 -
 39
39 -
 40
40 -
 41
41 -
 42
42 -
 43
43 -
 44
44 -
 45
45 -
46
-
47
-
48
-
49
-
50
-
51
-
52
-
53
-
54
-
55
-
56
-
57
-
58
-
59
-
60
-
61
-
62
-
63
-
64
-
65
-
66
-
67
-
68
-
69
-
70
-
71
-
72
-
73
-
74
-
75
-
76
-
77
-
78
-
79
-
80
-
81
-
82
-
83
-
84
-
85
-
86
 |
 |
