Icom ID-52A Advanced Manual english - Page 101
Setting D-PRS Weather
 |
View all Icom ID-52A manuals
Add to My Manuals
Save this manual to your list of manuals |
Page 101 highlights
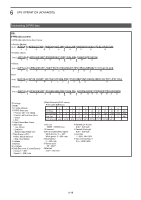
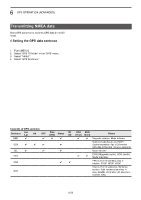
6 GPS OPERATION (ADVANCED) Transmitting D-PRS data DDSetting D-PRS Weather Set to transmit as a D-PRS Weather station. LLSee page 6-31 for details. 1. Setting the GPS TX Mode to D-PRS [MENU] > GPS > GPS TX Mode > D-PRS 2. Checking the Unproto Address You should use the default address, and editing is not recommended. 3. Setting the TX format to "Weather" Set "TX Format" to "Weather." 4. Selecting the Symbol Select the Symbol that indicates the weather station. LLSee page 6-31 to directly enter the Symbol. 5. Selecting the SSID To help identify your station's type, select the APRS® (Automatic Packet Reporting System) based SSID after the D-PRS data call sign. (p. 6-32) 6. Entering a comment Enter a comment to transmit as a D-PRS Weather station. 1. Select "Comment." 2. Push [QUICK]. 3. Select "Edit." 4. Enter a comment. 5. After entering, push [ENT]. 6. Push [ENT] again. 7. Setting the Time Stamp Set the Time Stamp function to transmit the received time data in UTC (Universal Time Coordinated) time. (p. 6-38) 8. Exiting the WEATHER screen To close the WEATHER screen, push [MENU]. •• Returns to the standby screen, and then is displayed. 6-16
-
 1
1 -
2
-
3
-
4
-
5
-
6
-
7
-
8
-
9
-
10
-
11
-
12
-
13
-
14
-
15
-
16
-
17
-
18
-
19
-
20
-
21
-
22
-
23
-
24
-
25
-
26
-
27
-
28
-
29
-
30
-
31
-
32
-
33
-
34
-
35
-
36
-
37
-
38
-
39
-
40
-
41
-
42
-
43
-
44
-
45
-
46
-
47
-
48
-
49
-
50
-
51
-
52
-
53
-
54
-
55
-
56
-
57
-
58
-
59
-
60
-
61
-
62
-
63
-
64
-
65
-
66
-
67
-
68
-
69
-
70
-
71
-
72
-
73
-
74
-
75
-
76
-
77
-
78
-
79
-
80
-
81
-
82
-
83
-
84
-
85
-
86
-
87
-
88
-
89
-
90
-
91
-
92
-
93
-
94
-
95
-
 96
96 -
 97
97 -
 98
98 -
 99
99 -
 100
100 -
 101
101 -
 102
102 -
 103
103 -
 104
104 -
 105
105 -
 106
106 -
107
-
108
-
109
-
110
-
111
-
112
-
113
-
114
-
115
-
116
-
117
-
118
-
119
-
120
-
121
-
122
-
123
-
124
-
125
-
126
-
127
-
128
-
129
-
130
-
131
-
132
-
133
-
134
-
135
-
136
-
137
-
138
-
139
-
140
-
141
-
142
-
143
-
144
-
145
-
146
-
147
-
148
-
149
-
150
-
151
-
152
-
153
-
154
-
155
-
156
-
157
-
158
-
159
-
160
-
161
-
162
-
163
-
164
-
165
-
166
-
167
-
168
-
169
-
170
-
171
-
172
-
173
-
174
-
175
-
176
-
177
-
178
-
179
-
180
-
181
-
182
-
183
-
184
-
185
-
186
-
187
-
188
-
189
-
190
-
191
-
192
-
193
-
194
-
195
-
196
-
197
-
198
-
199
-
200
-
201
-
202
-
203
-
204
-
205
-
206
-
207
-
208
-
209
-
210
-
211
-
212
-
213
-
214
-
215
-
216
-
217
-
218
-
219
-
220
-
221
-
222
-
223
-
224
-
225
-
226
-
227
-
228
-
229
-
230
-
231
-
232
-
233
-
234
-
235
-
236
-
237
-
238
-
239
-
240
-
241
-
242
-
243
-
244
-
245
-
246
-
247
-
248
-
249
-
250
-
251
-
252
-
253
-
254
-
255
-
256
-
257
-
258
-
259
-
260
-
261
-
262
-
263
 |
 |
