Kodak ESP9 User Manual - Page 23
Using the on-screen keyboard, Many ESP 9 users
 |
UPC - 041771349479
View all Kodak ESP9 manuals
Add to My Manuals
Save this manual to your list of manuals |
Page 23 highlights
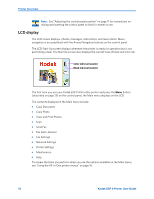
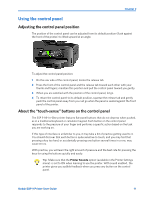
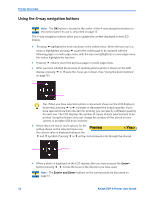
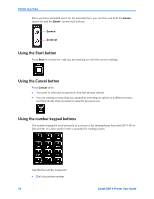
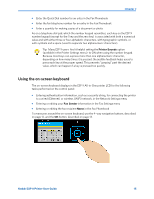
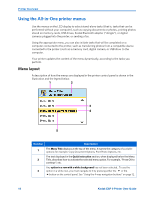
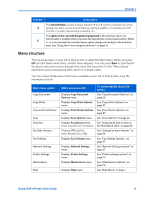
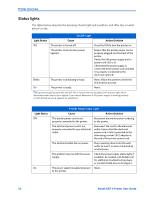
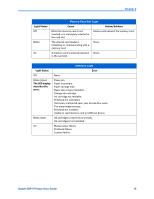
Chapter 2 • Enter the Quick Dial number for an entry in the Fax Phonebook • Enter the fax telephone number for an entry in the Fax Phonebook • Enter a quantity for making copies of a document or photo As on a telephone dial pad, which the number keypad resembles, each key on the ESP 9 number keypad (except for the 1 key and the zero key) is associated with both a numerical value and with either three or four alphabetic characters, with typographic symbols, or with symbols and a space (used to separate two alphanumeric characters). Tip: Many ESP 9 users find it helpful setting the Printer Sounds option (available in the Printer Settings menu) to ON when using the number keypad. Because most keys can express more than one alphanumeric character, depending on how many times it is pressed, the audible feedback helps users to press each key at the proper speed. This prevents "jumping" past the desired value, which can happen if a key is pressed too quickly . Using the on-screen keyboard The on-screen keyboard displays in the ESP 9 All-in-One printer LCD for the following tasks performed on the control panel: • Entering authentication information, such as a security string, for connecting the printer to a wired (Ethernet) or wireless (WiFi) network, in the Network Settings menu • Entering or editing your Fax Sender information in the Fax Settings menu • Entering or editing the fax recipient Name in the Fax Phonebook To maneuver around the on-screen keyboard, use the 4-way navigation buttons, described on page 12, and the OK button, described on page 13. Kodak ESP 9 Printer User Guide 15
-
 1
1 -
2
-
3
-
4
-
5
-
6
-
7
-
8
-
9
-
10
-
11
-
12
-
13
-
14
-
15
-
16
-
17
-
 18
18 -
 19
19 -
 20
20 -
 21
21 -
 22
22 -
 23
23 -
 24
24 -
 25
25 -
 26
26 -
 27
27 -
 28
28 -
29
-
30
-
31
-
32
-
33
-
34
-
35
-
36
-
37
-
38
-
39
-
40
-
41
-
42
-
43
-
44
-
45
-
46
-
47
-
48
-
49
-
50
-
51
-
52
-
53
-
54
-
55
-
56
-
57
-
58
-
59
-
60
-
61
-
62
-
63
-
64
-
65
-
66
-
67
-
68
-
69
-
70
-
71
-
72
-
73
-
74
-
75
-
76
-
77
-
78
-
79
-
80
-
81
-
82
-
83
-
84
-
85
-
86
-
87
-
88
-
89
-
90
-
91
-
92
-
93
-
94
-
95
-
96
-
97
-
98
-
99
-
100
-
101
-
102
-
103
-
104
-
105
-
106
-
107
-
108
-
109
-
110
-
111
-
112
-
113
-
114
-
115
-
116
-
117
-
118
-
119
-
120
-
121
-
122
-
123
-
124
-
125
-
126
-
127
-
128
-
129
-
130
-
131
-
132
-
133
-
134
-
135
-
136
-
137
-
138
-
139
-
140
-
141
 |
 |
