Kodak ESP9 User Manual - Page 70
Scan Options, Save as Defaults, Start, Document, Photo, USB Connected Computer, Scan Destination - scanning problems
 |
UPC - 041771349479
View all Kodak ESP9 manuals
Add to My Manuals
Save this manual to your list of manuals |
Page 70 highlights
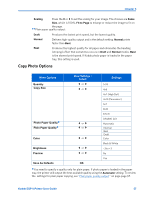
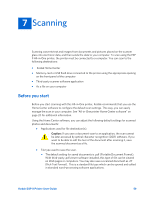
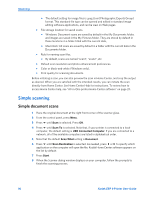
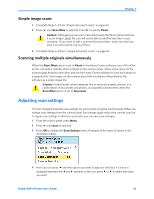
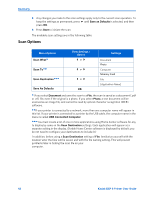
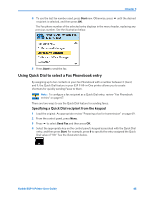
Scanning 5 Any changes you make to the scan settings apply only to the current scan operation. To keep the settings as permanent, press until Save as Defaults is selected, and then press OK. 6 Press Start to initiate the scan. The available scan settings are in the following table: Scan Options Menu Options Scan What Scan To Scan Destination Save As Defaults View Settings / Select or or or OK Settings Document Photo Computer Memory Card File [Application Name] If you select Document and save the scan to a File, the scan is saved as a document (.pdf or .rtf) file, even if the original is a photo. If you select Photo, a text document will be scanned as an image file, and cannot be read by optical character recognition (OCR) software. If your printer is connected to a network, more than one computer name will appear in this list. If your printer is connected to a printer by the USB cable, the computer name in the menu is called USB Connected Computer. You must create a list of one or more applications using Home Center software for any to display by name in the Scan Destination settings. Each application will appear as a separate setting in the display. (Kodak Home Center software is displayed by default; you do not need to configure your destinations to include it.) In addition, before using a Scan Destination setting of File, familiarize yourself with the location wher the files will be saved, and with the file naming setting. This will prevent problems later in finding the scan file on your computer. 62 Kodak ESP 9 Printer User Guide
-
 1
1 -
2
-
3
-
4
-
5
-
6
-
7
-
8
-
9
-
10
-
11
-
12
-
13
-
14
-
15
-
16
-
17
-
18
-
19
-
20
-
21
-
22
-
23
-
24
-
25
-
26
-
27
-
28
-
29
-
30
-
31
-
32
-
33
-
34
-
35
-
36
-
37
-
38
-
39
-
40
-
41
-
42
-
43
-
44
-
45
-
46
-
47
-
48
-
49
-
50
-
51
-
52
-
53
-
54
-
55
-
56
-
57
-
58
-
59
-
60
-
61
-
62
-
63
-
64
-
 65
65 -
 66
66 -
 67
67 -
 68
68 -
 69
69 -
 70
70 -
 71
71 -
 72
72 -
 73
73 -
 74
74 -
 75
75 -
76
-
77
-
78
-
79
-
80
-
81
-
82
-
83
-
84
-
85
-
86
-
87
-
88
-
89
-
90
-
91
-
92
-
93
-
94
-
95
-
96
-
97
-
98
-
99
-
100
-
101
-
102
-
103
-
104
-
105
-
106
-
107
-
108
-
109
-
110
-
111
-
112
-
113
-
114
-
115
-
116
-
117
-
118
-
119
-
120
-
121
-
122
-
123
-
124
-
125
-
126
-
127
-
128
-
129
-
130
-
131
-
132
-
133
-
134
-
135
-
136
-
137
-
138
-
139
-
140
-
141
 |
 |
