Kodak ESP9 User Manual - Page 87
Replacing the printhead - ink cartridges
 |
UPC - 041771349479
View all Kodak ESP9 manuals
Add to My Manuals
Save this manual to your list of manuals |
Page 87 highlights
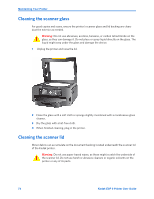
Chapter 9 8 Press down on the tab until you hear a click and feel the latch snap into position. Note: Listen carefully during this step; make sure you hear the ink cartridges click into place in the printhead. This seats the cartridges properly, and prevents ink from being dispensed incompletely during your print or copy jobs. 9 Close the printer access door. The printhead moves to its ready position and prepares the new ink cartridge for use (this could take up to a minute). Replacing the printhead If your printhead is damaged or broken, you may replace it yourself. 1 Make sure your printer is turned on. 2 Open the printer access door by lifting from the recessed hand-holds on the sides of the unit. Kodak ESP 9 Printer User Guide 79
-
 1
1 -
2
-
3
-
4
-
5
-
6
-
7
-
8
-
9
-
10
-
11
-
12
-
13
-
14
-
15
-
16
-
17
-
18
-
19
-
20
-
21
-
22
-
23
-
24
-
25
-
26
-
27
-
28
-
29
-
30
-
31
-
32
-
33
-
34
-
35
-
36
-
37
-
38
-
39
-
40
-
41
-
42
-
43
-
44
-
45
-
46
-
47
-
48
-
49
-
50
-
51
-
52
-
53
-
54
-
55
-
56
-
57
-
58
-
59
-
60
-
61
-
62
-
63
-
64
-
65
-
66
-
67
-
68
-
69
-
70
-
71
-
72
-
73
-
74
-
75
-
76
-
77
-
78
-
79
-
80
-
81
-
 82
82 -
 83
83 -
 84
84 -
 85
85 -
 86
86 -
 87
87 -
 88
88 -
 89
89 -
 90
90 -
 91
91 -
 92
92 -
93
-
94
-
95
-
96
-
97
-
98
-
99
-
100
-
101
-
102
-
103
-
104
-
105
-
106
-
107
-
108
-
109
-
110
-
111
-
112
-
113
-
114
-
115
-
116
-
117
-
118
-
119
-
120
-
121
-
122
-
123
-
124
-
125
-
126
-
127
-
128
-
129
-
130
-
131
-
132
-
133
-
134
-
135
-
136
-
137
-
138
-
139
-
140
-
141
 |
 |

Chapter 9
Kodak ESP 9 Printer User Guide
79
8
Press down on the tab until you hear a click and feel the latch snap into position.
9
Close the printer access door. The printhead moves to its ready position and prepares
the new ink cartridge for use (this could take up to a minute).
Replacing the printhead
If your printhead is damaged or broken, you may replace it yourself.
1
Make sure your printer is turned on.
2
Open the printer access door by lifting from the recessed hand-holds on the sides of the
unit.
Note:
Listen carefully during this step; make sure you hear the ink cartridges click
into place in the printhead. This seats the cartridges properly, and prevents ink from
being dispensed incompletely during your print or copy jobs.