Kyocera KM-5530 DF-600/610/MT-1/BF-1/PH-3A Operation Guide - Page 46
Setzen Sie die Heftklammern
 |
View all Kyocera KM-5530 manuals
Add to My Manuals
Save this manual to your list of manuals |
Page 46 highlights
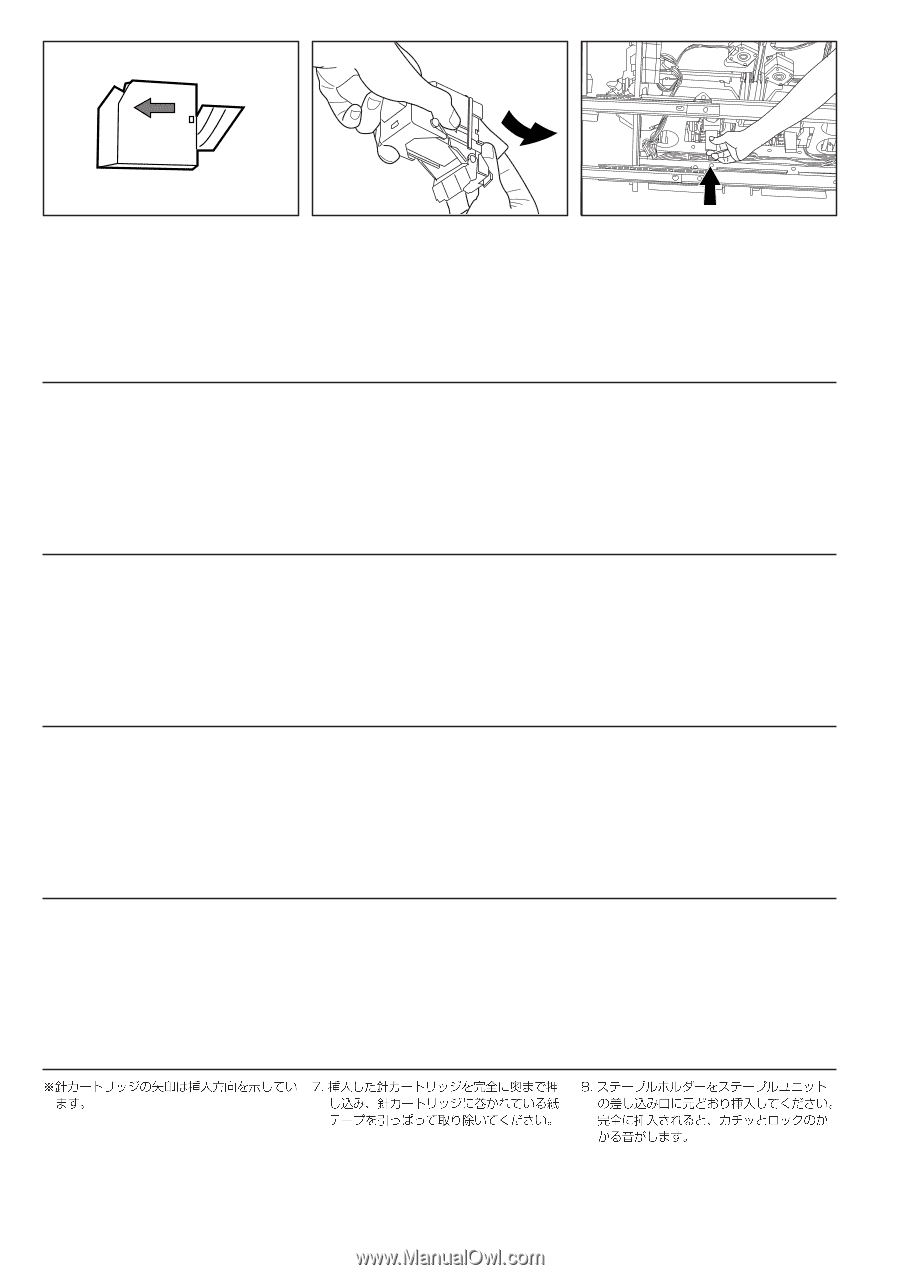
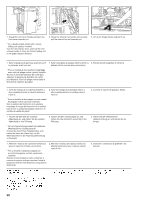
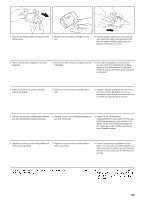
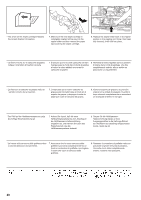
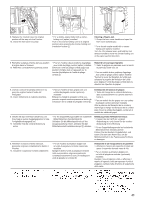
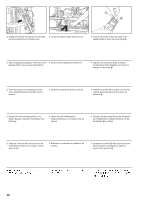
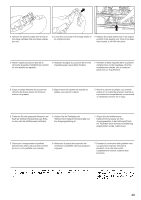
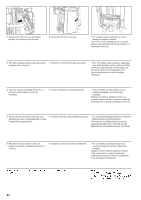
* The arrow on the staple cartridge indicates the correct direction of insertion. 7. Make sure the new staple cartridge is completely inserted all the way into the staple holder and then remove the paper tape covering the staple cartridge. 8. Replace the staple holder back in its original position in the stapling unit. Once it has been fully inserted, it will click into place. * La flèche inscrite sur la cartouche d'agrafes indique l'orientation d'insertion correcte. 7. S'assurer que la nouvelle cartouche est bien insérée jusqu'au fond dans la boîte d'agrafes et retirer le ruban adhésif recouvrant la cartouche d'agrafes. 8. Remettre la boîte d'agrafes dans sa position d'origine dans l'unité d'agrafage. Une fois complètement insérée, elle se mettra en place avec un cliquettement. * La flecha en el cartucho de grapas indica el sentido correcto de la inserción. 7. Compruebe que el nuevo cartucho de grapas está colocado hasta el fondo en el soporte de grapas y despegue la cinta de papel que cubre el cartucho de grapas. 8. Vuelva el soporte de grapas a su posición original en la unidad de grapado. Cuando lo haya colocado completamente se escuchará un chasquido al entrar en su lugar. * Der Pfeil auf der Heftklammernpatrone zeigt die richtige Einschubrichtung an. 7. Achten Sie darauf, daß die neue Heftklammernpatrone bis zum Anschlag in die Heftklammern-Haltevorrichtung eingeführt ist, und nehmen Sie dann das Papierband ab, das die Heftklammernpatrone abdeckt. 8. Setzen Sie die HeftklammernHaltevorrichtung wieder an ihrer Ausgangsposition in die Heftungs-Einheit ain. Nachdem sie vollständig eingeschoben wurde, rastet sie ein. * La freccia sulla cartuccia delle graffette indica la corretta direzione di inserimento. 7. Assicurarsi che la nuova cartuccia delle graffette sia inserita completamente fino in fondo al contenitore di graffette e poi togliere il nastro che copre la cartuccia delle graffette. 8. Rimettere il contenitore di graffette nella sua posizione originale nell'unità di pinzatura. Una volta che é stato completamente inserito, scatterà nella posizione. 40
-
 1
1 -
2
-
3
-
4
-
5
-
6
-
7
-
8
-
9
-
10
-
11
-
12
-
13
-
14
-
15
-
16
-
17
-
18
-
19
-
20
-
21
-
22
-
23
-
24
-
25
-
26
-
27
-
28
-
29
-
30
-
31
-
32
-
33
-
34
-
35
-
36
-
37
-
38
-
39
-
40
-
 41
41 -
 42
42 -
 43
43 -
 44
44 -
 45
45 -
 46
46 -
 47
47 -
 48
48 -
 49
49 -
 50
50 -
 51
51 -
52
-
53
-
54
-
55
-
56
-
57
-
58
-
59
-
60
-
61
-
62
-
63
-
64
-
65
-
66
-
67
-
68
-
69
-
70
-
71
-
72
-
73
-
74
-
75
-
76
-
77
-
78
-
79
-
80
-
81
-
82
-
83
-
84
-
85
-
86
-
87
-
88
-
89
-
90
-
91
-
92
 |
 |