Lexmark P6350 User's Guide - Page 52
Choosing a photo paper size using the control panel, Changing the photo size, Adjusting brightness
 |
View all Lexmark P6350 manuals
Add to My Manuals
Save this manual to your list of manuals |
Page 52 highlights
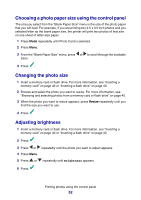
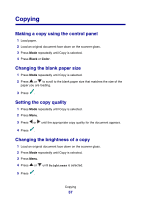
Choosing a photo paper size using the control panel The size you select from the "Blank Paper Size" menu is the size of the photo paper that you will load. For example, if you are printing two 2.5 x 3.5 inch photos and you selected letter as the blank paper size, the printer will print two photos of that size on one sheet of letter-size paper. 1 Press Mode repeatedly until Photo Card is selected. 2 Press Menu. 3 From the "Blank Paper Size" menu, press or to scroll through the available sizes. 4 Press . Changing the photo size 1 Insert a memory card or flash drive. For more information, see "Inserting a memory card" on page 40 or "Inserting a flash drive" on page 43. 2 Browse and select the photo you want to resize. For more information, see "Browsing and selecting photos from a memory card or flash drive" on page 45. 3 When the photo you want to resize appears, press Resize repeatedly until you find the size you want to use. 4 Press . Adjusting brightness 1 Insert a memory card or flash drive. For more information, see "Inserting a memory card" on page 40 or "Inserting a flash drive" on page 43. 2 Press . 3 Press or repeatedly until the photo you want to adjust appears. 4 Press Menu. 5 Press or repeatedly until Brightness appears. 6 Press . Printing photos using the control panel 52
-
 1
1 -
2
-
3
-
4
-
5
-
6
-
7
-
8
-
9
-
10
-
11
-
12
-
13
-
14
-
15
-
16
-
17
-
18
-
19
-
20
-
21
-
22
-
23
-
24
-
25
-
26
-
27
-
28
-
29
-
30
-
31
-
32
-
33
-
34
-
35
-
36
-
37
-
38
-
39
-
40
-
41
-
42
-
43
-
44
-
45
-
46
-
 47
47 -
 48
48 -
 49
49 -
 50
50 -
 51
51 -
 52
52 -
 53
53 -
 54
54 -
 55
55 -
 56
56 -
 57
57 -
58
-
59
-
60
-
61
-
62
-
63
-
64
-
65
-
66
-
67
-
68
-
69
-
70
-
71
-
72
-
73
-
74
-
75
-
76
-
77
-
78
-
79
-
80
-
81
-
82
-
83
-
84
-
85
-
86
-
87
-
88
-
89
-
90
-
91
-
92
-
93
-
94
-
95
-
96
-
97
-
98
-
99
-
100
-
101
-
102
-
103
-
104
-
105
-
106
-
107
-
108
-
109
-
110
-
111
-
112
-
113
-
114
-
115
-
116
-
117
 |
 |