Nokia 7710 User Guide - Page 138
Finish, Settings, To edit synchronisation profile settings
 |
View all Nokia 7710 manuals
Add to My Manuals
Save this manual to your list of manuals |
Page 138 highlights
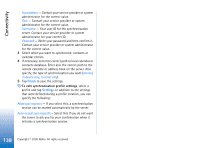
Connectivity Host address: - Contact your service provider or system administrator for the correct value. Port: - Contact your service provider or system administrator for the correct value. User name: - Your user ID for the synchronisation server. Contact your service provider or system administrator for your correct ID. Password: - Write your password and then confirm it. Contact your service provider or system administrator for the correct value. 3 Select what you want to synchronise: contacts or calendar entries. 4 If necessary, enter the correct path to local calendar or contacts database. Enter also the correct path to the remote calendar or address book on the server. Also specify, the type of synchronisation you want (Normal, To device only, To server only). 5 Tap Finish to save the settings. To edit synchronisation profile settings, select a profile and tap Settings. In addition to the settings that were defined during a profile creation, you can specify the following: Allow sync requests: - If you select this, a synchronisation session can be started automatically by the server. Auto-accept sync requests: - Select this if you do not want the server to ask you for your confirmation when it initiates a synchronisation session. 138 Copyright © 2005 Nokia. All rights reserved.
-
 1
1 -
2
-
3
-
4
-
5
-
6
-
7
-
8
-
9
-
10
-
11
-
12
-
13
-
14
-
15
-
16
-
17
-
18
-
19
-
20
-
21
-
22
-
23
-
24
-
25
-
26
-
27
-
28
-
29
-
30
-
31
-
32
-
33
-
34
-
35
-
36
-
37
-
38
-
39
-
40
-
41
-
42
-
43
-
44
-
45
-
46
-
47
-
48
-
49
-
50
-
51
-
52
-
53
-
54
-
55
-
56
-
57
-
58
-
59
-
60
-
61
-
62
-
63
-
64
-
65
-
66
-
67
-
68
-
69
-
70
-
71
-
72
-
73
-
74
-
75
-
76
-
77
-
78
-
79
-
80
-
81
-
82
-
83
-
84
-
85
-
86
-
87
-
88
-
89
-
90
-
91
-
92
-
93
-
94
-
95
-
96
-
97
-
98
-
99
-
100
-
101
-
102
-
103
-
104
-
105
-
106
-
107
-
108
-
109
-
110
-
111
-
112
-
113
-
114
-
115
-
116
-
117
-
118
-
119
-
120
-
121
-
122
-
123
-
124
-
125
-
126
-
127
-
128
-
129
-
130
-
131
-
132
-
 133
133 -
 134
134 -
 135
135 -
 136
136 -
 137
137 -
 138
138 -
 139
139 -
 140
140 -
 141
141 -
 142
142 -
 143
143 -
144
-
145
-
146
-
147
-
148
-
149
-
150
-
151
-
152
-
153
 |
 |
