Ricoh AC205 Service Manual - Page 37
Replacement And Adjustment, General Precautions, Servicing The Machine, Releasing Plastic Latches
 |
View all Ricoh AC205 manuals
Add to My Manuals
Save this manual to your list of manuals |
Page 37 highlights
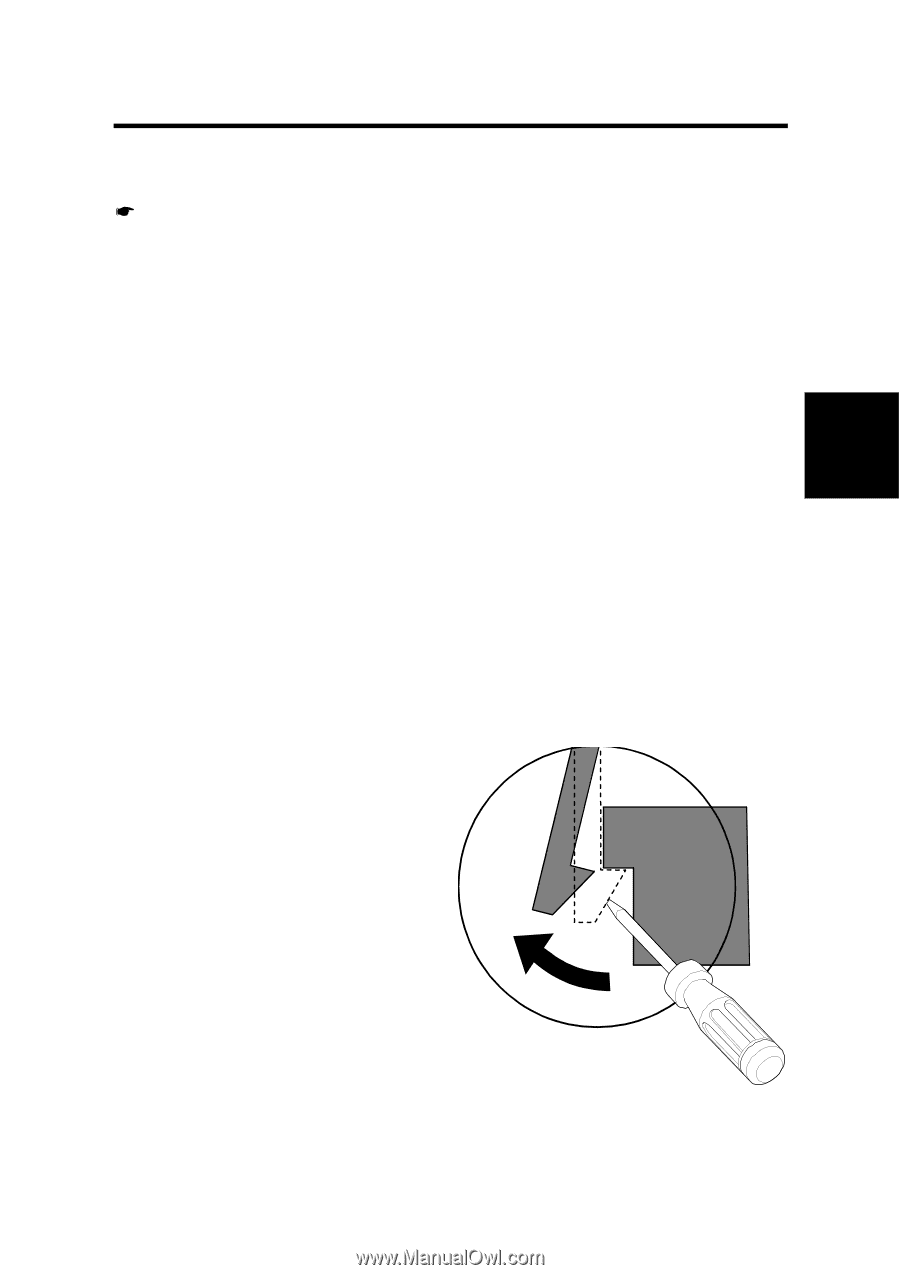
Replacement Adjustment GENERAL PRECAUTIONS 3. REPLACEMENT AND ADJUSTMENT This manual uses the following symbols : See or refer to : Screw : Connector 3.1 GENERAL PRECAUTIONS • Use caution when disassembling and reassembling components. • Ensure that all cables are correctly routed. Verify the correct cable routing before you begin service on the machine. Return all cables to their original position after you service the machine. 3.1.1 SERVICING THE MACHINE 1. Ensure there are no documents stored in memory before you service the machine. 2. Remove the toner cartridge before you disassemble parts. 3. Unplug the power cord before you service the machine. 4. Use a flat clean surface to service the machine. 5. Use only approved replacement parts. Machine function cannot be guaranteed if unauthorized replacement parts are used. 6. Do not force plastic components. 7. Ensure that all components are in their correct positions. 3.1.2 RELEASING PLASTIC LATCHES Many of the machine assemblies and parts are held in place with plastic latches. The latches break easily. Release them carefully. To remove these assemblies and parts, use gentle to moderate force to press the hook end of the latch away from the area to which it is latched. B273R901.WMF SM 3-1 B273
-
 1
1 -
2
-
3
-
4
-
5
-
6
-
7
-
8
-
9
-
10
-
11
-
12
-
13
-
14
-
15
-
16
-
17
-
18
-
19
-
20
-
21
-
22
-
23
-
24
-
25
-
26
-
27
-
28
-
29
-
30
-
31
-
 32
32 -
 33
33 -
 34
34 -
 35
35 -
 36
36 -
 37
37 -
 38
38 -
 39
39 -
 40
40 -
 41
41 -
 42
42 -
43
-
44
-
45
-
46
-
47
-
48
-
49
-
50
-
51
-
52
-
53
-
54
-
55
-
56
-
57
-
58
-
59
-
60
-
61
-
62
-
63
-
64
-
65
-
66
-
67
-
68
-
69
-
70
-
71
-
72
-
73
-
74
-
75
-
76
-
77
-
78
-
79
-
80
-
81
-
82
-
83
-
84
-
85
-
86
-
87
-
88
-
89
-
90
-
91
-
92
-
93
-
94
-
95
-
96
-
97
-
98
-
99
-
100
-
101
-
102
-
103
-
104
-
105
-
106
-
107
-
108
-
109
-
110
-
111
-
112
-
113
-
114
-
115
-
116
-
117
-
118
-
119
-
120
-
121
-
122
-
123
-
124
-
125
-
126
-
127
-
128
-
129
-
130
-
131
-
132
-
133
-
134
-
135
-
136
-
137
-
138
-
139
-
140
-
141
-
142
-
143
-
144
-
145
-
146
-
147
-
148
-
149
-
150
-
151
-
152
-
153
-
154
-
155
-
156
-
157
-
158
-
159
-
160
-
161
-
162
-
163
-
164
-
165
-
166
-
167
-
168
-
169
-
170
-
171
-
172
-
173
-
174
-
175
-
176
-
177
-
178
-
179
-
180
-
181
-
182
-
183
-
184
-
185
-
186
-
187
-
188
 |
 |