Ricoh Aficio MP 5000B General Settings Guide - Page 218
Set Wait Time, 60 seconds., Background Density of ADS Full Color
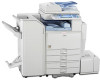 |
View all Ricoh Aficio MP 5000B manuals
Add to My Manuals
Save this manual to your list of manuals |
Page 218 highlights
6. Scanner Features The default setting is Set Wait Time, 60 second(s). This setting is valid if [SADF] is specified for [Original Feed Type] when scanning. If [Set Wait Time] is selected, enter the wait time in seconds (3-999) for placing additional originals with the number keys. Scanning will start automatically if additional originals are placed within this time. You can end scanning and begin transmission by pressing the [ ] key within this time. Once the specified time has elapsed, transmission starts automatically. If [Continuous Wait] is selected, the machine will wait for the additional originals until the [ ] key is pressed. Scanning will start when additional originals are placed and the [Start] key is pressed. You can end scanning and begin sending by pressing the [ ] key. Even if originals are placed on the exposure glass, the machine will operate according to the specified settings. However, every time originals are placed on the exposure glass, you must press the [Start] key to start scanning. Scanning will start if additional originals are placed and the [Start] key is pressed within this time. You can end scanning and begin transmission by pressing the [ ] key within this time. Once the specified time has elapsed, transmission starts automatically. If originals are placed in the auto document feeder (ADF), transmission will start without waiting for additional originals after all originals in the ADF have been scanned, regardless of the specified 6 settings. If a paper misfeed occurs or any of the following operations are performed while the machine is waiting for additional originals, the countdown stops and does not start again until the [ ] key is pressed. • Changing the settings such as the scan settings • Opening the upper cover of the ADF • Pressing the [Interrupt] key to activate the copy mode Background Density of ADS (Full Color) Characteristics due to the type of paper such as nonwhiteness like newspaper or transparent originals can be reduced by correcting the scanning density. This menu appears only when the machine has the color scanner function. The default setting is the middle of 5 adjustment levels. • p.12 "Accessing User Tools" 216
-
 1
1 -
2
-
3
-
4
-
5
-
6
-
7
-
8
-
9
-
10
-
11
-
12
-
13
-
14
-
15
-
16
-
17
-
18
-
19
-
20
-
21
-
22
-
23
-
24
-
25
-
26
-
27
-
28
-
29
-
30
-
31
-
32
-
33
-
34
-
35
-
36
-
37
-
38
-
39
-
40
-
41
-
42
-
43
-
44
-
45
-
46
-
47
-
48
-
49
-
50
-
51
-
52
-
53
-
54
-
55
-
56
-
57
-
58
-
59
-
60
-
61
-
62
-
63
-
64
-
65
-
66
-
67
-
68
-
69
-
70
-
71
-
72
-
73
-
74
-
75
-
76
-
77
-
78
-
79
-
80
-
81
-
82
-
83
-
84
-
85
-
86
-
87
-
88
-
89
-
90
-
91
-
92
-
93
-
94
-
95
-
96
-
97
-
98
-
99
-
100
-
101
-
102
-
103
-
104
-
105
-
106
-
107
-
108
-
109
-
110
-
111
-
112
-
113
-
114
-
115
-
116
-
117
-
118
-
119
-
120
-
121
-
122
-
123
-
124
-
125
-
126
-
127
-
128
-
129
-
130
-
131
-
132
-
133
-
134
-
135
-
136
-
137
-
138
-
139
-
140
-
141
-
142
-
143
-
144
-
145
-
146
-
147
-
148
-
149
-
150
-
151
-
152
-
153
-
154
-
155
-
156
-
157
-
158
-
159
-
160
-
161
-
162
-
163
-
164
-
165
-
166
-
167
-
168
-
169
-
170
-
171
-
172
-
173
-
174
-
175
-
176
-
177
-
178
-
179
-
180
-
181
-
182
-
183
-
184
-
185
-
186
-
187
-
188
-
189
-
190
-
191
-
192
-
193
-
194
-
195
-
196
-
197
-
198
-
199
-
200
-
201
-
202
-
203
-
204
-
205
-
206
-
207
-
208
-
209
-
210
-
211
-
212
-
 213
213 -
 214
214 -
 215
215 -
 216
216 -
 217
217 -
 218
218 -
 219
219 -
 220
220 -
 221
221 -
 222
222 -
 223
223 -
224
-
225
-
226
-
227
-
228
-
229
-
230
-
231
-
232
-
233
-
234
-
235
-
236
-
237
-
238
-
239
-
240
-
241
-
242
-
243
-
244
-
245
-
246
-
247
-
248
-
249
-
250
-
251
-
252
-
253
-
254
-
255
-
256
-
257
-
258
-
259
-
260
-
261
-
262
-
263
-
264
-
265
-
266
-
267
-
268
-
269
-
270
-
271
-
272
-
273
-
274
-
275
-
276
-
277
-
278
-
279
-
280
-
281
-
282
-
283
-
284
-
285
-
286
-
287
-
288
-
289
-
290
-
291
-
292
-
293
-
294
-
295
-
296
-
297
-
298
-
299
-
300
-
301
-
302
-
303
-
304
-
305
-
306
-
307
-
308
-
309
-
310
-
311
-
312
-
313
-
314
-
315
-
316
-
317
-
318
-
319
-
320
-
321
-
322
-
323
-
324
 |
 |