Samsung CLX-3305FW User Manual Ver.1.0 (English) - Page 231
Setting the scan settings in the computer, Scanning from network connected machine
 |
View all Samsung CLX-3305FW manuals
Add to My Manuals
Save this manual to your list of manuals |
Page 231 highlights
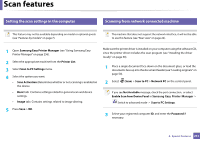
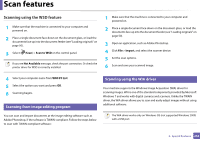
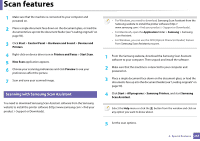
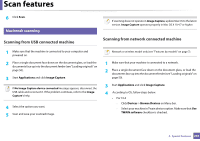
Scan features 16 Setting the scan settings in the computer 17 Scanning from network connected machine This feature may not be available depending on model or optional goods (see "Features by models" on page 7). The machine that does not support the network interface, it will not be able to use this feature (see "Rear view" on page 22). 1 Open Samsung Easy Printer Manager (see "Using Samsung Easy Printer Manager" on page 256). 2 Select the appropriate machine from the Printer List. 3 Select Scan to PC Settings menu. 4 Select the option you want. • Scan Activation: Determines whether or not scanning is enabled on the device. • Basic tab: Contains settings related to general scan and device settings. • Image tab: Contains settings related to image altering. 5 Press Save > OK. Make sure the printer driver is installed on your computer using the software CD, since the printer driver includes the scan program (see "Installing the driver locally" on page 30). 1 Place a single document face down on the document glass, or load the documents face up into the document feeder (see "Loading originals" on page 50). 2 Select (Scan) > Scan to PC > Network PC on the control panel. If you see Not Available message, check the port connection, or select Enable Scan from Device Panel in Samsung Easy Printer Manager > Switch to advanced mode > Scan to PC Settings. 3 Select your registered computer ID, and enter the Password if necessary. 4. Special Features 231
-
 1
1 -
2
-
3
-
4
-
5
-
6
-
7
-
8
-
9
-
10
-
11
-
12
-
13
-
14
-
15
-
16
-
17
-
18
-
19
-
20
-
21
-
22
-
23
-
24
-
25
-
26
-
27
-
28
-
29
-
30
-
31
-
32
-
33
-
34
-
35
-
36
-
37
-
38
-
39
-
40
-
41
-
42
-
43
-
44
-
45
-
46
-
47
-
48
-
49
-
50
-
51
-
52
-
53
-
54
-
55
-
56
-
57
-
58
-
59
-
60
-
61
-
62
-
63
-
64
-
65
-
66
-
67
-
68
-
69
-
70
-
71
-
72
-
73
-
74
-
75
-
76
-
77
-
78
-
79
-
80
-
81
-
82
-
83
-
84
-
85
-
86
-
87
-
88
-
89
-
90
-
91
-
92
-
93
-
94
-
95
-
96
-
97
-
98
-
99
-
100
-
101
-
102
-
103
-
104
-
105
-
106
-
107
-
108
-
109
-
110
-
111
-
112
-
113
-
114
-
115
-
116
-
117
-
118
-
119
-
120
-
121
-
122
-
123
-
124
-
125
-
126
-
127
-
128
-
129
-
130
-
131
-
132
-
133
-
134
-
135
-
136
-
137
-
138
-
139
-
140
-
141
-
142
-
143
-
144
-
145
-
146
-
147
-
148
-
149
-
150
-
151
-
152
-
153
-
154
-
155
-
156
-
157
-
158
-
159
-
160
-
161
-
162
-
163
-
164
-
165
-
166
-
167
-
168
-
169
-
170
-
171
-
172
-
173
-
174
-
175
-
176
-
177
-
178
-
179
-
180
-
181
-
182
-
183
-
184
-
185
-
186
-
187
-
188
-
189
-
190
-
191
-
192
-
193
-
194
-
195
-
196
-
197
-
198
-
199
-
200
-
201
-
202
-
203
-
204
-
205
-
206
-
207
-
208
-
209
-
210
-
211
-
212
-
213
-
214
-
215
-
216
-
217
-
218
-
219
-
220
-
221
-
222
-
223
-
224
-
225
-
 226
226 -
 227
227 -
 228
228 -
 229
229 -
 230
230 -
 231
231 -
 232
232 -
 233
233 -
 234
234 -
 235
235 -
 236
236 -
237
-
238
-
239
-
240
-
241
-
242
-
243
-
244
-
245
-
246
-
247
-
248
-
249
-
250
-
251
-
252
-
253
-
254
-
255
-
256
-
257
-
258
-
259
-
260
-
261
-
262
-
263
-
264
-
265
-
266
-
267
-
268
-
269
-
270
-
271
-
272
-
273
-
274
-
275
-
276
-
277
-
278
-
279
-
280
-
281
-
282
-
283
-
284
-
285
-
286
-
287
-
288
-
289
-
290
-
291
-
292
-
293
-
294
-
295
-
296
-
297
-
298
-
299
-
300
-
301
-
302
-
303
-
304
-
305
-
306
-
307
-
308
-
309
-
310
-
311
-
312
-
313
-
314
 |
 |