Samsung SC-D366 User Manual (ENGLISH) - Page 88
資料傳輸
 |
View all Samsung SC-D366 manuals
Add to My Manuals
Save this manual to your list of manuals |
Page 88 highlights
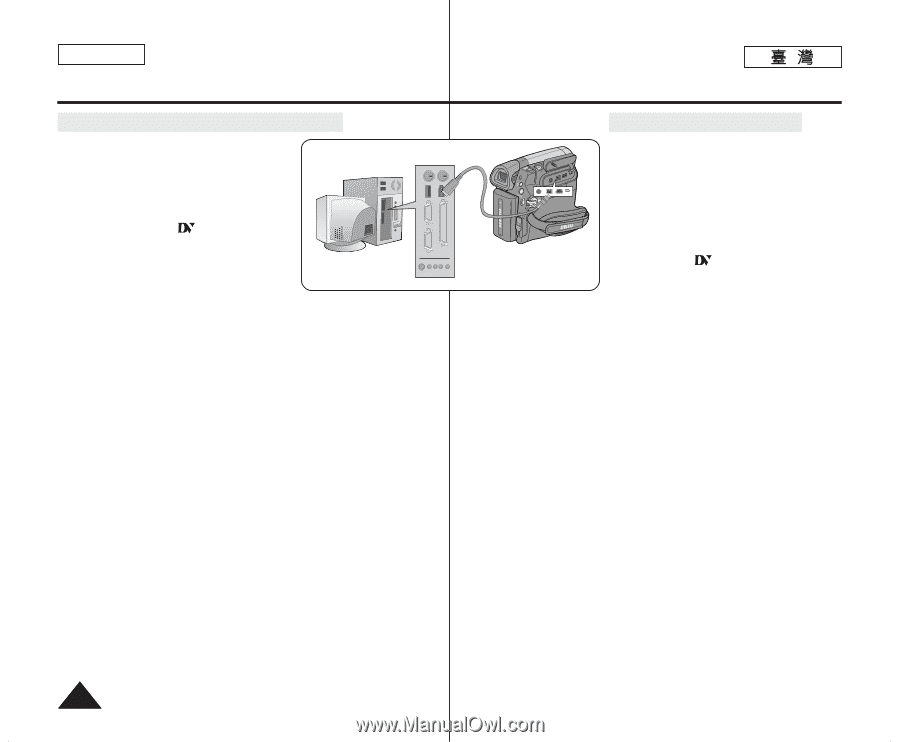
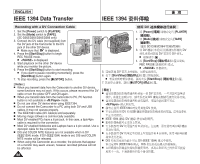
ENGLISH IEEE 1394 Data Transfer IEEE 1394 Recording with a DV Connection Cable 1. Set the [Power] switch to [PLAYER]. 2. Set the [Mode] switch to [TAPE]. (SC-D363/D364/D365/D366 only) 3. Connect the DV cable (not supplied) from the DV jack of the Camcorder to the DV jack of the other DV device. I Make sure that is displayed. 4. Press the [Start/Stop] button to begin REC PAUSE mode. I is displayed. 5. Start playback on the other DV device while you monitor the picture. 6. Press the [Start/Stop] button to start recording. I If you want to pause recording momentarily, press the [Start/Stop] button again. 7. To stop recording, press the [I (STOP)] button. [ Notes ] I When you transmit data from the Camcorder to another DV device, some functions may not work. If this occurs, please reconnect the DV cable or turn the power OFF and ON again. I When you transmit data from the Camcorder to PC, PC function button is not available in mode. I Do not use other DV device when using IEEE1394. I Do not connect the Camcorder to a PC using both DV and USB cables. It may not operate properly. I The IEEE1394 cable (DV cable)is sold separately. I Moving image software is commercially available. I Most DV enabled PCs have a 6 pin jack. In this case, a 6pin/4pin cable is required for the connection. I Most DV enabled Notebooks and Laptops have a 4 pin socket. Use a 4pin/4pin cable for the connection. I DIS and COLOR NITE features are not available when in DV (IEEE1394) mode. If DV (IEEE1394) mode is set, DIS and COLOR NITE modes will be released. I When using this Camcorder as a recorder, the pictures that appear on a monitor may seem uneven, however recorded pictures will not be affected. 88 DV 1. [Power] [PLAYER] 0 QMUEINCUK PLAYE R 2. [Mode] 0 [TAPE] ERA CAM SC-D363/D364/ D365/D366 3. DV DV DV DV 0 I 0 4. [Start/Stop] / REC PAUSE 0 I 0 5. DV 0 6. [Start/Stop] / 0 I [Start/Stop] / 0 7. [I (STOP)] 0 [ ] I DV 0 DV I 0 I IEEE1394 DV 0 I DV USB 0 I IEEE 1394 DV 0 I 0 I DV 6 0 0 I DV 4 0 I DIS DV (IEEE 1394) DV (IEEE1394) DIS I 0 0 0 6 /4 0 4 /4 0 0
-
 1
1 -
2
-
3
-
4
-
5
-
6
-
7
-
8
-
9
-
10
-
11
-
12
-
13
-
14
-
15
-
16
-
17
-
18
-
19
-
20
-
21
-
22
-
23
-
24
-
25
-
26
-
27
-
28
-
29
-
30
-
31
-
32
-
33
-
34
-
35
-
36
-
37
-
38
-
39
-
40
-
41
-
42
-
43
-
44
-
45
-
46
-
47
-
48
-
49
-
50
-
51
-
52
-
53
-
54
-
55
-
56
-
57
-
58
-
59
-
60
-
61
-
62
-
63
-
64
-
65
-
66
-
67
-
68
-
69
-
70
-
71
-
72
-
73
-
74
-
75
-
76
-
77
-
78
-
79
-
80
-
81
-
82
-
 83
83 -
 84
84 -
 85
85 -
 86
86 -
 87
87 -
 88
88 -
 89
89 -
 90
90 -
 91
91 -
 92
92 -
 93
93 -
94
-
95
-
96
-
97
-
98
-
99
-
100
-
101
-
102
-
103
-
104
-
105
-
106
 |
 |