Samsung SGH-T669 User Manual (user Manual) (ver.f6) (English) - Page 77
Finding a Contact Entry, Print via Bluetooth, Send namecard via, Copy to SIM
 |
UPC - 610214622112
View all Samsung SGH-T669 manuals
Add to My Manuals
Save this manual to your list of manuals |
Page 77 highlights
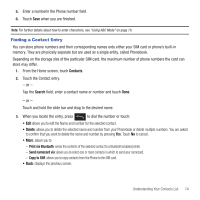
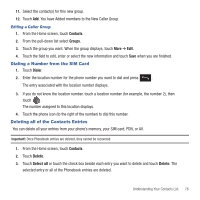
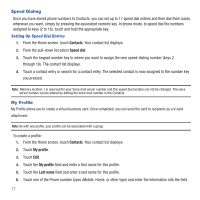
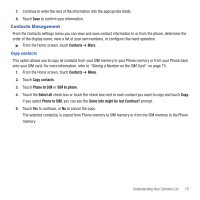
5. Enter a numberin the Phone number field. 6. Touch Save when you are finished. Note: For further details about how to enter characters, see "Using ABC Mode" on page 70. Finding a Contact Entry You can store phone numbers and their corresponding names onto either your SIM card or phone's built-in memory. They are physically separate but are used as a single entity, called Phonebook. Depending on the storage size of the particular SIM card, the maximum number of phone numbers the card can store may differ. 1. From the Home screen, touch Contacts. 2. Touch the Contact entry. - or - Tap the Search field, enter a contact name or number and touch Done. - or - Touch and hold the slide bar and drag to the desired name. 3. When you locate the entry, press to dial the number or touch: • Edit allows you to edit the Name and number for the selected contact. • Delete: allows you to delete the selected name and number from your Phonebook or delete multiple numbers. You are asked to confirm that you want to delete the name and number by pressing Yes. Touch No to cancel. • More: allows you to - Print via Bluetooth: sends the contents of the selected contact to a Bluetooth enabled printer. - Send namecard via: allows you to select one or more contacts in which to send your namecard. - Copy to SIM: allows you to copy contacts from the Phone to the SIM card. • Back: displays the previous screen. Understanding Your Contacts List 74
-
 1
1 -
2
-
3
-
4
-
5
-
6
-
7
-
8
-
9
-
10
-
11
-
12
-
13
-
14
-
15
-
16
-
17
-
18
-
19
-
20
-
21
-
22
-
23
-
24
-
25
-
26
-
27
-
28
-
29
-
30
-
31
-
32
-
33
-
34
-
35
-
36
-
37
-
38
-
39
-
40
-
41
-
42
-
43
-
44
-
45
-
46
-
47
-
48
-
49
-
50
-
51
-
52
-
53
-
54
-
55
-
56
-
57
-
58
-
59
-
60
-
61
-
62
-
63
-
64
-
65
-
66
-
67
-
68
-
69
-
70
-
71
-
 72
72 -
 73
73 -
 74
74 -
 75
75 -
 76
76 -
 77
77 -
 78
78 -
 79
79 -
 80
80 -
 81
81 -
 82
82 -
83
-
84
-
85
-
86
-
87
-
88
-
89
-
90
-
91
-
92
-
93
-
94
-
95
-
96
-
97
-
98
-
99
-
100
-
101
-
102
-
103
-
104
-
105
-
106
-
107
-
108
-
109
-
110
-
111
-
112
-
113
-
114
-
115
-
116
-
117
-
118
-
119
-
120
-
121
-
122
-
123
-
124
-
125
-
126
-
127
-
128
-
129
-
130
-
131
-
132
-
133
-
134
-
135
-
136
-
137
-
138
-
139
-
140
-
141
-
142
-
143
-
144
-
145
-
146
-
147
-
148
-
149
-
150
-
151
-
152
-
153
-
154
-
155
-
156
-
157
-
158
-
159
-
160
-
161
-
162
-
163
-
164
-
165
-
166
-
167
-
168
-
169
-
170
-
171
-
172
-
173
-
174
-
175
-
176
-
177
-
178
-
179
-
180
-
181
-
182
-
183
-
184
-
185
-
186
-
187
-
188
-
189
-
190
-
191
-
192
-
193
-
194
-
195
-
196
-
197
-
198
-
199
-
200
-
201
-
202
-
203
-
204
-
205
-
206
-
207
-
208
-
209
-
210
-
211
-
212
-
213
-
214
-
215
-
216
-
217
 |
 |
