Xerox 6180N FreeFlow® Print Server System Guide - Page 31
Clear the [Use Job Name] check box under Save File As
 |
UPC - 095205425307
View all Xerox 6180N manuals
Add to My Manuals
Save this manual to your list of manuals |
Page 31 highlights
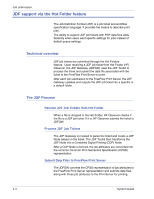
System Guide Job submission 3. Enter the print path of the file you want to print in the File Name field, or select [Browse...] to search for the file. 4. Clear the Printer Default check box under Hold Job, to enable selection of [Print Options: ] drop-down list options Print or Save. • Print: Prints the job file and does not save it. This is the default setting. If you select this option, continue with Step 6. • Save: Saves the print file, including the current job ticket, on the print server but does not print the job. If you select this option, continue with Step 5. NOTE: Different printers save the print job in different ways. Refer to your printer documentation for more information on how each printer saves the job. 5. If you selected [Save] in Step 4: • Clear the [Printer Default] check box under Save Format if you want to select a save format for the job. • Clear the [Printer Default] check box under Saved Job Repository to select a location in which to save the job. • Clear the [Use Job Name] check box under Save File As to enter a new name for the job. 6. Clear the [Printer Default] check box under Hold Job to select whether the job should be held or not held at the printer. If you select [No], your job prints immediately. If you select [Yes], your job is held at the printer until it is released to print. 7. Clear the [Printer Default] check box under PDL Type to select a type of page description language (PDL) for the job. If you select an ASCII option, select the font and its size and the font orientation. 8. Set up the remaining job ticket parameters in this section of the Job Submission window as required. This window is divided into two sections: • Basic printing section: This section at the top of the Job allows you to make basic selections for your print job. • Basic printing section: This section at the top of the Job allows you to make basic selections for your print job. • Advanced Features section: This section contains fields in which you can specify Image Adjustment and Job Notes settings. NOTE: Do not enter job names, sender names, or queue names that total over 140 characters. 9. If desired, record job notes by entering them in the fields in the [Job Information] section. 2- 11
-
 1
1 -
2
-
3
-
4
-
5
-
6
-
7
-
8
-
9
-
10
-
11
-
12
-
13
-
14
-
15
-
16
-
17
-
18
-
19
-
20
-
21
-
22
-
23
-
24
-
25
-
 26
26 -
 27
27 -
 28
28 -
 29
29 -
 30
30 -
 31
31 -
 32
32 -
 33
33 -
 34
34 -
 35
35 -
 36
36 -
37
-
38
-
39
-
40
-
41
-
42
-
43
-
44
-
45
-
46
-
47
-
48
-
49
-
50
-
51
-
52
-
53
-
54
-
55
-
56
-
57
-
58
-
59
-
60
-
61
-
62
-
63
-
64
-
65
-
66
-
67
-
68
-
69
-
70
-
71
-
72
-
73
-
74
-
75
-
76
-
77
-
78
-
79
-
80
-
81
-
82
-
83
-
84
-
85
-
86
-
87
-
88
-
89
-
90
-
91
-
92
-
93
-
94
-
95
-
96
-
97
-
98
-
99
-
100
-
101
-
102
-
103
-
104
-
105
-
106
-
107
-
108
-
109
-
110
-
111
-
112
-
113
-
114
-
115
-
116
-
117
-
118
-
119
-
120
-
121
-
122
-
123
-
124
-
125
-
126
-
127
-
128
-
129
-
130
-
131
-
132
-
133
-
134
-
135
-
136
 |
 |
