Yamaha CL3 Owner's Manual - Page 35
Setup, Specifying the brightness of the touch screen, LEDs, channel name displays, and lamps
 |
View all Yamaha CL3 manuals
Add to My Manuals
Save this manual to your list of manuals |
Page 35 highlights
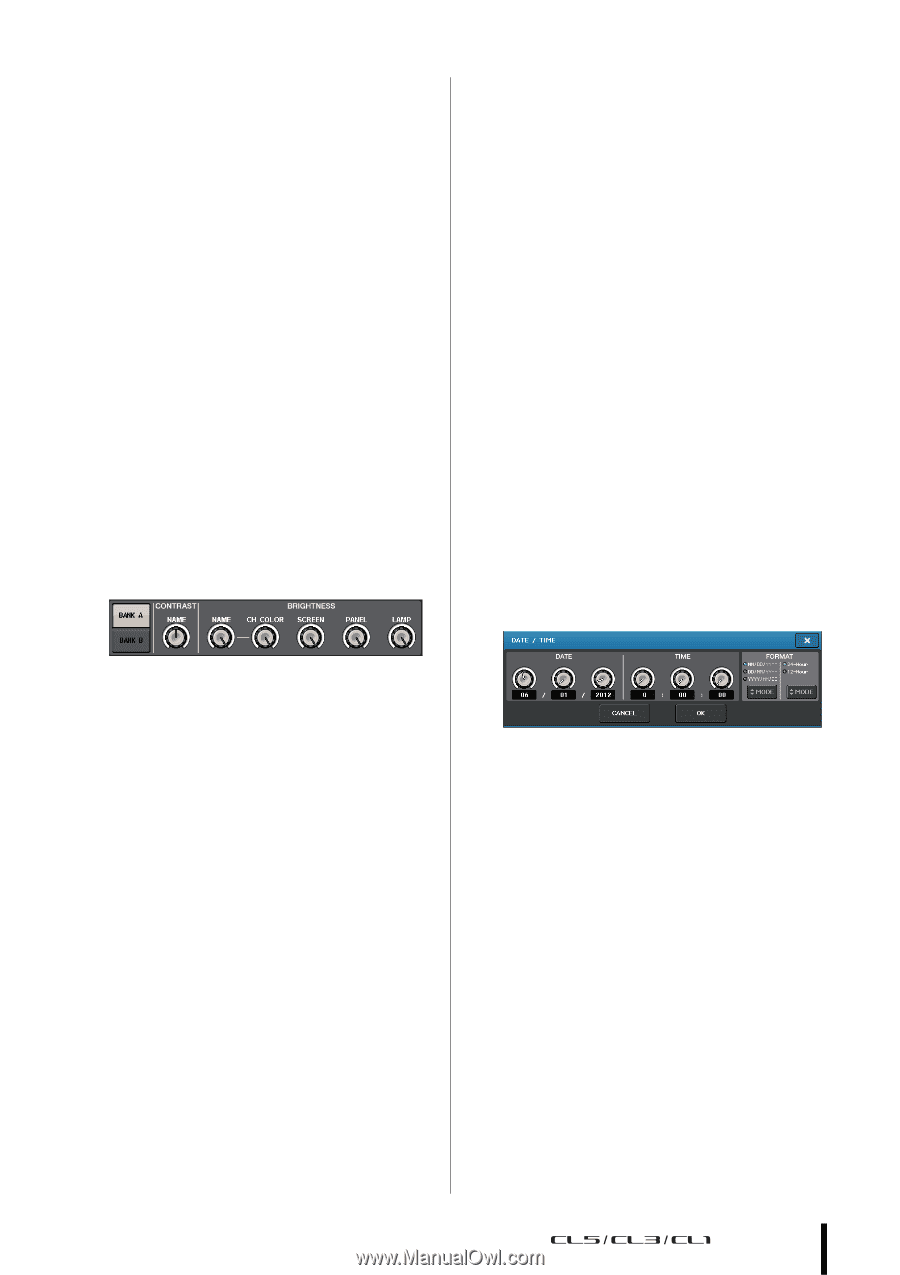
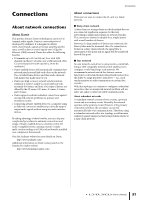
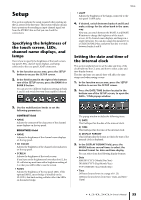
Setup This section explains the setup required when starting up the CL series for the first time. This section will also discuss basic operations for sending an input channel signal out from the STEREO bus so that you can check the connections. Specifying the brightness of the touch screen, LEDs, channel name displays, and lamps Here is how to specify the brightness of the touch screen, top panel LEDs, channel name displays, and lamps connected to the rear panel LAMP connectors. 1. In the function access area, press the SETUP button to access the SETUP screen. 2. In the field located in the right of the bottom row of the SETUP screen, press the BANK A or BANK B button. You can save two different brightness settings in bank A and B, and switch between them rapidly if desired. Setup • LAMP Adjusts the brightness of the lamps connected to the rear panel LAMP jacks. 4. If desired, switch between banks A and B and make settings for the other bank in the same way. Now you can switch between the BANK A and BANK B buttons to change the brightness of the touch screen, LCD, channel name displays, and lamps in a single operation. You can also assign this parameter to a USER DEFINED key, and press that key to switch between banks A and B. Setting the date and time of the internal clock This section explains how to set the date and time of the clock built into the CL unit, and how to select a date and time display format. The date and time you specify here will affect the time stamp used when saving a scene. 1. In the function access area, press the SETUP button to access the SETUP screen. 2. Press the DATE/TIME button located in the bottom row of the SETUP screen, to open the DATE / TIME popup window. 3. Use the multifunction knobs to set the following parameters. CONTRAST field • NAME Adjusts the contrast of the characters of the channel name displays on the top panel. BRIGHTNESS field • NAME Adjusts the brightness of the channel name displays on the top panel. • CH COLOR Adjusts the brightness of the channel color indicators on the top panel. • SCREEN Adjusts the brightness of the touch screen. If you have set the brightness to lower than level 2, the CL will start up next time with a brightness setting of 2 so that you will be able to see the screen. • PANEL Adjusts the brightness of the top panel LEDs. If the optional MBCL meter bridge is installed on the CL3/CL1, this knob setting will also affect the LEDs on the meter bridge. The popup window includes the following items. 1) DATE This field specifies the date of the internal clock. 2) TIME This field specifies the time of the internal clock. 3) DISPLAY FORMAT This field specifies the format in which the time of the internal clock is displayed. 3. In the DISPLAY FORMAT field, press the MODE buttons several times to select the desired format for date and time display. You can select from the following display formats. • Date MM/DD/YYYY (Month/Day/Year) DD/MM/YYYY (Day/Month/Year) YYYY/MM/DD (Year/Month/Day) • Time 24Hours (hours shown in a range of 0-23) 12Hours (hours shown from 0am-11am, and 0pm- 11pm) Owner's Manual 35
-
 1
1 -
2
-
3
-
4
-
5
-
6
-
7
-
8
-
9
-
10
-
11
-
12
-
13
-
14
-
15
-
16
-
17
-
18
-
19
-
20
-
21
-
22
-
23
-
24
-
25
-
26
-
27
-
28
-
29
-
 30
30 -
 31
31 -
 32
32 -
 33
33 -
 34
34 -
 35
35 -
 36
36 -
 37
37 -
 38
38 -
 39
39 -
 40
40 -
41
-
42
-
43
-
44
-
45
-
46
-
47
-
48
-
49
-
50
-
51
-
52
-
53
-
54
-
55
-
56
-
57
-
58
-
59
-
60
-
61
-
62
-
63
-
64
-
65
 |
 |