Yamaha CL3 Owner's Manual - Page 47
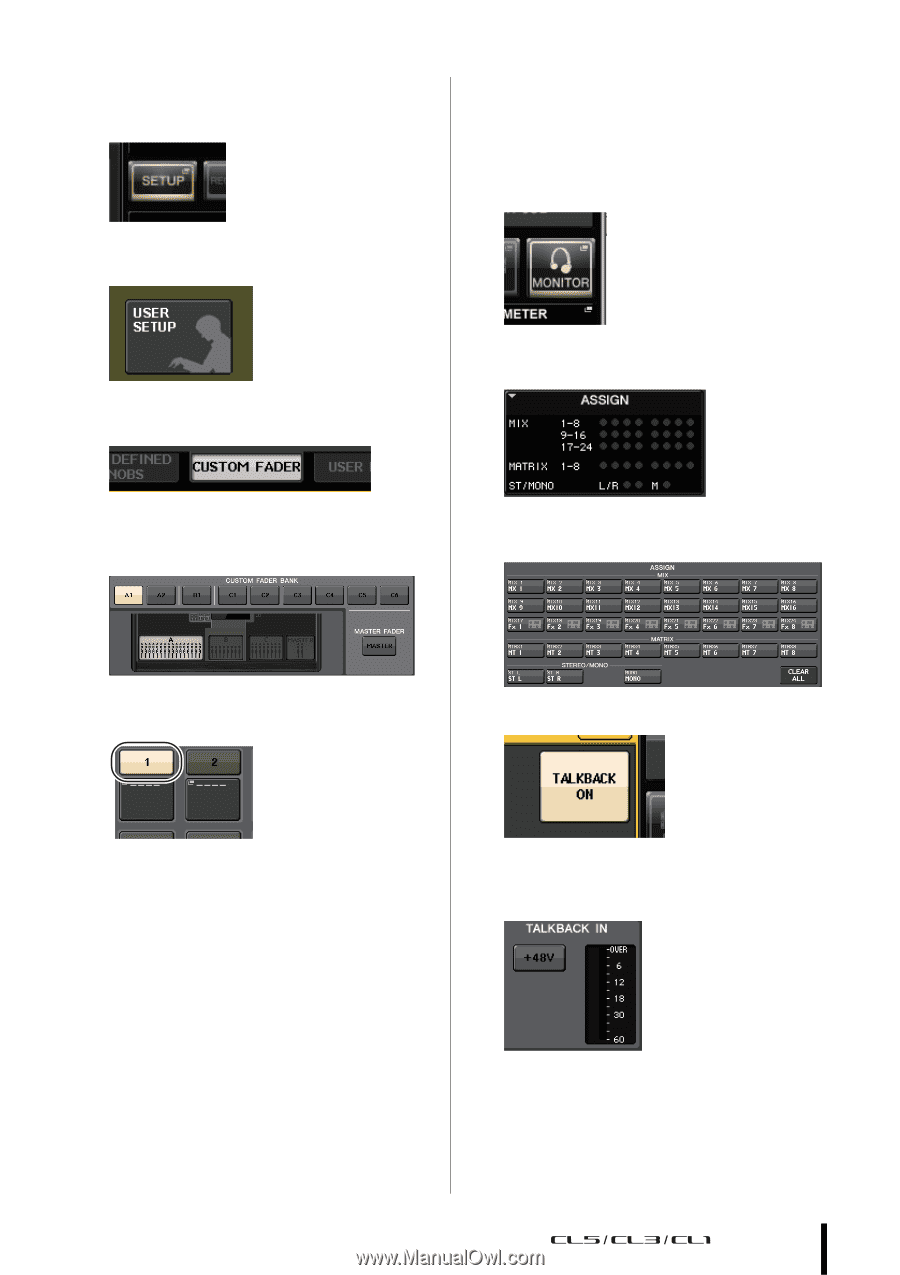
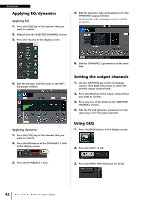
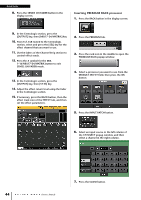
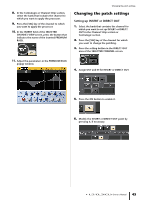
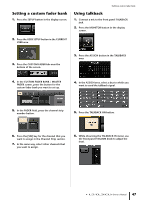
Setting a custom fader bank, Using talkback, In the CUSTOM FADER BANK / MASTER
 |
View all Yamaha CL3 manuals
Add to My Manuals
Save this manual to your list of manuals |
Page 47 highlights
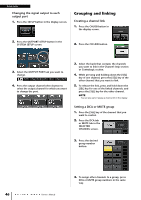
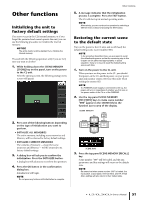
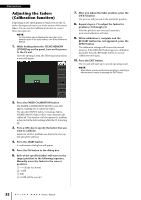
Setting a custom fader bank 1. Press the SETUP button in the display screen. Setting a custom fader bank Using talkback 1. Connect a mic to the front panel TALKBACK jack. 2. Press the MONITOR button in the display screen. 2. Press the USER SETUP button in the CURRENT USER area. 3. Press the CUSTOM FADER tab near the bottom of the screen. 3. Press the ASSIGN button in the TALKBACK area. 4. In the CUSTOM FADER BANK / MASTER FADER screen, press the button for the custom fader bank you want to set up. 4. In the ASSIGN area, select a bus to which you want to send the talkback signal. 5. In the FADER field, press the channel strip number button. 5. Press the TALKBACK ON button. 6. Press the [SEL] key for the channel that you want to assign in the Channel Strip section. 7. In the same way, select other channels that you want to assign. 6. While observing the TALKBACK IN meter, use the front panel VOLUME knob to adjust the level. Owner's Manual 47
-
 1
1 -
2
-
3
-
4
-
5
-
6
-
7
-
8
-
9
-
10
-
11
-
12
-
13
-
14
-
15
-
16
-
17
-
18
-
19
-
20
-
21
-
22
-
23
-
24
-
25
-
26
-
27
-
28
-
29
-
30
-
31
-
32
-
33
-
34
-
35
-
36
-
37
-
38
-
39
-
40
-
41
-
 42
42 -
 43
43 -
 44
44 -
 45
45 -
 46
46 -
 47
47 -
 48
48 -
 49
49 -
 50
50 -
 51
51 -
 52
52 -
53
-
54
-
55
-
56
-
57
-
58
-
59
-
60
-
61
-
62
-
63
-
64
-
65
 |
 |