Apple M3322LL/A User Guide - Page 47
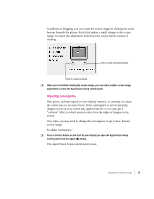
In addition to dragging, you can adjust the shape of the screen image
 |
View all Apple M3322LL/A manuals
Add to My Manuals
Save this manual to your list of manuals |
Page 47 highlights
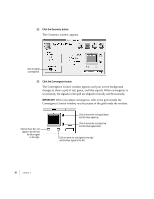
3 Click Pincushion and move the pointer over the picture of the display. The pointer changes to indicate you're making an adjustment to the shape of the screen image. Screen rectangle 4 Drag the left or right side of the screen rectangle to adjust the screen image. If your screen image is bowed in, drag outward to make the screen image more rectangular. If your screen image is bowed out, drag inward to make the screen image more rectangular. In addition to dragging, you can adjust the shape of the screen image by clicking the arrow buttons beneath the picture. Each click makes a small change to the screen image. To repeat the adjustment, hold down the mouse button instead of clicking. 5 When you've finished adjusting the shape of the screen image, you can make another screen image adjustment or close the AppleVision Setup control panel. Adjusting the Screen Image 33
-
 1
1 -
2
-
3
-
4
-
5
-
6
-
7
-
8
-
9
-
10
-
11
-
12
-
13
-
14
-
15
-
16
-
17
-
18
-
19
-
20
-
21
-
22
-
23
-
24
-
25
-
26
-
27
-
28
-
29
-
30
-
31
-
32
-
33
-
34
-
35
-
36
-
37
-
38
-
39
-
40
-
41
-
 42
42 -
 43
43 -
 44
44 -
 45
45 -
 46
46 -
 47
47 -
 48
48 -
 49
49 -
 50
50 -
 51
51 -
 52
52 -
53
-
54
-
55
-
56
-
57
-
58
-
59
-
60
-
61
-
62
-
63
-
64
-
65
-
66
-
67
-
68
-
69
-
70
-
71
-
72
-
73
-
74
-
75
-
76
-
77
-
78
-
79
-
80
-
81
-
82
-
83
-
84
-
85
-
86
-
87
-
88
-
89
-
90
-
91
-
92
-
93
-
94
-
95
-
96
-
97
-
98
-
99
-
100
-
101
-
102
-
103
-
104
-
105
-
106
-
107
-
108
-
109
-
110
-
111
-
112
-
113
-
114
-
115
-
116
-
117
-
118
-
119
-
120
-
121
-
122
-
123
-
124
-
125
-
126
-
127
-
128
-
129
-
130
-
131
-
132
-
133
-
134
-
135
-
136
-
137
-
138
-
139
-
140
-
141
-
142
-
143
-
144
-
145
-
146
-
147
-
148
-
149
-
150
-
151
-
152
-
153
-
154
-
155
-
156
 |
 |
