Asus M3A78-EMH HDMI User Manual - Page 19
Setup, Logging into RAIDXpert, Regular Connection
 |
View all Asus M3A78-EMH HDMI manuals
Add to My Manuals
Save this manual to your list of manuals |
Page 19 highlights
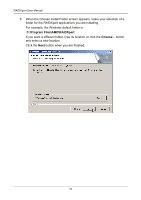
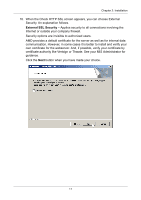
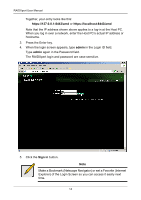
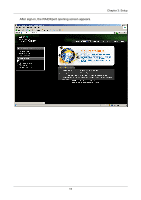
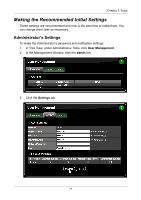
Chapter 3: Setup • Logging into RAIDXpert (below) • Choosing a Language (page 16) • Accessing the Host PC (page 16) • Making the Recommended Initial Settings (page 17) • Creating a New Logical Drive (page 20) • Logging out of RAIDXpert (page 24) • Connecting to RAIDXpert from the Internet (page 25) • Running RAIDXpert without Network Connection (page 25) After installation, the next step is to log into and configure RAIDXpert. Logging into RAIDXpert Choose RAIDXpert in the Windows Programs menu. Choose RAIDXpert in the Linux Applications menu. Or, log on manually with your browser: 1. Launch the Browser. 2. In the Browser address field, type the entry explained below. If you did not choose the External Security option during RAIDXpert installation (see page 11), use the Regular connection. If you chose the External Security option during RAIDXpert installation (see page 11), use the Secure connection. Regular Connection • RAIDXpert uses an HTTP connection http:// • Enter the Host PC's IP address 127.0.0.1 or localhost • Enter the Port number 25902 • Add to launch RAIDXpert amd Together, your entry looks like this: http://127.0.0.1:25902/ati or http://localhost:25902/ati Secure Connection • RAIDXpert uses a secure HTTP connection https:// • Enter the Host PC's IP address 127.0.0.1 or localhost • Enter the Port number 8443 • Add to launch RAIDXpert amd 13
-
 1
1 -
2
-
3
-
4
-
5
-
6
-
7
-
8
-
9
-
10
-
11
-
12
-
13
-
 14
14 -
 15
15 -
 16
16 -
 17
17 -
 18
18 -
 19
19 -
 20
20 -
 21
21 -
 22
22 -
 23
23 -
 24
24 -
25
-
26
-
27
-
28
-
29
-
30
-
31
-
32
-
33
-
34
-
35
-
36
-
37
-
38
-
39
-
40
-
41
-
42
-
43
-
44
-
45
-
46
-
47
-
48
-
49
-
50
-
51
-
52
-
53
-
54
-
55
-
56
-
57
-
58
-
59
-
60
-
61
-
62
-
63
-
64
-
65
-
66
-
67
-
68
-
69
-
70
-
71
-
72
-
73
-
74
-
75
-
76
-
77
-
78
-
79
-
80
-
81
-
82
-
83
-
84
-
85
-
86
-
87
-
88
-
89
-
90
-
91
-
92
-
93
-
94
-
95
-
96
-
97
-
98
-
99
-
100
-
101
-
102
-
103
-
104
-
105
-
106
-
107
-
108
-
109
-
110
-
111
-
112
-
113
-
114
-
115
-
116
-
117
-
118
-
119
-
120
 |
 |
