Asus M3A78-EMH HDMI User Manual - Page 28
GigaByte Boundary, Fast Initialization, The Final Settings screen appears.
 |
View all Asus M3A78-EMH HDMI manuals
Add to My Manuals
Save this manual to your list of manuals |
Page 28 highlights
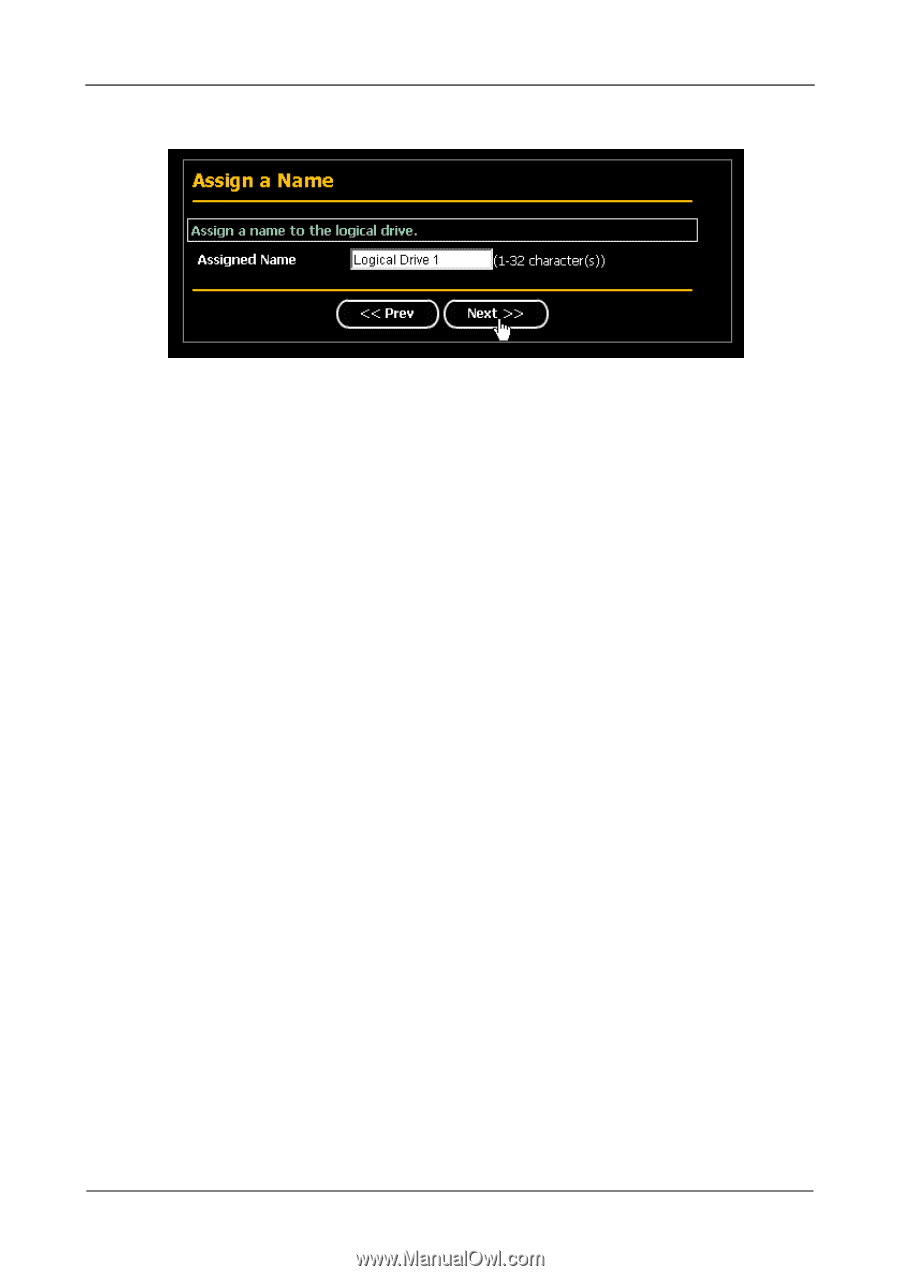
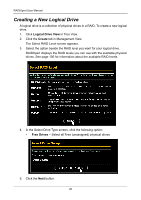
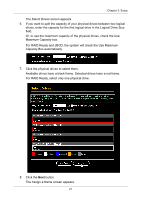
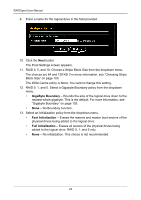
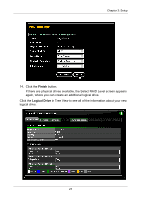
RAIDXpert User Manual 9. Enter a name for the logical drive in the field provided. 10. Click the Next button. The Final Settings screen appears. 11. RAID 0, 5, and 10. Choose a Stripe Block Size from the dropdown menu. The choices are 64 and 128 KB. For more information, see "Choosing Stripe Block Size" on page 103. The Write Cache policy is None. You cannot change this setting. 12. RAID 0, 1, and 5. Select a Gigabyte Boundary policy from the dropdown menu. • GigaByte Boundary - Rounds the size of the logical drive down to the nearest whole gigabyte. This is the default. For more information, see "Gigabyte Boundary" on page 103. • None - No Boundary function. 13. Select an Initialization policy from the dropdown menu. • Fast Initialization - Erases the reserve and master boot sectors of the physical drives being added to the logical drive. • Full Initialization - Erases all sectors of the physical drives being added to the logical drive. RAID 0, 1, and 5 only. • None - No initialization. This choice is not recommended. 22
-
 1
1 -
2
-
3
-
4
-
5
-
6
-
7
-
8
-
9
-
10
-
11
-
12
-
13
-
14
-
15
-
16
-
17
-
18
-
19
-
20
-
21
-
22
-
 23
23 -
 24
24 -
 25
25 -
 26
26 -
 27
27 -
 28
28 -
 29
29 -
 30
30 -
 31
31 -
 32
32 -
 33
33 -
34
-
35
-
36
-
37
-
38
-
39
-
40
-
41
-
42
-
43
-
44
-
45
-
46
-
47
-
48
-
49
-
50
-
51
-
52
-
53
-
54
-
55
-
56
-
57
-
58
-
59
-
60
-
61
-
62
-
63
-
64
-
65
-
66
-
67
-
68
-
69
-
70
-
71
-
72
-
73
-
74
-
75
-
76
-
77
-
78
-
79
-
80
-
81
-
82
-
83
-
84
-
85
-
86
-
87
-
88
-
89
-
90
-
91
-
92
-
93
-
94
-
95
-
96
-
97
-
98
-
99
-
100
-
101
-
102
-
103
-
104
-
105
-
106
-
107
-
108
-
109
-
110
-
111
-
112
-
113
-
114
-
115
-
116
-
117
-
118
-
119
-
120
 |
 |