Asus M3A78-EMH HDMI User Manual - Page 82
Scheduled, Logical Drive View, Migration, Enable
 |
View all Asus M3A78-EMH HDMI manuals
Add to My Manuals
Save this manual to your list of manuals |
Page 82 highlights
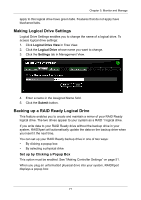
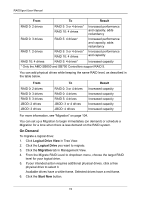
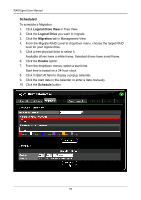
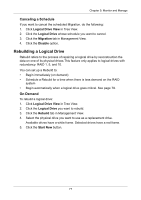
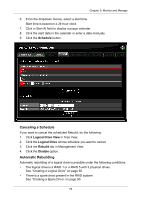
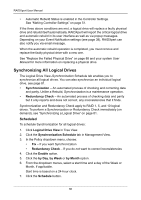
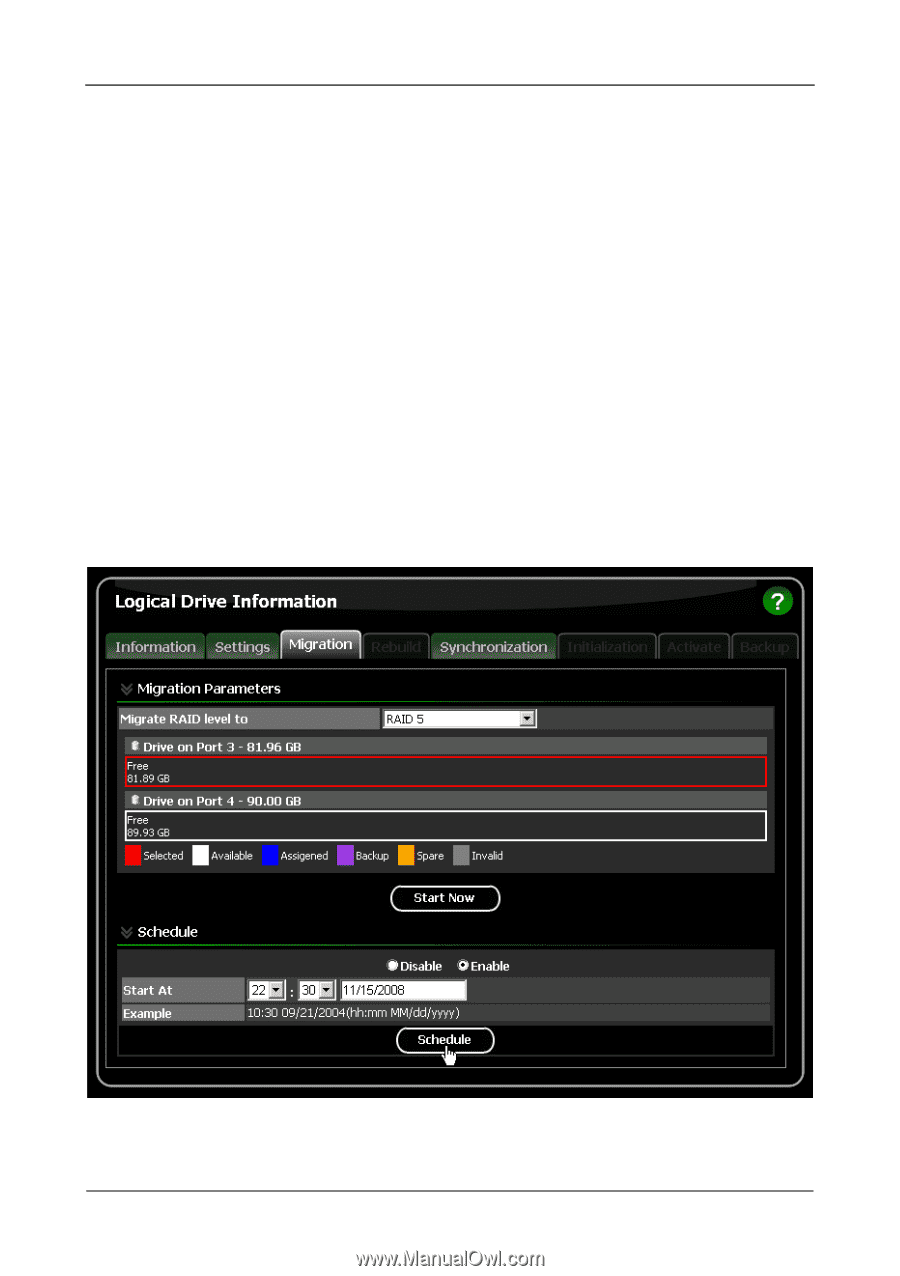
RAIDXpert User Manual Scheduled To schedule a Migration: 1. Click Logical Drive View in Tree View. 2. Click the Logical Drive you want to migrate. 3. Click the Migration tab in Management View. 4. From the Migrate RAID Level to dropdown menu, choose the target RAID level for your logical drive. 5. Click a free physical drive to select it. Available drives have a white frame. Selected drives have a red frame. 6. Click the Enable option. 7. From the dropdown menus, select a start time. Start time is based on a 24-hour clock. 8. Click in Start At field to display a popup calendar. 9. Click the start date in the calendar or enter a date manually. 10. Click the Schedule button. 76
-
 1
1 -
2
-
3
-
4
-
5
-
6
-
7
-
8
-
9
-
10
-
11
-
12
-
13
-
14
-
15
-
16
-
17
-
18
-
19
-
20
-
21
-
22
-
23
-
24
-
25
-
26
-
27
-
28
-
29
-
30
-
31
-
32
-
33
-
34
-
35
-
36
-
37
-
38
-
39
-
40
-
41
-
42
-
43
-
44
-
45
-
46
-
47
-
48
-
49
-
50
-
51
-
52
-
53
-
54
-
55
-
56
-
57
-
58
-
59
-
60
-
61
-
62
-
63
-
64
-
65
-
66
-
67
-
68
-
69
-
70
-
71
-
72
-
73
-
74
-
75
-
76
-
 77
77 -
 78
78 -
 79
79 -
 80
80 -
 81
81 -
 82
82 -
 83
83 -
 84
84 -
 85
85 -
 86
86 -
 87
87 -
88
-
89
-
90
-
91
-
92
-
93
-
94
-
95
-
96
-
97
-
98
-
99
-
100
-
101
-
102
-
103
-
104
-
105
-
106
-
107
-
108
-
109
-
110
-
111
-
112
-
113
-
114
-
115
-
116
-
117
-
118
-
119
-
120
 |
 |
RAIDXpert User Manual
76
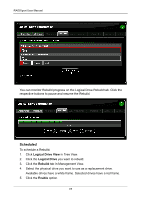
Scheduled
To schedule a Migration:
1.
Click
Logical Drive View
in Tree View.
2.
Click the
Logical Drive
you want to migrate.
3.
Click the
Migration
tab in Management View.
4.
From the Migrate RAID Level to dropdown menu, choose the target RAID
level for your logical drive.
5.
Click a free physical drive to select it.
Available drives have a white frame. Selected drives have a red frame.
6.
Click the
Enable
option.
7.
From the dropdown menus, select a start time.
Start time is based on a 24-hour clock.
8.
Click in Start At field to display a popup calendar.
9.
Click the start date in the calendar or enter a date manually.
10.
Click the
Schedule
button.