Brother International Laura Ashley Innov-ís NX2000 Users Manual - English - Page 141
Cleaning the Bobbin Case
 |
View all Brother International Laura Ashley Innov-ís NX2000 manuals
Add to My Manuals
Save this manual to your list of manuals |
Page 141 highlights
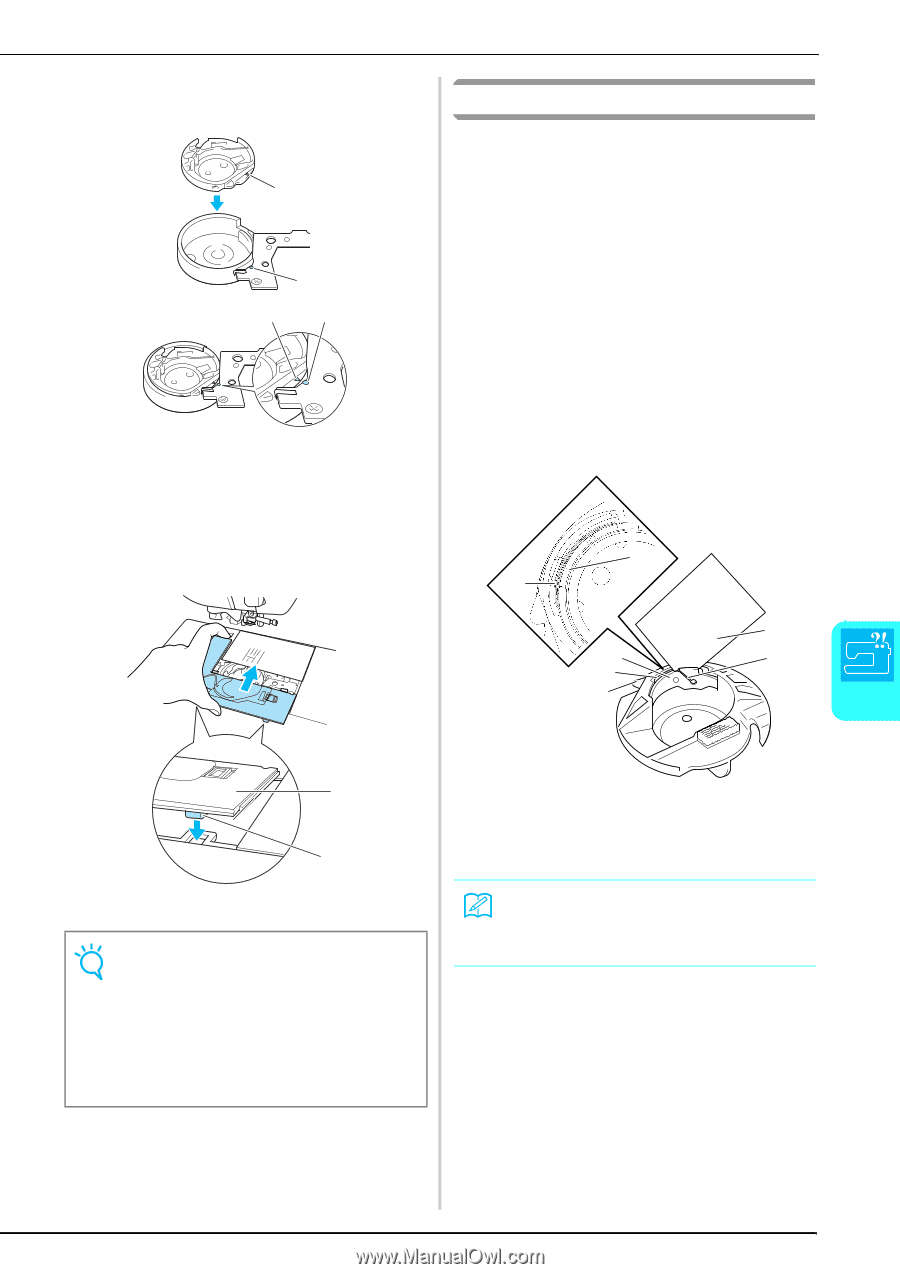
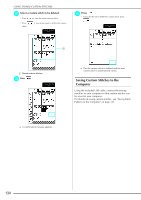
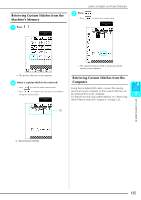
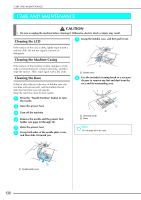
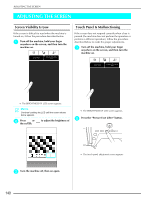
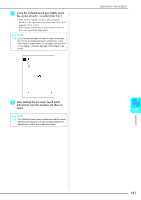
i Insert the bobbin case so that the ▲ mark aligns with the ● mark as shown below. a b a b a ▲ mark b ● mark * Align the ▲ and ● marks. j Insert the tabs on the needle plate cover into the needle plate, and then slide the cover back into place. CARE AND MAINTENANCE Cleaning the Bobbin Case Thread wax and dust easily collect around the notch in the tension spring on the bobbin case, resulting in an incorrect thread tension. Therefore, the bobbin case should be cleaned as necessary should tension problems arise. When cleaning the bobbin case, use business card stock or another type of paper of similar thickness and sturdiness in order to prevent pieces of paper tearing off and getting lodged in the bobbin case. a Follow steps from "Cleaning the Race" on page 138 to remove the bobbin case. b Using a piece of paper of adequate thickness and sturdiness, slide the paper between the tension plate base and the tension spring and also slide the paper behind the notch of the spring to remove any dirt or dust. a d c a b d e 6 Appendix a b a Needle plate cover b Tabs Note • Never use a bobbin case that is scratched; otherwise, the upper thread may become tangled, the needle may break, or sewing performance may suffer. • For a new bobbin case (part code: XC3153-351 (black), part code: SABWRK1/BWRK1 (gray)), contact your nearest authorized dealer. • Be sure that the bobbin case is correctly installed. Otherwise, the needle may break. a Tension plate base b Notch c Paper (e.g. business card type) d Tension spring e Bobbin case projection (stopper) Memo Do not bend the tension spring. In addition, do not use anything other than recommended paper to clean the bobbin case. c Use the included cleaning brush to remove any lint and dust from inside the bobbin case. d Reinsert the bobbin case and needle plate cover assuring the bobbin case projection (stopper) is touching the bracket spring. 139
-
 1
1 -
2
-
3
-
4
-
5
-
6
-
7
-
8
-
9
-
10
-
11
-
12
-
13
-
14
-
15
-
16
-
17
-
18
-
19
-
20
-
21
-
22
-
23
-
24
-
25
-
26
-
27
-
28
-
29
-
30
-
31
-
32
-
33
-
34
-
35
-
36
-
37
-
38
-
39
-
40
-
41
-
42
-
43
-
44
-
45
-
46
-
47
-
48
-
49
-
50
-
51
-
52
-
53
-
54
-
55
-
56
-
57
-
58
-
59
-
60
-
61
-
62
-
63
-
64
-
65
-
66
-
67
-
68
-
69
-
70
-
71
-
72
-
73
-
74
-
75
-
76
-
77
-
78
-
79
-
80
-
81
-
82
-
83
-
84
-
85
-
86
-
87
-
88
-
89
-
90
-
91
-
92
-
93
-
94
-
95
-
96
-
97
-
98
-
99
-
100
-
101
-
102
-
103
-
104
-
105
-
106
-
107
-
108
-
109
-
110
-
111
-
112
-
113
-
114
-
115
-
116
-
117
-
118
-
119
-
120
-
121
-
122
-
123
-
124
-
125
-
126
-
127
-
128
-
129
-
130
-
131
-
132
-
133
-
134
-
135
-
 136
136 -
 137
137 -
 138
138 -
 139
139 -
 140
140 -
 141
141 -
 142
142 -
 143
143 -
 144
144 -
 145
145 -
 146
146 -
147
-
148
-
149
-
150
-
151
-
152
-
153
-
154
-
155
-
156
-
157
-
158
-
159
-
160
-
161
-
162
-
163
-
164
 |
 |