Brother International Laura Ashley Innov-ís NX2000 Users Manual - English - Page 45
Useful Functions
 |
View all Brother International Laura Ashley Innov-ís NX2000 manuals
Add to My Manuals
Save this manual to your list of manuals |
Page 45 highlights
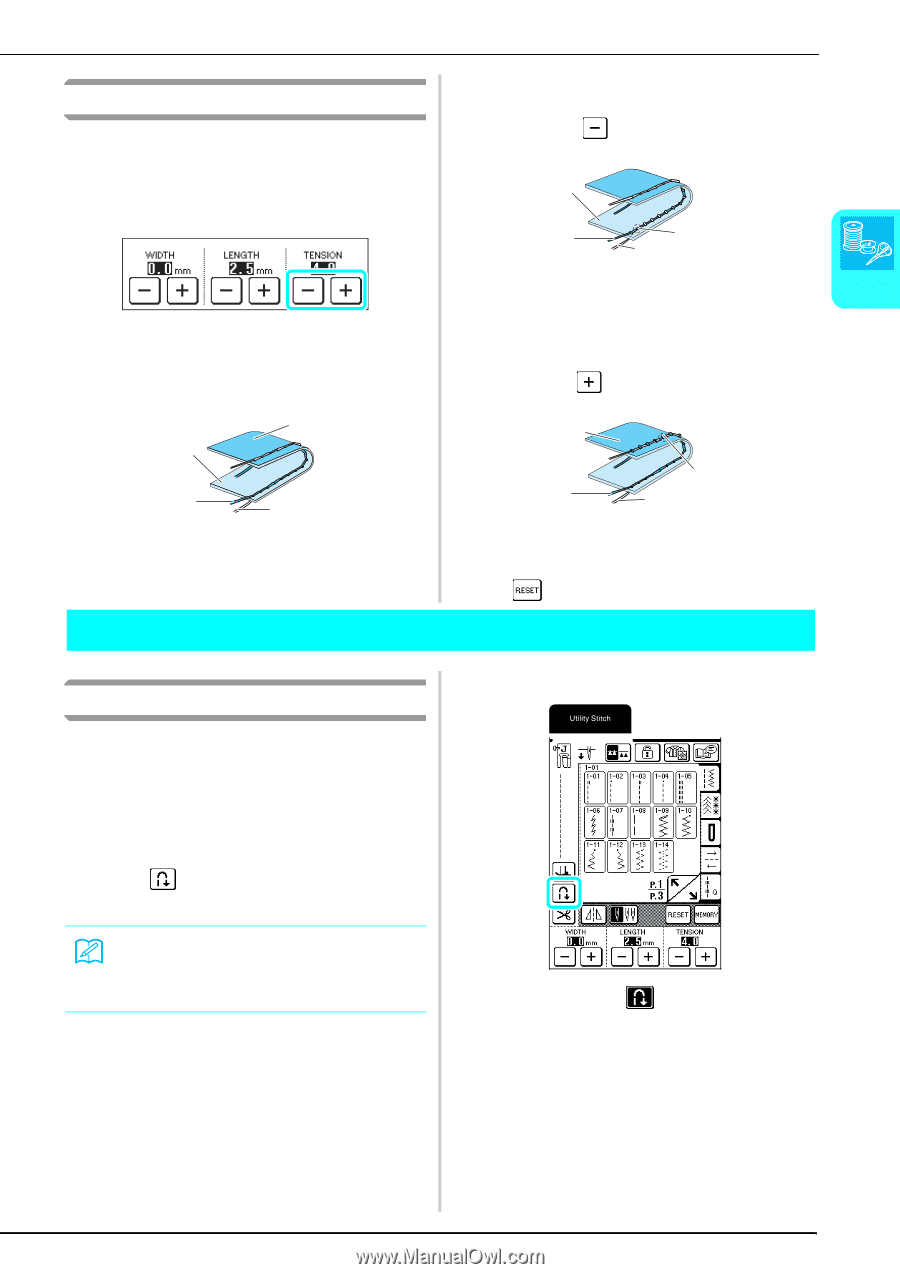
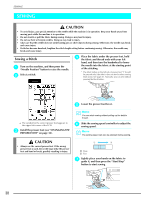
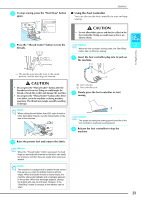
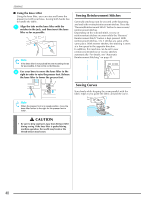
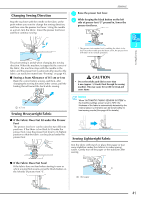
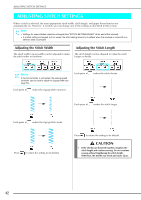
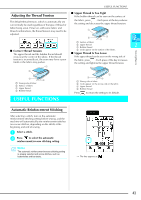
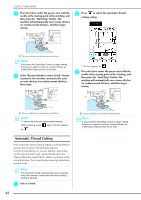
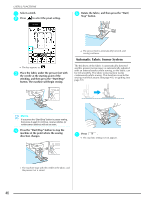
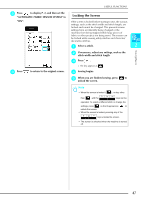
USEFUL FUNCTIONS Adjusting the Thread Tension ■ Upper Thread Is Too Tight If the bobbin thread can be seen on the surface of The default thread tension, which is automatically set, can normally be used regardless of the type of thread or fabric being sewn. However, with some fabric and thread combinations, the thread tension may need to be the fabric, press . Each press of the key reduces the setting and decreases the upper thread tension. a adjusted. b d c Sewing Basics a Surface of fabric b Upper thread 2 c Bobbin thread ■ Correct Thread Tension The upper thread and the bobbin thread should d Locks appear on the surface of the fabric. ■ Upper Thread Is Too Loose cross near the center of the fabric. If the thread If the upper thread can be seen on the wrong side of tension is incorrectly set, the seam may have a poor finish or the fabric may pucker. the fabric, press . Each press of the key increases the setting and tightens the upper thread tension. a a b c d a Wrong side of fabric b Surface of fabric c Upper thread d Bobbin thread b c d a Wrong side of fabric b Locks appear on the wrong side of the fabric. c Upper thread d Bobbin thread Press to return the setting to its default. USEFUL FUNCTIONS Automatic Reinforcement Stitching After selecting a stitch, turn on the automatic reinforcement stitching setting before sewing, and the machine will automatically sew reinforcement stitches (or reverse stitches, depending on the stitch) at the beginning and end of sewing. a Select a stitch. b Press to select the automatic reinforcement/reverse stitching setting. Memo The automatic reinforcement/reverse stitching setting is already selected with some stitches, such as buttonholes and bar tacks. → The key appears as . 43
-
 1
1 -
2
-
3
-
4
-
5
-
6
-
7
-
8
-
9
-
10
-
11
-
12
-
13
-
14
-
15
-
16
-
17
-
18
-
19
-
20
-
21
-
22
-
23
-
24
-
25
-
26
-
27
-
28
-
29
-
30
-
31
-
32
-
33
-
34
-
35
-
36
-
37
-
38
-
39
-
 40
40 -
 41
41 -
 42
42 -
 43
43 -
 44
44 -
 45
45 -
 46
46 -
 47
47 -
 48
48 -
 49
49 -
 50
50 -
51
-
52
-
53
-
54
-
55
-
56
-
57
-
58
-
59
-
60
-
61
-
62
-
63
-
64
-
65
-
66
-
67
-
68
-
69
-
70
-
71
-
72
-
73
-
74
-
75
-
76
-
77
-
78
-
79
-
80
-
81
-
82
-
83
-
84
-
85
-
86
-
87
-
88
-
89
-
90
-
91
-
92
-
93
-
94
-
95
-
96
-
97
-
98
-
99
-
100
-
101
-
102
-
103
-
104
-
105
-
106
-
107
-
108
-
109
-
110
-
111
-
112
-
113
-
114
-
115
-
116
-
117
-
118
-
119
-
120
-
121
-
122
-
123
-
124
-
125
-
126
-
127
-
128
-
129
-
130
-
131
-
132
-
133
-
134
-
135
-
136
-
137
-
138
-
139
-
140
-
141
-
142
-
143
-
144
-
145
-
146
-
147
-
148
-
149
-
150
-
151
-
152
-
153
-
154
-
155
-
156
-
157
-
158
-
159
-
160
-
161
-
162
-
163
-
164
 |
 |