Brother International Laura Ashley Innov-ís NX2000 Users Manual - English - Page 58
Changing the Needle Position Left or, Middle Needle Position Stitches Only, Basting, Aligning
 |
View all Brother International Laura Ashley Innov-ís NX2000 manuals
Add to My Manuals
Save this manual to your list of manuals |
Page 58 highlights
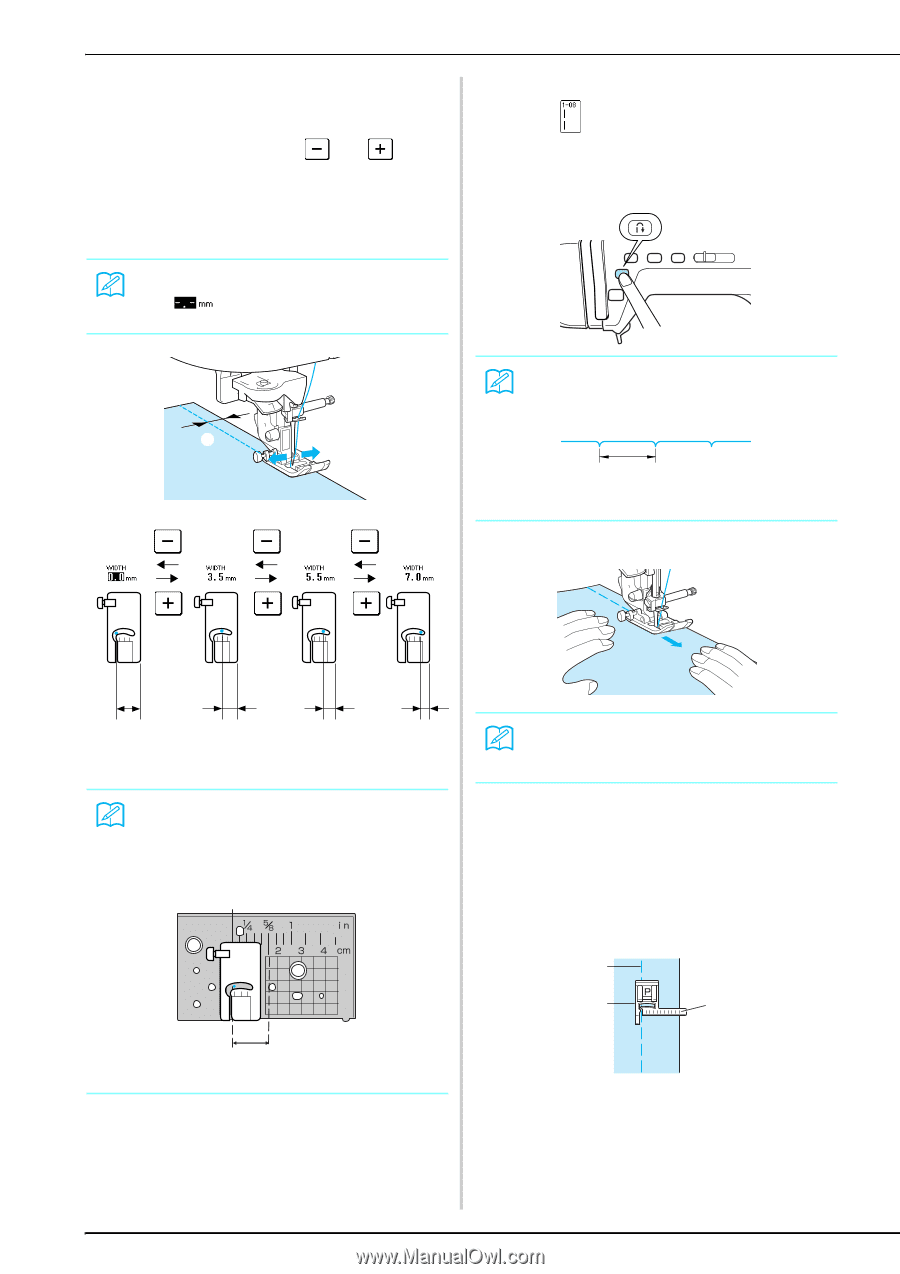
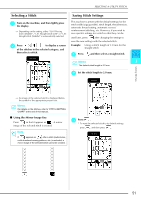
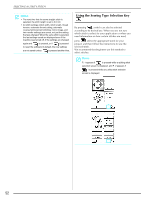
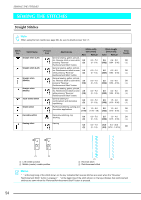
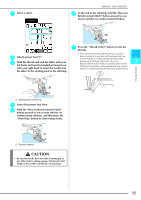
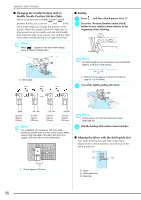
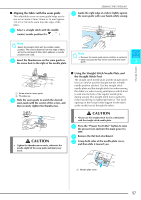
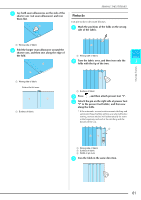
SEWING THE STITCHES ■ Changing the Needle Position (Left or Middle Needle Position Stitches Only) When you select left or middle (center) needle position stitches, you can use and in the stitch width display to change the position of the needle. Match the distance from the right edge of the presser foot to the needle with the stitch width, then align the edge of the presser foot with the edge of the fabric during sewing for an attractive finish. Memo When appears in the stitch width display, select a different straight stitch. ■ Basting a Press , and then attach presser foot "J". b Press the "Reverse/Reinforcement Stitch" button to sew reinforcement stitches at the beginning of the stitching. a a Stitch width Memo The stitch length can be set between 5 mm and 30 mm (approx. 3/16 and 1-3/16 inches). a a Between 5 mm (approx. 3/16 inch) and 30 mm (approx. 1-3/16 inches) c Sew while lightly guiding the fabric. J J J J 12.0 mm (approx. 1/2 inch) 8.5 mm (approx. 11/32 inch) 6.5 mm (approx. 1/4 inch) 5.0 mm (approx. 3/16 inch) Memo For a standard 16 mm (approx. 5/8 inch) seam allowance, set the width to 0 mm on the screen. While sewing, align the edge of the fabric with the 16mm (approx. 5/8 inch) mark on the needle plate. J Memo This is easy to do if the foot controller is used (see page 39). d End the basting with reinforcement stitches. ■ Aligning the fabric with the stitch guide foot Sew while keeping the right edge of the fabric aligned with a desired position of markings on the stitch guide foot. 1 2 3 a a 16 mm (approx. 5/8 inch) a Seam b Stitch guide foot c Markings 56
-
 1
1 -
2
-
3
-
4
-
5
-
6
-
7
-
8
-
9
-
10
-
11
-
12
-
13
-
14
-
15
-
16
-
17
-
18
-
19
-
20
-
21
-
22
-
23
-
24
-
25
-
26
-
27
-
28
-
29
-
30
-
31
-
32
-
33
-
34
-
35
-
36
-
37
-
38
-
39
-
40
-
41
-
42
-
43
-
44
-
45
-
46
-
47
-
48
-
49
-
50
-
51
-
52
-
 53
53 -
 54
54 -
 55
55 -
 56
56 -
 57
57 -
 58
58 -
 59
59 -
 60
60 -
 61
61 -
 62
62 -
 63
63 -
64
-
65
-
66
-
67
-
68
-
69
-
70
-
71
-
72
-
73
-
74
-
75
-
76
-
77
-
78
-
79
-
80
-
81
-
82
-
83
-
84
-
85
-
86
-
87
-
88
-
89
-
90
-
91
-
92
-
93
-
94
-
95
-
96
-
97
-
98
-
99
-
100
-
101
-
102
-
103
-
104
-
105
-
106
-
107
-
108
-
109
-
110
-
111
-
112
-
113
-
114
-
115
-
116
-
117
-
118
-
119
-
120
-
121
-
122
-
123
-
124
-
125
-
126
-
127
-
128
-
129
-
130
-
131
-
132
-
133
-
134
-
135
-
136
-
137
-
138
-
139
-
140
-
141
-
142
-
143
-
144
-
145
-
146
-
147
-
148
-
149
-
150
-
151
-
152
-
153
-
154
-
155
-
156
-
157
-
158
-
159
-
160
-
161
-
162
-
163
-
164
 |
 |