Brother International Laura Ashley Innov-ís NX2000 Users Manual - English - Page 83
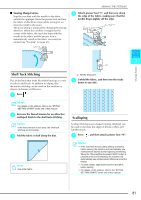
Shell Tuck Stitching, Scalloping
 |
View all Brother International Laura Ashley Innov-ís NX2000 manuals
Add to My Manuals
Save this manual to your list of manuals |
Page 83 highlights
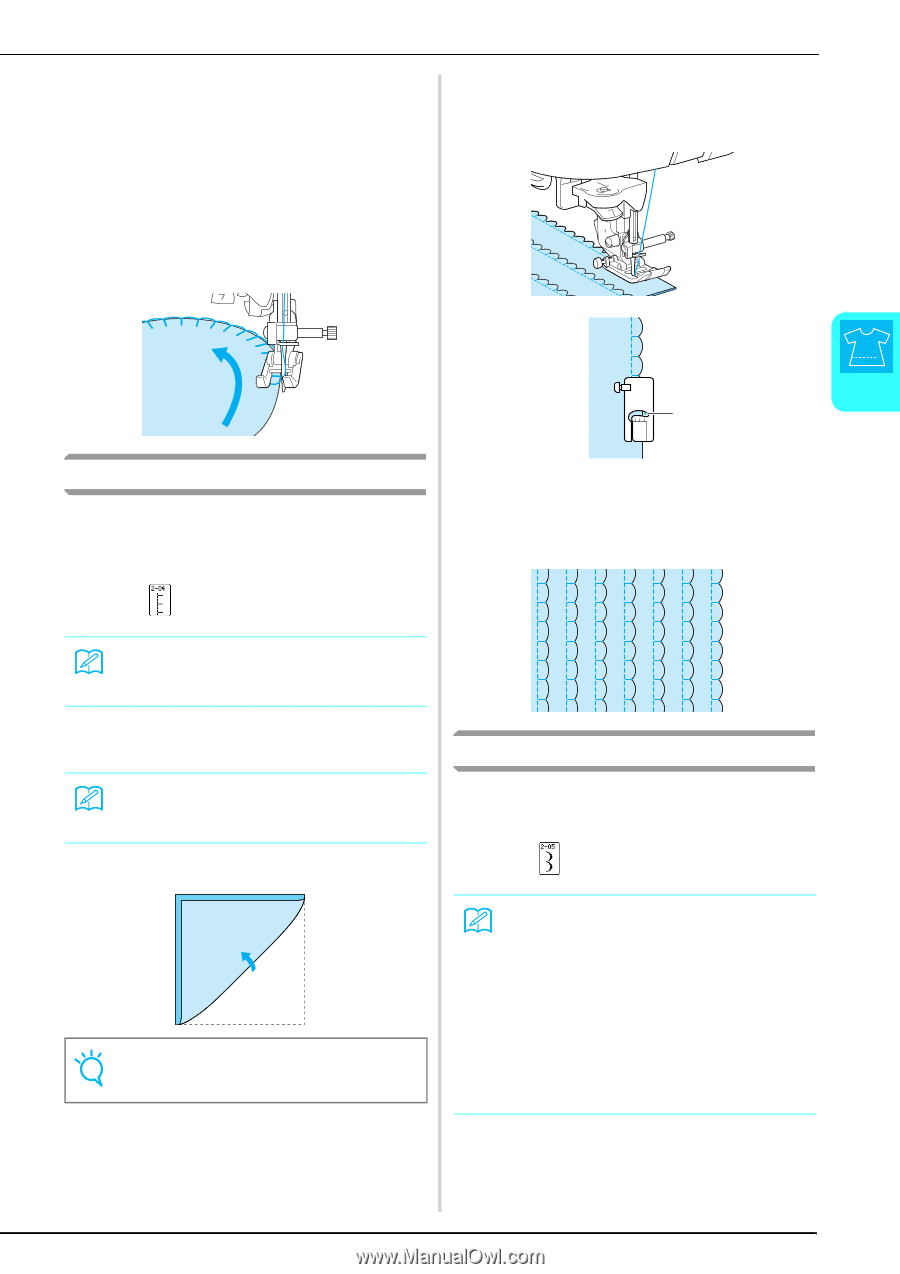
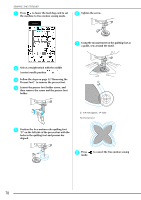
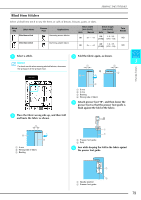
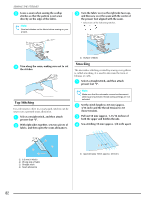
■ Sewing Sharp Curves Stop the machine with the needle in the fabric outside the appliqué. Raise the presser foot and turn the fabric a little bit at a time while sewing for an attractive finish to the seam. The pivot setting is useful when changing the sewing direction. When the machine is stopped at the corner of the fabric, the machine stops with the needle in the fabric and the presser foot is automatically raised so the fabric can easily be rotated (see "Pivoting" on page 45). SEWING THE STITCHES d Attach presser foot "J", and then sew along the edge of the fabric, making sure that the needle drops slightly off the edge. 3 a Utility Stitches Shell Tuck Stitching The arched tuck that looks like shells lined up in a row is called a shell tuck. In addition to edging, this decorative stitching can be used on the neckline or sleeves of dresses and blouses. a Press . a Needle drop point e Unfold the fabric, and then iron the tucks down to one side. Memo For details on the stitches, refer to the "STITCH SETTING CHART" at the end of this manual. b Increase the thread tension for an attractive scalloped finish to the shell tuck stitching. Memo If the thread tension is too loose, the shell tuck stitching will not scallop. c Fold the fabric in half along the bias. ÅB Note Use a thin fabric. Scalloping Scallop stitching (wave-shaped running stitching) can be used to decorate the edges of blouse collars and handkerchiefs. a Press , and then attach presser foot "N". Memo • If the automatic thread cutting setting is selected before sewing, the machine will automatically sew reinforcement stitches at the beginning of stitching. When the "Reverse/Reinforcement Stitch" button is pressed at the end of stitching, the machine will automatically sew reinforcement stitches and cut the thread. • For best results, apply starch and iron the fabric before sewing. • For details on the stitches, refer to the "STITCH SETTING CHART" at the end of this manual. 81
-
 1
1 -
2
-
3
-
4
-
5
-
6
-
7
-
8
-
9
-
10
-
11
-
12
-
13
-
14
-
15
-
16
-
17
-
18
-
19
-
20
-
21
-
22
-
23
-
24
-
25
-
26
-
27
-
28
-
29
-
30
-
31
-
32
-
33
-
34
-
35
-
36
-
37
-
38
-
39
-
40
-
41
-
42
-
43
-
44
-
45
-
46
-
47
-
48
-
49
-
50
-
51
-
52
-
53
-
54
-
55
-
56
-
57
-
58
-
59
-
60
-
61
-
62
-
63
-
64
-
65
-
66
-
67
-
68
-
69
-
70
-
71
-
72
-
73
-
74
-
75
-
76
-
77
-
 78
78 -
 79
79 -
 80
80 -
 81
81 -
 82
82 -
 83
83 -
 84
84 -
 85
85 -
 86
86 -
 87
87 -
 88
88 -
89
-
90
-
91
-
92
-
93
-
94
-
95
-
96
-
97
-
98
-
99
-
100
-
101
-
102
-
103
-
104
-
105
-
106
-
107
-
108
-
109
-
110
-
111
-
112
-
113
-
114
-
115
-
116
-
117
-
118
-
119
-
120
-
121
-
122
-
123
-
124
-
125
-
126
-
127
-
128
-
129
-
130
-
131
-
132
-
133
-
134
-
135
-
136
-
137
-
138
-
139
-
140
-
141
-
142
-
143
-
144
-
145
-
146
-
147
-
148
-
149
-
150
-
151
-
152
-
153
-
154
-
155
-
156
-
157
-
158
-
159
-
160
-
161
-
162
-
163
-
164
 |
 |