Brother International Laura Ashley Innov-ís NX2000 Users Manual - English - Page 64
Zigzag Stitches
 |
View all Brother International Laura Ashley Innov-ís NX2000 manuals
Add to My Manuals
Save this manual to your list of manuals |
Page 64 highlights
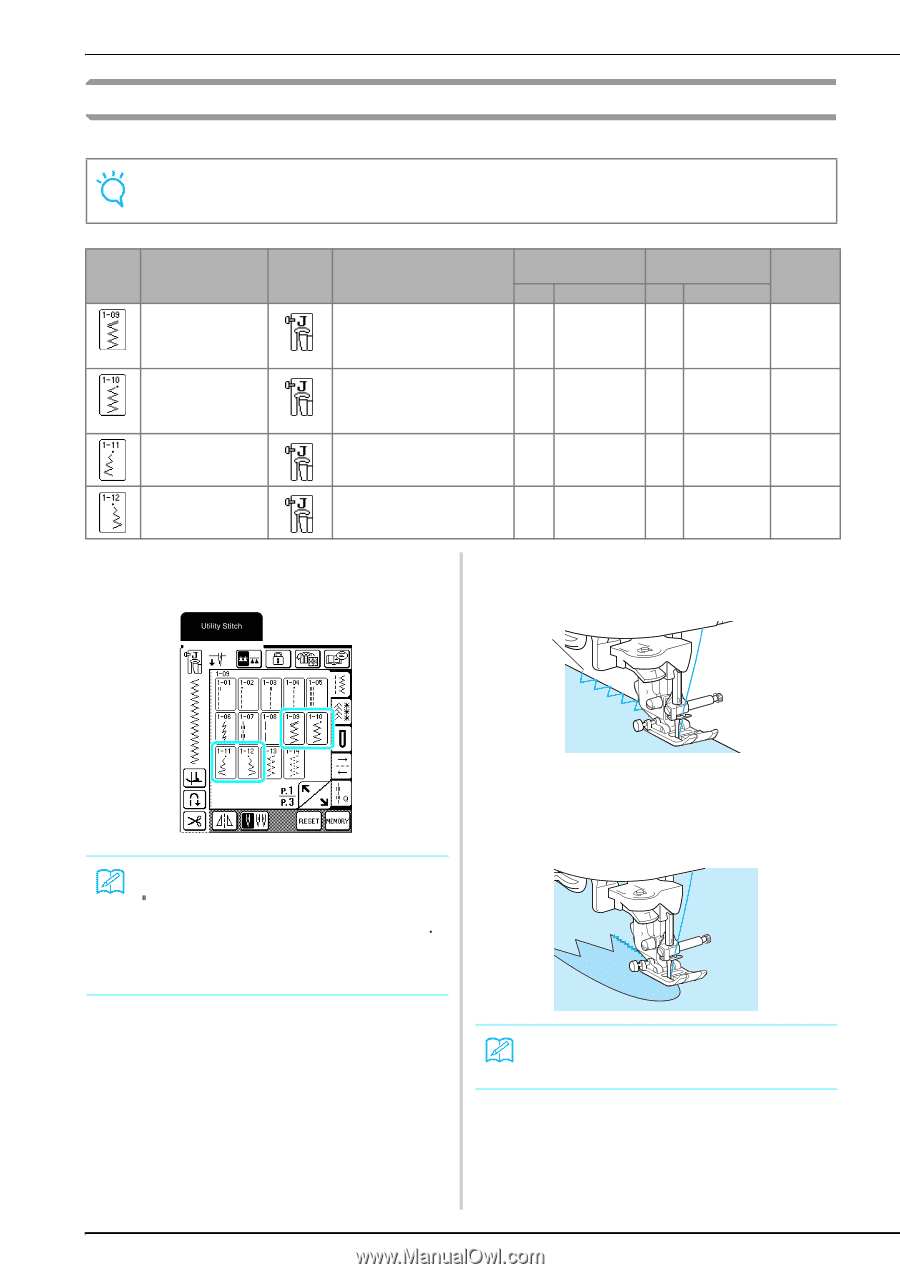
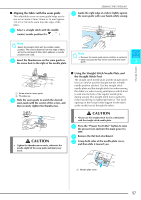
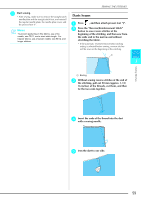
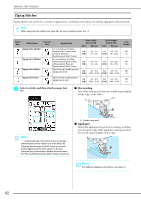
SEWING THE STITCHES Zigzag Stitches Zigzag stitches are useful for a variety of applications, including overcasting and sewing appliqués and patchwork. Note When using the twin needle (see page 30), be sure to attach presser foot "J". Stitch Key Stitch Name Zigzag stitch (Middle) Zigzag stitch (Middle) Zigzag stitch (Right) Presser Foot Applications For overcasting, mending. Reverse stitch is sewn while pressing "Reverse/ Reinforcement Stitch" button. For overcasting, mending. Reinforcement stitch is sewn while pressing "Reverse/ Reinforcement Stitch" button. Start from right needle position, zigzag sew at left. Stitch width [mm (inch)] Auto Manual Stitch length [mm (inch)] Auto Manual 3.5 (1/8) 0.0 - 7.0 (0 - 1/4) 1.4 0.0 - 4.0 (1/16) (0 - 3/16) 3.5 (1/8) 0.0 - 7.0 (0 - 1/4) 1.4 0.0 - 4.0 (1/16) (0 - 3/16) 3.5 2.5 - 5.0 1.4 0.3 - 4.0 (1/8) (3/32 - 3/16) (1/16) (1/64 - 3/16) Zigzag stitch (Left) Start from left needle position, zigzag sew at right. 3.5 2.5 - 5.0 1.4 0.3 - 4.0 (1/8) (3/32 - 3/16) (1/16) (1/64 - 3/16) Twin Needle OK ( J ) OK ( J ) OK ( J ) OK ( J ) a Select a stitch, and then attach presser foot "J". ■ Overcasting Sew while making sure that the needle drops slightly off the edge of the fabric. a Memo " " at the beginning of the stitch shown on the key indicates that reverse stitches are sewn when the "Reverse/Reinforcement Stitch" button is pressed. " " at the beginning of the stitch shown on the key indicates that reinforcement stitches are sewn when the "Reverse/Reinforcement Stitch" button is pressed. a Needle drop point ■ Appliqués Attach the appliqué using starch or basting, and then sew along the edge of the appliqué, making sure that the needle drops slightly off the edge. Memo For additional applique instructions, see page 73. 62
-
 1
1 -
2
-
3
-
4
-
5
-
6
-
7
-
8
-
9
-
10
-
11
-
12
-
13
-
14
-
15
-
16
-
17
-
18
-
19
-
20
-
21
-
22
-
23
-
24
-
25
-
26
-
27
-
28
-
29
-
30
-
31
-
32
-
33
-
34
-
35
-
36
-
37
-
38
-
39
-
40
-
41
-
42
-
43
-
44
-
45
-
46
-
47
-
48
-
49
-
50
-
51
-
52
-
53
-
54
-
55
-
56
-
57
-
58
-
 59
59 -
 60
60 -
 61
61 -
 62
62 -
 63
63 -
 64
64 -
 65
65 -
 66
66 -
 67
67 -
 68
68 -
 69
69 -
70
-
71
-
72
-
73
-
74
-
75
-
76
-
77
-
78
-
79
-
80
-
81
-
82
-
83
-
84
-
85
-
86
-
87
-
88
-
89
-
90
-
91
-
92
-
93
-
94
-
95
-
96
-
97
-
98
-
99
-
100
-
101
-
102
-
103
-
104
-
105
-
106
-
107
-
108
-
109
-
110
-
111
-
112
-
113
-
114
-
115
-
116
-
117
-
118
-
119
-
120
-
121
-
122
-
123
-
124
-
125
-
126
-
127
-
128
-
129
-
130
-
131
-
132
-
133
-
134
-
135
-
136
-
137
-
138
-
139
-
140
-
141
-
142
-
143
-
144
-
145
-
146
-
147
-
148
-
149
-
150
-
151
-
152
-
153
-
154
-
155
-
156
-
157
-
158
-
159
-
160
-
161
-
162
-
163
-
164
 |
 |