Brother International Laura Ashley Innov-ís NX2000 Users Manual - English - Page 61
Darts Seams
 |
View all Brother International Laura Ashley Innov-ís NX2000 manuals
Add to My Manuals
Save this manual to your list of manuals |
Page 61 highlights
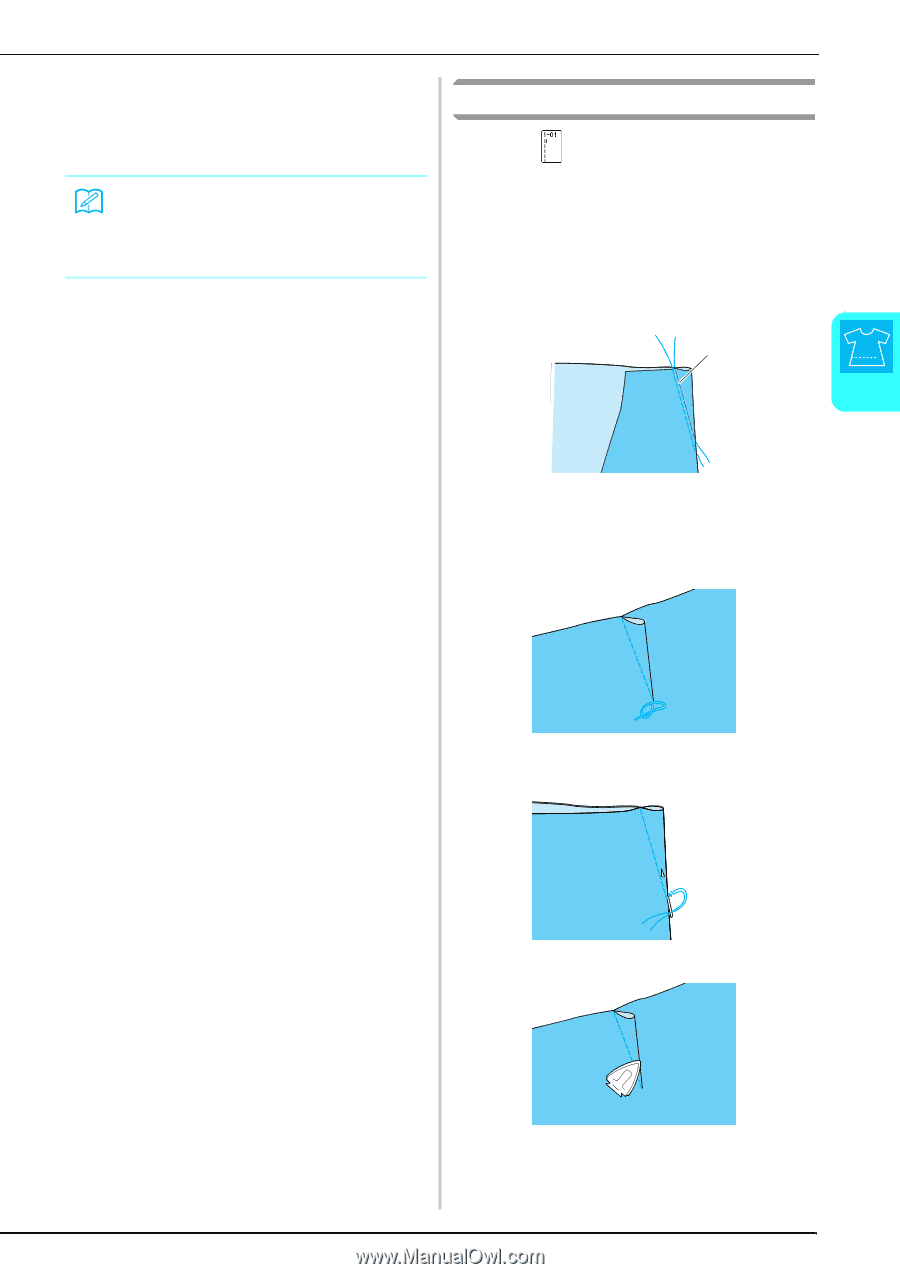
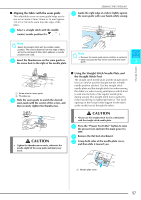
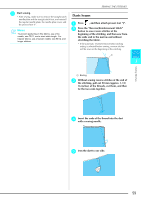
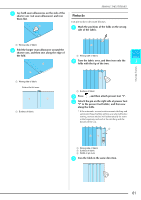
SEWING THE STITCHES j Start sewing. * After sewing, make sure to remove the straight stitch needle plate and the straight stitch foot, and reinstall the regular needle plate, the needle plate cover and the presser foot "J". Memo To prevent puckering on fine fabrics, use a fine needle, size 75/11, and a short stitch length. For heavier fabrics, use a heavier needle, size 90/14, and longer stitches. Darts Seams a Press , and then attach presser foot "J". b Press the "Reverse/Reinforcement Stitch" button to sew reverse stitches at the beginning of the stitching, and then sew from the wide end to the narrow end without stretching the fabric. * If the automatic reverse/reinforcement stitching setting is selected before sewing, reverse stitches will be sewn at the beginning of the stitching. a 3 Utility Stitches a Basting c Without sewing reverse stitches at the end of the stitching, pull out 50 mm (approx. 1-15/ 16 inches) of the threads, cut them, and then tie the two ends together. d Insert the ends of the thread into the dart with a sewing needle. e Iron the dart to one side. 59
-
 1
1 -
2
-
3
-
4
-
5
-
6
-
7
-
8
-
9
-
10
-
11
-
12
-
13
-
14
-
15
-
16
-
17
-
18
-
19
-
20
-
21
-
22
-
23
-
24
-
25
-
26
-
27
-
28
-
29
-
30
-
31
-
32
-
33
-
34
-
35
-
36
-
37
-
38
-
39
-
40
-
41
-
42
-
43
-
44
-
45
-
46
-
47
-
48
-
49
-
50
-
51
-
52
-
53
-
54
-
55
-
 56
56 -
 57
57 -
 58
58 -
 59
59 -
 60
60 -
 61
61 -
 62
62 -
 63
63 -
 64
64 -
 65
65 -
 66
66 -
67
-
68
-
69
-
70
-
71
-
72
-
73
-
74
-
75
-
76
-
77
-
78
-
79
-
80
-
81
-
82
-
83
-
84
-
85
-
86
-
87
-
88
-
89
-
90
-
91
-
92
-
93
-
94
-
95
-
96
-
97
-
98
-
99
-
100
-
101
-
102
-
103
-
104
-
105
-
106
-
107
-
108
-
109
-
110
-
111
-
112
-
113
-
114
-
115
-
116
-
117
-
118
-
119
-
120
-
121
-
122
-
123
-
124
-
125
-
126
-
127
-
128
-
129
-
130
-
131
-
132
-
133
-
134
-
135
-
136
-
137
-
138
-
139
-
140
-
141
-
142
-
143
-
144
-
145
-
146
-
147
-
148
-
149
-
150
-
151
-
152
-
153
-
154
-
155
-
156
-
157
-
158
-
159
-
160
-
161
-
162
-
163
-
164
 |
 |