Brother International MFC-J4710DW Software Users Manual - English - Page 163
Choosing your machine from Print & Fax or Print & Scan, Scan To, Format, Combine into single document
 |
View all Brother International MFC-J4710DW manuals
Add to My Manuals
Save this manual to your list of manuals |
Page 163 highlights
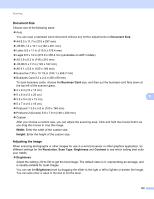
Scanning Scan To: Choose the destination folder or destination application. Name: Enter the prefix text used for the name of the scanned image. Format: Select the file format of the scanned data. Combine into single document (Mac OS X v10.7.x): When you choose PDF or TIFF for the file format, check this box to scan a document as one item and save as one file. Image Correction: From the manual setting you can adjust Brightness, Contrast (Mac OS X v10.7.x only), Tint, Temperature, Threshold and Saturation. 9 f Click on Scan to start scanning. Choosing your machine from Print & Fax or Print & Scan 9 a Connect your Brother machine to the computer using a USB cable. Or connect your Brother machine to the same LAN or Wireless LAN where the computer is connected. b Select System Preferences from the Apple Menu. c Click Print & Fax or Print & Scan. d Select the machine from the list on the left side of the screen and click Open Print Queue. NOTE If you do not see the Scan tab on the screen, remove your machine by clicking the - button from the Print & Fax or Print & Scan list. Then add the machine by clicking the + button. 155
-
 1
1 -
2
-
3
-
4
-
5
-
6
-
7
-
8
-
9
-
10
-
11
-
12
-
13
-
14
-
15
-
16
-
17
-
18
-
19
-
20
-
21
-
22
-
23
-
24
-
25
-
26
-
27
-
28
-
29
-
30
-
31
-
32
-
33
-
34
-
35
-
36
-
37
-
38
-
39
-
40
-
41
-
42
-
43
-
44
-
45
-
46
-
47
-
48
-
49
-
50
-
51
-
52
-
53
-
54
-
55
-
56
-
57
-
58
-
59
-
60
-
61
-
62
-
63
-
64
-
65
-
66
-
67
-
68
-
69
-
70
-
71
-
72
-
73
-
74
-
75
-
76
-
77
-
78
-
79
-
80
-
81
-
82
-
83
-
84
-
85
-
86
-
87
-
88
-
89
-
90
-
91
-
92
-
93
-
94
-
95
-
96
-
97
-
98
-
99
-
100
-
101
-
102
-
103
-
104
-
105
-
106
-
107
-
108
-
109
-
110
-
111
-
112
-
113
-
114
-
115
-
116
-
117
-
118
-
119
-
120
-
121
-
122
-
123
-
124
-
125
-
126
-
127
-
128
-
129
-
130
-
131
-
132
-
133
-
134
-
135
-
136
-
137
-
138
-
139
-
140
-
141
-
142
-
143
-
144
-
145
-
146
-
147
-
148
-
149
-
150
-
151
-
152
-
153
-
154
-
155
-
156
-
157
-
 158
158 -
 159
159 -
 160
160 -
 161
161 -
 162
162 -
 163
163 -
 164
164 -
 165
165 -
 166
166 -
 167
167 -
 168
168 -
169
-
170
-
171
-
172
-
173
-
174
-
175
-
176
-
177
-
178
-
179
-
180
-
181
-
182
-
183
-
184
-
185
-
186
-
187
-
188
-
189
-
190
-
191
-
192
-
193
-
194
-
195
-
196
-
197
-
198
-
199
-
200
-
201
-
202
-
203
-
204
-
205
-
206
-
207
-
208
-
209
-
210
-
211
-
212
-
213
-
214
-
215
-
216
-
217
-
218
-
219
-
220
-
221
-
222
-
223
-
224
-
225
-
226
-
227
-
228
-
229
-
230
-
231
-
232
-
233
-
234
-
235
-
236
-
237
-
238
-
239
-
240
 |
 |
