Brother International MFC-J4710DW Software Users Manual - English - Page 195
USB cable scanning, Using the Scan button over a USB cable connection
 |
View all Brother International MFC-J4710DW manuals
Add to My Manuals
Save this manual to your list of manuals |
Page 195 highlights
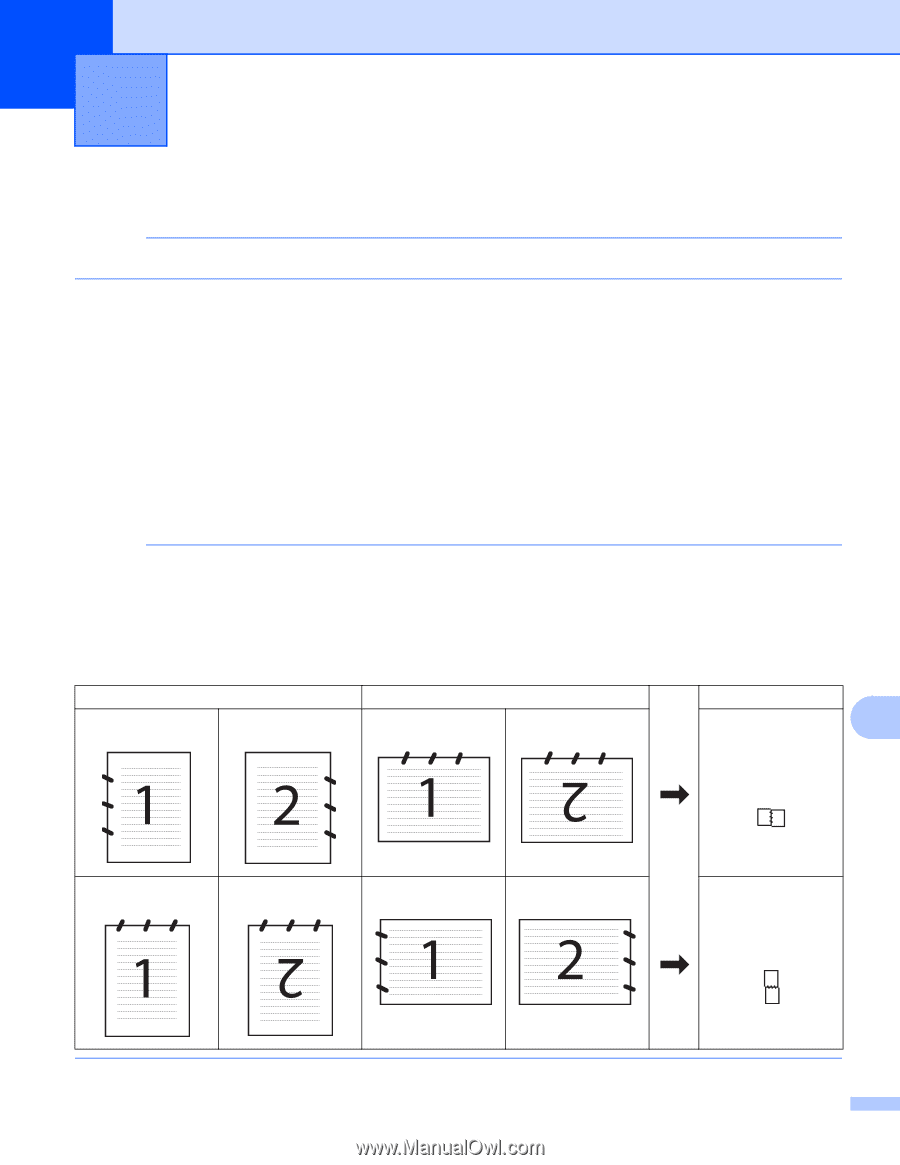
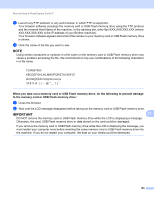
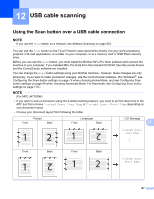
12 USB cable scanning 12 Using the Scan button over a USB cable connection 12 NOTE If you use the Scan button on a network, see Network Scanning on page 201. You can use the Scan button on the Touch Panel to scan documents directly into your word processing, graphics or E-mail applications, to a folder on your computer, or to a memory card or USB Flash memory drive. Before you can use the Scan button, you must install the Brother MFL-Pro Suite software and connect the machine to your computer. If you installed MFL-Pro Suite from the included CD-ROM, then the correct drivers and the ControlCenter software are installed. You can change the Scan button settings using your Brother machine - however, these changes are only temporary. If you want to make permanent changes, use the ControlCenter software. (For Windows®, see Configuring the Scan button settings on page 75 when choosing Home Mode, and see Configuring Scan button settings on page 90 when choosing Advanced Mode. For Macintosh, see Configuring Scan button settings on page 170.) NOTE (For MFC-J4710DW) • If you want to scan a document using the 2-sided scanning feature, you need to put the document in the ADF and then choose 2-sided Scan: Long Edge or 2-sided Scan: Short Edge depending on your document layout. • Choose your document layout from following the table: Front Portrait Back Landscape Front Back LCD Message 12 2-sided Scan: Long Edge Front Back Front Back 2-sided Scan: Short Edge 187
-
 1
1 -
2
-
3
-
4
-
5
-
6
-
7
-
8
-
9
-
10
-
11
-
12
-
13
-
14
-
15
-
16
-
17
-
18
-
19
-
20
-
21
-
22
-
23
-
24
-
25
-
26
-
27
-
28
-
29
-
30
-
31
-
32
-
33
-
34
-
35
-
36
-
37
-
38
-
39
-
40
-
41
-
42
-
43
-
44
-
45
-
46
-
47
-
48
-
49
-
50
-
51
-
52
-
53
-
54
-
55
-
56
-
57
-
58
-
59
-
60
-
61
-
62
-
63
-
64
-
65
-
66
-
67
-
68
-
69
-
70
-
71
-
72
-
73
-
74
-
75
-
76
-
77
-
78
-
79
-
80
-
81
-
82
-
83
-
84
-
85
-
86
-
87
-
88
-
89
-
90
-
91
-
92
-
93
-
94
-
95
-
96
-
97
-
98
-
99
-
100
-
101
-
102
-
103
-
104
-
105
-
106
-
107
-
108
-
109
-
110
-
111
-
112
-
113
-
114
-
115
-
116
-
117
-
118
-
119
-
120
-
121
-
122
-
123
-
124
-
125
-
126
-
127
-
128
-
129
-
130
-
131
-
132
-
133
-
134
-
135
-
136
-
137
-
138
-
139
-
140
-
141
-
142
-
143
-
144
-
145
-
146
-
147
-
148
-
149
-
150
-
151
-
152
-
153
-
154
-
155
-
156
-
157
-
158
-
159
-
160
-
161
-
162
-
163
-
164
-
165
-
166
-
167
-
168
-
169
-
170
-
171
-
172
-
173
-
174
-
175
-
176
-
177
-
178
-
179
-
180
-
181
-
182
-
183
-
184
-
185
-
186
-
187
-
188
-
189
-
 190
190 -
 191
191 -
 192
192 -
 193
193 -
 194
194 -
 195
195 -
 196
196 -
 197
197 -
 198
198 -
 199
199 -
 200
200 -
201
-
202
-
203
-
204
-
205
-
206
-
207
-
208
-
209
-
210
-
211
-
212
-
213
-
214
-
215
-
216
-
217
-
218
-
219
-
220
-
221
-
222
-
223
-
224
-
225
-
226
-
227
-
228
-
229
-
230
-
231
-
232
-
233
-
234
-
235
-
236
-
237
-
238
-
239
-
240
 |
 |