Brother International MFC-J4710DW Software Users Manual - English - Page 212
Configuring network scanning for Macintosh, Scan To Button, Display Name, Pin number
 |
View all Brother International MFC-J4710DW manuals
Add to My Manuals
Save this manual to your list of manuals |
Page 212 highlights
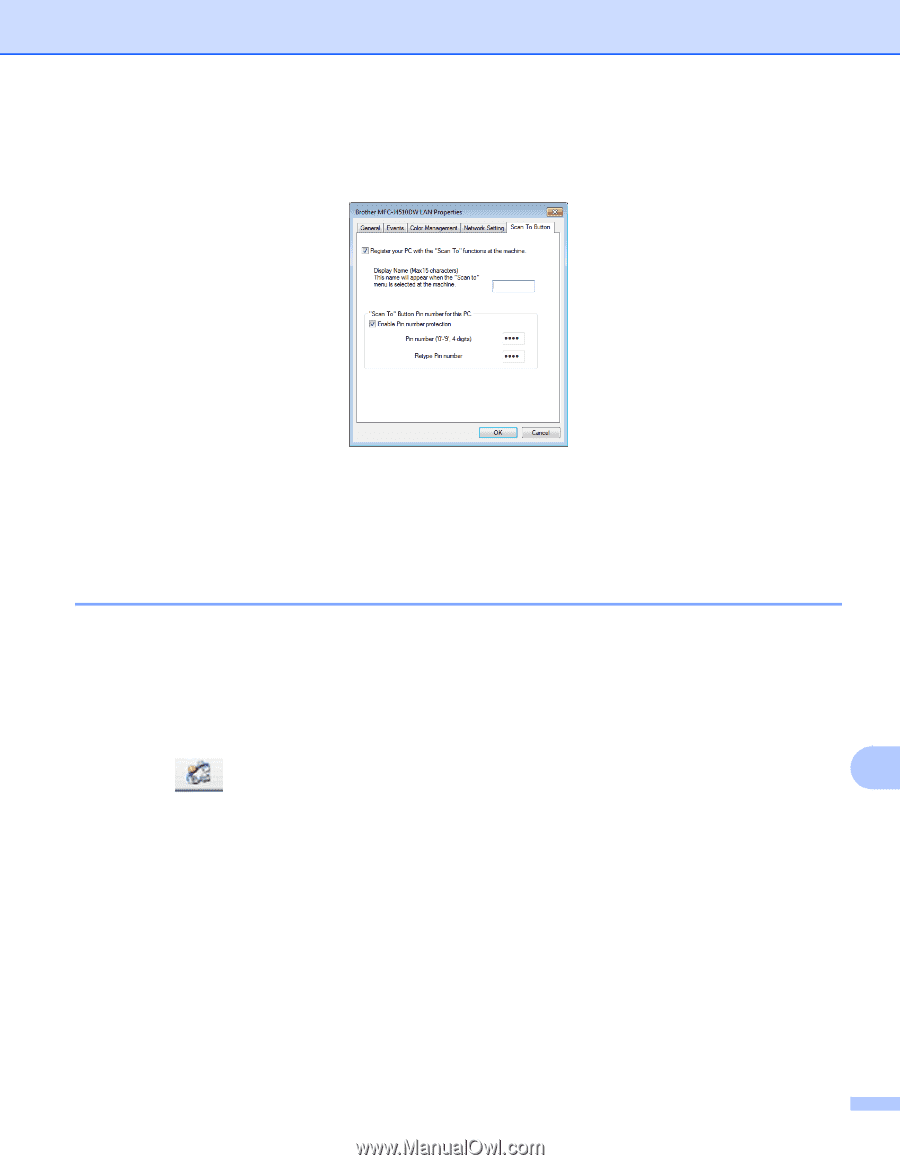
Network Scanning d Click the Scan To Button tab and enter your computer name in the Display Name field. The machine's LCD displays the name you enter. The default setting is your computer name. You can enter any name that you like. e If you want to avoid receiving unwanted documents, enter a 4-digit PIN number in the Pin number and Retype Pin number field. To send data to a computer protected by a PIN number, the LCD prompts you to enter the PIN number before the document can be scanned and sent to the computer. (See Using the Scan button on your network on page 206.) Configuring network scanning for Macintosh 13 If you want to scan from the machine on a network, you must choose the networked machine in the Device Selector window. The Device Selector window can be opened from the Model pop-up menu in the main screen of ControlCenter2. If you have already installed the MFL-Pro Suite software following the network installation steps in the Quick Setup Guide then this selection should already be made. To use the machine as a network scanner, the machine must be configured with a TCP/IP address. You can set or change the address settings from the control panel. See Network User's Guide: Control Panel Setup. a Click the icon and choose Open. The ControlCenter2 window will open. 13 b Choose Other from the Model pop-up menu in the main screen of ControlCenter2. The Device Selector window appears. c Specify your machine by IP address or mDNS service name. To change the IP address, enter the new IP address. You can also choose a machine from the list of the machines available. Click Browse to show the list. 204
-
 1
1 -
2
-
3
-
4
-
5
-
6
-
7
-
8
-
9
-
10
-
11
-
12
-
13
-
14
-
15
-
16
-
17
-
18
-
19
-
20
-
21
-
22
-
23
-
24
-
25
-
26
-
27
-
28
-
29
-
30
-
31
-
32
-
33
-
34
-
35
-
36
-
37
-
38
-
39
-
40
-
41
-
42
-
43
-
44
-
45
-
46
-
47
-
48
-
49
-
50
-
51
-
52
-
53
-
54
-
55
-
56
-
57
-
58
-
59
-
60
-
61
-
62
-
63
-
64
-
65
-
66
-
67
-
68
-
69
-
70
-
71
-
72
-
73
-
74
-
75
-
76
-
77
-
78
-
79
-
80
-
81
-
82
-
83
-
84
-
85
-
86
-
87
-
88
-
89
-
90
-
91
-
92
-
93
-
94
-
95
-
96
-
97
-
98
-
99
-
100
-
101
-
102
-
103
-
104
-
105
-
106
-
107
-
108
-
109
-
110
-
111
-
112
-
113
-
114
-
115
-
116
-
117
-
118
-
119
-
120
-
121
-
122
-
123
-
124
-
125
-
126
-
127
-
128
-
129
-
130
-
131
-
132
-
133
-
134
-
135
-
136
-
137
-
138
-
139
-
140
-
141
-
142
-
143
-
144
-
145
-
146
-
147
-
148
-
149
-
150
-
151
-
152
-
153
-
154
-
155
-
156
-
157
-
158
-
159
-
160
-
161
-
162
-
163
-
164
-
165
-
166
-
167
-
168
-
169
-
170
-
171
-
172
-
173
-
174
-
175
-
176
-
177
-
178
-
179
-
180
-
181
-
182
-
183
-
184
-
185
-
186
-
187
-
188
-
189
-
190
-
191
-
192
-
193
-
194
-
195
-
196
-
197
-
198
-
199
-
200
-
201
-
202
-
203
-
204
-
205
-
206
-
 207
207 -
 208
208 -
 209
209 -
 210
210 -
 211
211 -
 212
212 -
 213
213 -
 214
214 -
 215
215 -
 216
216 -
 217
217 -
218
-
219
-
220
-
221
-
222
-
223
-
224
-
225
-
226
-
227
-
228
-
229
-
230
-
231
-
232
-
233
-
234
-
235
-
236
-
237
-
238
-
239
-
240
 |
 |