Canon EOS C500 Instruction Manual - Page 116
Transferring Custom Picture Files, After selecting a file, open the [Protect] submenu.
 |
View all Canon EOS C500 manuals
Add to My Manuals
Save this manual to your list of manuals |
Page 116 highlights
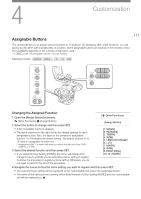
Custom Picture Settings 116 1 After selecting a file, open the [Protect] submenu. [, / Edit File] > [Protect] 2 Select [Protect] and then press SET. • In the custom picture menu, i will appear next to the file name. • To remove protection settings, select [Unprotect] instead. 3 Press the CUSTOM PICTURE button to exit the custom picture menu. Transferring Custom Picture Files You can transfer custom picture files between the camera and SD card. When the selected custom picture file is in the camera, use [Copy To *] or [Load From *] depending on the operation you wish to perform. Similarly, when the selected custom picture file is on an SD card, use [Copy To Cam.] or [Load From Cam]. Copying a File from the Camera to an SD Card 1 After selecting a file in the camera, open the [Copy To *] submenu. [+ / Transfer File] > [Copy To *] 2 Select the file slot on the SD card under which to save the file and then press SET. [+ / Transfer File] [Copy To *] • If there are available slots, you can select [New File] to save the file in the first available slot. 3 Select [OK] and then press SET. • The currently selected file will be copied to the selected slot on the SD card, overwriting the file in that slot. When the confirmation screen appears, press SET. 4 Press the CUSTOM PICTURE button to exit the custom picture menu. Replacing a File in the Camera with a File on an SD Card 1 After selecting a file in the camera to replace, open the [Load From *] submenu. [+ / Transfer File] > [Load From *] [+ / Transfer File] [Load From *] 2 Select the file to transfer to the camera and then press SET. 3 Select [OK] and then press SET. • The file in the camera will be overwritten by the one on the SD card. When the confirmation screen appears, press SET. 4 Press the CUSTOM PICTURE button to exit the custom picture menu. Copying a File from an SD Card to the Camera 1 After selecting a file on the SD card, open the [Copy To Cam.] submenu. [+ / Transfer File] > [Copy To Cam.] [+ / Transfer File] [Copy To Cam.] 2 Select the file slot under which to save the file and then press SET. 3 Select [OK] and then press SET. • The currently selected file will be copied to the selected slot on the camera, overwriting the file in that slot. When the confirmation screen appears, press SET. 4 Press the CUSTOM PICTURE button to exit the custom picture menu.
-
 1
1 -
2
-
3
-
4
-
5
-
6
-
7
-
8
-
9
-
10
-
11
-
12
-
13
-
14
-
15
-
16
-
17
-
18
-
19
-
20
-
21
-
22
-
23
-
24
-
25
-
26
-
27
-
28
-
29
-
30
-
31
-
32
-
33
-
34
-
35
-
36
-
37
-
38
-
39
-
40
-
41
-
42
-
43
-
44
-
45
-
46
-
47
-
48
-
49
-
50
-
51
-
52
-
53
-
54
-
55
-
56
-
57
-
58
-
59
-
60
-
61
-
62
-
63
-
64
-
65
-
66
-
67
-
68
-
69
-
70
-
71
-
72
-
73
-
74
-
75
-
76
-
77
-
78
-
79
-
80
-
81
-
82
-
83
-
84
-
85
-
86
-
87
-
88
-
89
-
90
-
91
-
92
-
93
-
94
-
95
-
96
-
97
-
98
-
99
-
100
-
101
-
102
-
103
-
104
-
105
-
106
-
107
-
108
-
109
-
110
-
 111
111 -
 112
112 -
 113
113 -
 114
114 -
 115
115 -
 116
116 -
 117
117 -
 118
118 -
 119
119 -
 120
120 -
 121
121 -
122
-
123
-
124
-
125
-
126
-
127
-
128
-
129
-
130
-
131
-
132
-
133
-
134
-
135
-
136
-
137
-
138
-
139
-
140
-
141
-
142
-
143
-
144
-
145
-
146
-
147
-
148
-
149
-
150
-
151
-
152
-
153
-
154
-
155
-
156
-
157
-
158
-
159
-
160
-
161
-
162
-
163
-
164
-
165
-
166
-
167
-
168
-
169
-
170
-
171
-
172
-
173
-
174
-
175
-
176
-
177
-
178
-
179
-
180
-
181
-
182
-
183
-
184
-
185
-
186
-
187
-
188
-
189
-
190
-
191
-
192
-
193
-
194
-
195
-
196
-
197
-
198
-
199
-
200
-
201
-
202
-
203
-
204
-
205
-
206
-
207
-
208
-
209
-
210
-
211
-
212
 |
 |