Canon EOS C500 Instruction Manual - Page 51
Recording, Recording Video, Preparing to Record
 |
View all Canon EOS C500 manuals
Add to My Manuals
Save this manual to your list of manuals |
Page 51 highlights
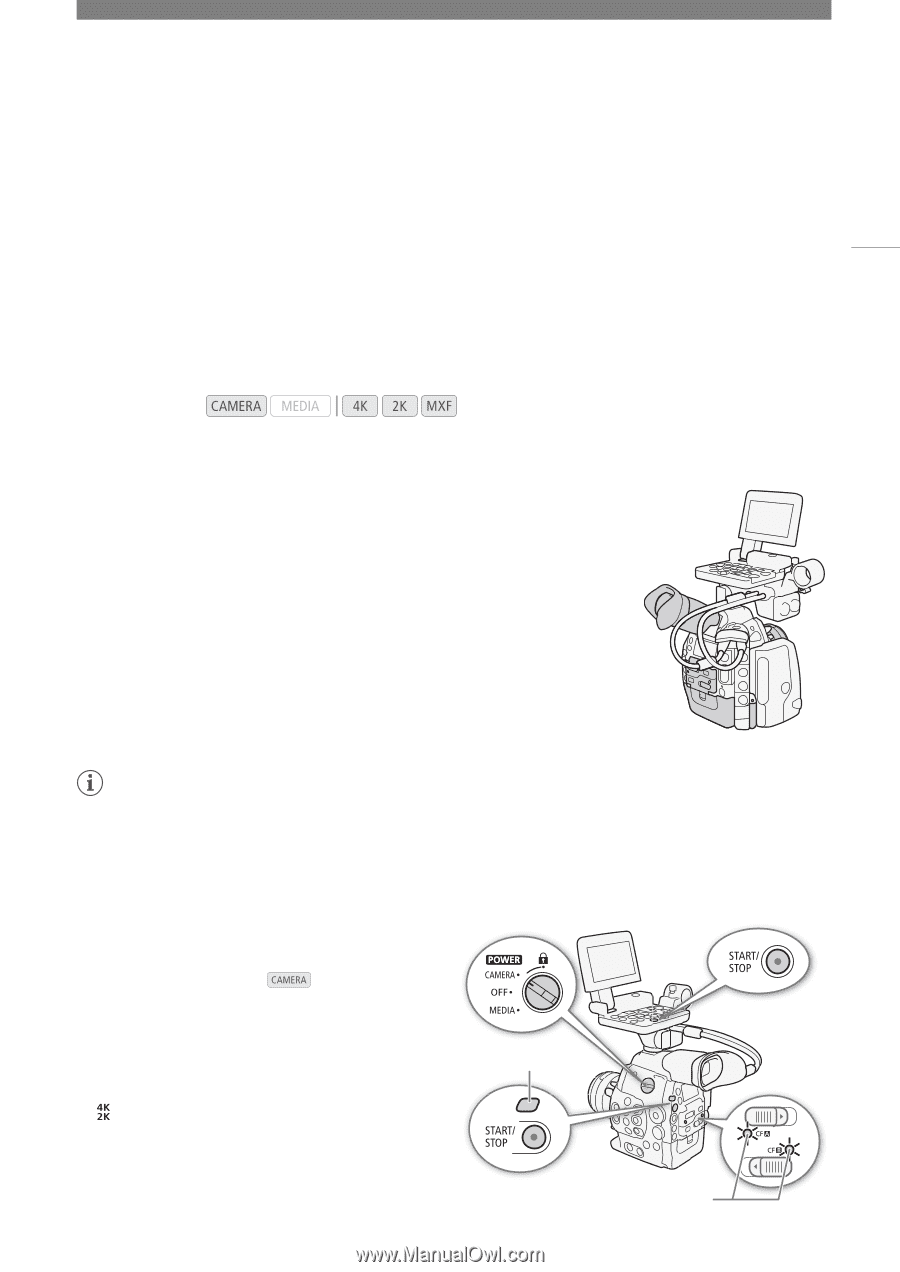
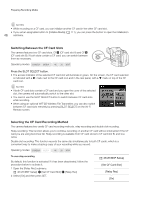
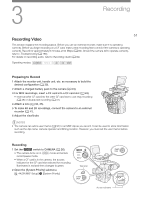
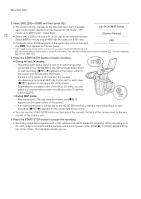
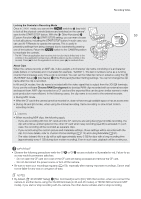
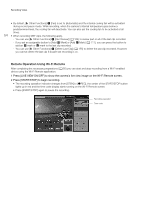
3 Recording 51 Recording Video This section explains the recording basics. Before you use an external recorder, make sure it is operating correctly. Before you begin recording on a CF card, make a test recording first to check if the camera is operating correctly. Record for approximately 6 minutes at 50 Mbps (A 60). Should the camera fail to operate correctly, refer to Troubleshooting (A 185). For details on recording audio, refer to Recording Audio (A 92). Operating modes: Preparing to Record 1 Attach the monitor unit, handle unit, etc. as necessary to build the desired configuration (A 32). 2 Attach a charged battery pack to the camera (A 24). 3 For MXF recordings, insert a CF card into a CF card slot (A 43). • Insert another CF card into the other CF card slot to use relay recording (A 46) or double slot recording (A 47). 4 Attach a lens (A 33, 35). 5 To make 4K and 2K recordings, connect the camera to an external recorder (A 41). 6 Adjust the viewfinder. NOTES • The camera can add a user memo (A 97) to an MXF clip as you record. It can be used to store information such as the clip name, camera operator and filming location. However, you must set the user memo before recording. Recording 1 Set the Q switch to CAMERA (A 26). • The camera turns on in mode and enters record pause mode. • When a CF card is in the camera, the access indicator for the CF card slot selected for recording illuminates in red and then changes to green. 2 Open the [System Priority] submenu. [ 4K/2K/MXF Setup] > [System Priority] Tally lamp Access indicators
-
 1
1 -
2
-
3
-
4
-
5
-
6
-
7
-
8
-
9
-
10
-
11
-
12
-
13
-
14
-
15
-
16
-
17
-
18
-
19
-
20
-
21
-
22
-
23
-
24
-
25
-
26
-
27
-
28
-
29
-
30
-
31
-
32
-
33
-
34
-
35
-
36
-
37
-
38
-
39
-
40
-
41
-
42
-
43
-
44
-
45
-
 46
46 -
 47
47 -
 48
48 -
 49
49 -
 50
50 -
 51
51 -
 52
52 -
 53
53 -
 54
54 -
 55
55 -
 56
56 -
57
-
58
-
59
-
60
-
61
-
62
-
63
-
64
-
65
-
66
-
67
-
68
-
69
-
70
-
71
-
72
-
73
-
74
-
75
-
76
-
77
-
78
-
79
-
80
-
81
-
82
-
83
-
84
-
85
-
86
-
87
-
88
-
89
-
90
-
91
-
92
-
93
-
94
-
95
-
96
-
97
-
98
-
99
-
100
-
101
-
102
-
103
-
104
-
105
-
106
-
107
-
108
-
109
-
110
-
111
-
112
-
113
-
114
-
115
-
116
-
117
-
118
-
119
-
120
-
121
-
122
-
123
-
124
-
125
-
126
-
127
-
128
-
129
-
130
-
131
-
132
-
133
-
134
-
135
-
136
-
137
-
138
-
139
-
140
-
141
-
142
-
143
-
144
-
145
-
146
-
147
-
148
-
149
-
150
-
151
-
152
-
153
-
154
-
155
-
156
-
157
-
158
-
159
-
160
-
161
-
162
-
163
-
164
-
165
-
166
-
167
-
168
-
169
-
170
-
171
-
172
-
173
-
174
-
175
-
176
-
177
-
178
-
179
-
180
-
181
-
182
-
183
-
184
-
185
-
186
-
187
-
188
-
189
-
190
-
191
-
192
-
193
-
194
-
195
-
196
-
197
-
198
-
199
-
200
-
201
-
202
-
203
-
204
-
205
-
206
-
207
-
208
-
209
-
210
-
211
-
212
 |
 |