Canon EOS C500 Instruction Manual - Page 24
Attaching the Battery Pack, Checking the Remaining Battery Charge
 |
View all Canon EOS C500 manuals
Add to My Manuals
Save this manual to your list of manuals |
Page 24 highlights
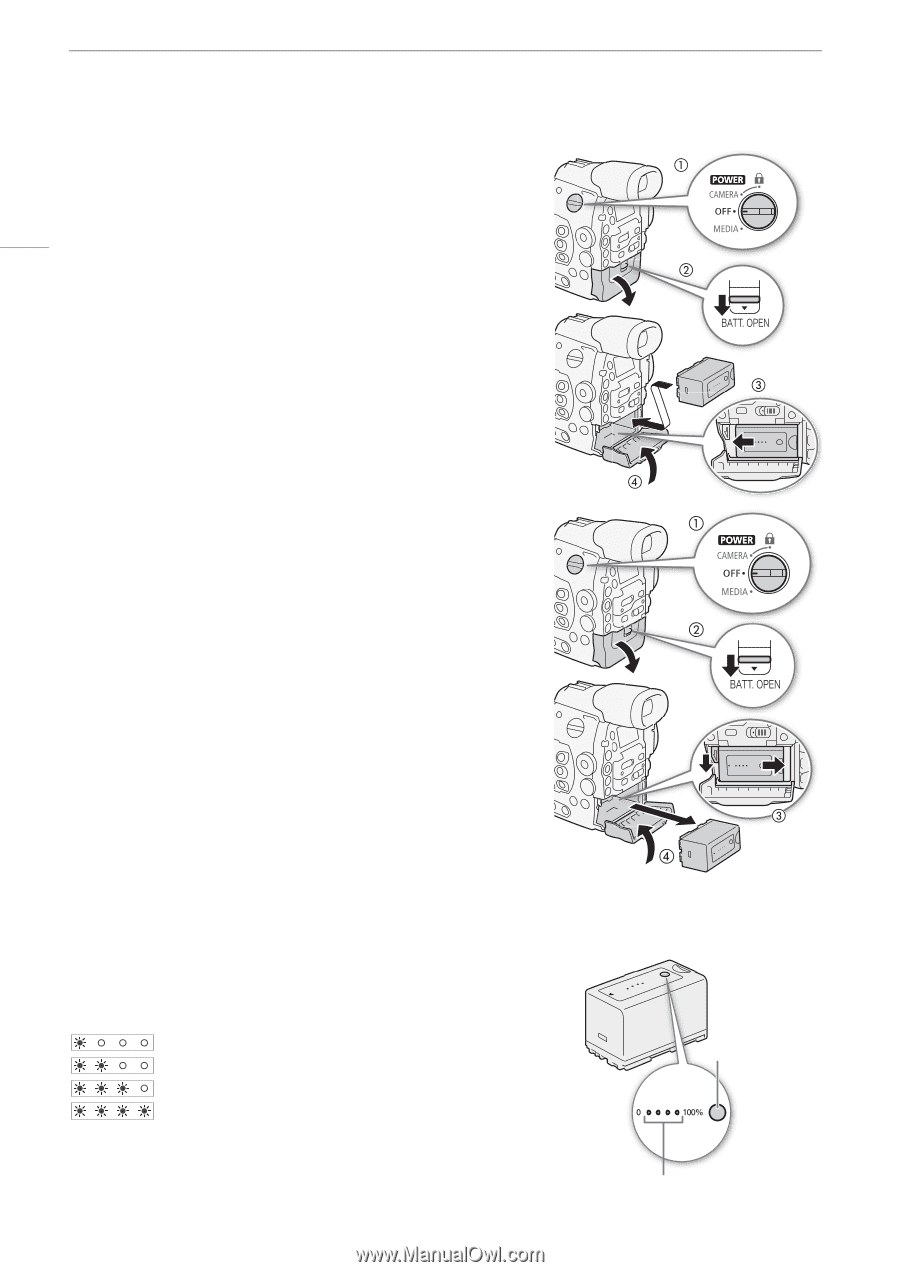
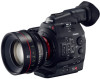
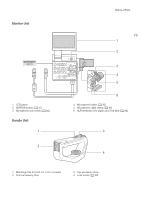
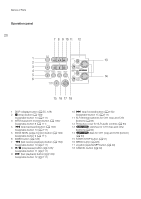
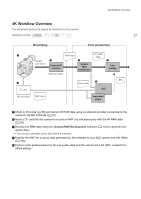
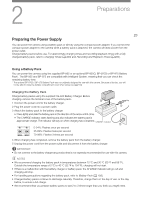
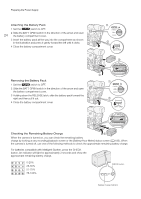
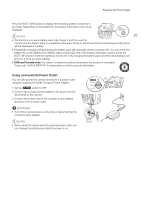
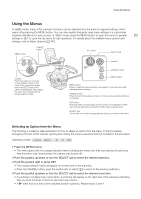
Preparing the Power Supply Attaching the Battery Pack 1 Set the Q switch to OFF. 2 Slide the BATT. OPEN switch in the direction of the arrow and open 24 the battery compartment cover. 3 Insert the battery pack all the way into the compartment as shown in the illustration and press it gently toward the left until it clicks. 4 Close the battery compartment cover. Removing the Battery Pack 1 Set the Q switch to OFF. 2 Slide the BATT. OPEN switch in the direction of the arrow and open the battery compartment cover. 3 Holding down the RELEASE latch, slide the battery pack toward the right and then pull it out. 4 Close the battery compartment cover. Checking the Remaining Battery Charge When the camera is turned on, you can check the remaining battery charge by looking at any recording/playback screen or the [Battery/Hour Meter] status screen (A 183). When the camera is turned off, use one of the following methods to check the approximate remaining battery charge. For batteries compatible with Intelligent System, press the CHECK button. An indicator will light for approximately 3 seconds and show the approximate remaining battery charge. 0-25% 26-50% 51-75% 76-100% CHECK button Battery charge indicator
-
 1
1 -
2
-
3
-
4
-
5
-
6
-
7
-
8
-
9
-
10
-
11
-
12
-
13
-
14
-
15
-
16
-
17
-
18
-
 19
19 -
 20
20 -
 21
21 -
 22
22 -
 23
23 -
 24
24 -
 25
25 -
 26
26 -
 27
27 -
 28
28 -
 29
29 -
30
-
31
-
32
-
33
-
34
-
35
-
36
-
37
-
38
-
39
-
40
-
41
-
42
-
43
-
44
-
45
-
46
-
47
-
48
-
49
-
50
-
51
-
52
-
53
-
54
-
55
-
56
-
57
-
58
-
59
-
60
-
61
-
62
-
63
-
64
-
65
-
66
-
67
-
68
-
69
-
70
-
71
-
72
-
73
-
74
-
75
-
76
-
77
-
78
-
79
-
80
-
81
-
82
-
83
-
84
-
85
-
86
-
87
-
88
-
89
-
90
-
91
-
92
-
93
-
94
-
95
-
96
-
97
-
98
-
99
-
100
-
101
-
102
-
103
-
104
-
105
-
106
-
107
-
108
-
109
-
110
-
111
-
112
-
113
-
114
-
115
-
116
-
117
-
118
-
119
-
120
-
121
-
122
-
123
-
124
-
125
-
126
-
127
-
128
-
129
-
130
-
131
-
132
-
133
-
134
-
135
-
136
-
137
-
138
-
139
-
140
-
141
-
142
-
143
-
144
-
145
-
146
-
147
-
148
-
149
-
150
-
151
-
152
-
153
-
154
-
155
-
156
-
157
-
158
-
159
-
160
-
161
-
162
-
163
-
164
-
165
-
166
-
167
-
168
-
169
-
170
-
171
-
172
-
173
-
174
-
175
-
176
-
177
-
178
-
179
-
180
-
181
-
182
-
183
-
184
-
185
-
186
-
187
-
188
-
189
-
190
-
191
-
192
-
193
-
194
-
195
-
196
-
197
-
198
-
199
-
200
-
201
-
202
-
203
-
204
-
205
-
206
-
207
-
208
-
209
-
210
-
211
-
212
 |
 |