Cisco PVC300 Administration Guide - Page 20
Configuring the Camera’s Network Settings, Automatic Configuration DHCP, PPPoE - ip
 |
UPC - 745883584505
View all Cisco PVC300 manuals
Add to My Manuals
Save this manual to your list of manuals |
Page 20 highlights
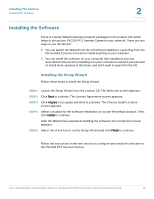
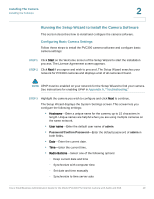
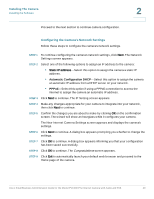
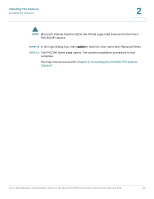
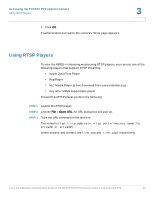
Installing The Camera Installing the Software 2 Proceed to the next section to continue camera configuration. Configuring the Camera's Network Settings Follow these steps to configure the camera's network settings. STEP 1 To continue configuring the camera's network settings, click Next. The Network Settings screen appears. STEP 2 Select one of the following options to assign an IP address to the camera: • Static IP address-Select this option to assign the camera a static IP address. • Automatic Configuration DHCP-Select this option to assign the camera an automatic IP address from a DHCP server on your network. • PPPoE-Select this option if using a PPPoE connection to access the Internet to assign the camera an automatic IP address. STEP 3 Click Next to continue. The IP Setting screen appears. STEP 4 Make any changes appropriate for your camera to integrate into your network, then click Next to continue. STEP 5 Confirm the changes you are about to make by clicking OK on the confirmation screen. The wizard will show an hourglass while it configures your camera. The New Internet Camera Settings screen appears and displays the camera's settings. STEP 6 Click Next to continue. A dialog box appears prompting you whether to change the settings. STEP 7 Click OK to continue. A dialog box appears informing you that your configuration has been saved successfully. STEP 8 Click OK to continue. The Congratulations screen appears. STEP 9 Click Exit to automatically launch your default web browser and proceed to the Home page of the camera. Cisco Small Business Administration Guide for the Model PVC300 PTZ Internet Camera with Audio and PoE 20
-
 1
1 -
2
-
3
-
4
-
5
-
6
-
7
-
8
-
9
-
10
-
11
-
12
-
13
-
14
-
 15
15 -
 16
16 -
 17
17 -
 18
18 -
 19
19 -
 20
20 -
 21
21 -
 22
22 -
 23
23 -
 24
24 -
 25
25 -
26
-
27
-
28
-
29
-
30
-
31
-
32
-
33
-
34
-
35
-
36
-
37
-
38
-
39
-
40
-
41
-
42
-
43
-
44
-
45
-
46
-
47
-
48
-
49
-
50
-
51
-
52
-
53
-
54
-
55
-
56
-
57
-
58
-
59
-
60
-
61
-
62
-
63
-
64
-
65
-
66
-
67
-
68
-
69
 |
 |