Cisco PVC300 Administration Guide - Page 32
Expanding the Setup Folder, Configuring Basic Settings, Device Settings
 |
UPC - 745883584505
View all Cisco PVC300 manuals
Add to My Manuals
Save this manual to your list of manuals |
Page 32 highlights
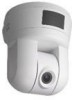
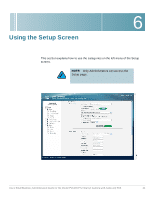
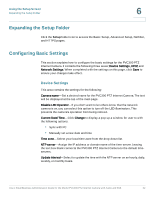
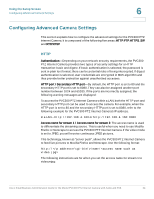
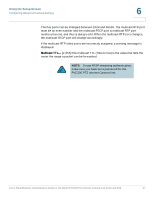
Using the Setup Screen Expanding the Setup Folder 6 Expanding the Setup Folder Click the Setup folder icon to access the Basic Setup, Advanced Setup, Netfilter, and HTTPS pages. Configuring Basic Settings This section explains how to configure the basic settings for the PVC300 PTZ Internet Camera. It contains the following three areas; Device Settings, UPnP, and Network Settings. When completed with the settings on this page, click Save to ensure your changes take effect. Device Settings This area contains the settings for the following: Camera name-Set a desired name for the PVC300 PTZ Internet Camera. The text will be displayed at the top of the main page. Disable LED Operator-If you don't want to let others know that the network camera is on, you can select this option to turn off the LED illuminators. This prevents the camera's operation from being noticed. Current Date/Time-Click Change to display a pop up a window for user to with the following options: • Sync with PC • Manually set a new date and time Time zone-Select your local time zone from the drop down list. NTP server-Assign the IP address or domain name of the time-server. Leaving the text box blank connects the PVC300 PTZ Internet Camera to the default timeservers. Update interval-Select to update the time with the NTP server on an hourly, daily, weekly, or monthly basis. Cisco Small Business Administration Guide for the Model PVC300 PTZ Internet Camera with Audio and PoE 32
-
 1
1 -
2
-
3
-
4
-
5
-
6
-
7
-
8
-
9
-
10
-
11
-
12
-
13
-
14
-
15
-
16
-
17
-
18
-
19
-
20
-
21
-
22
-
23
-
24
-
25
-
26
-
 27
27 -
 28
28 -
 29
29 -
 30
30 -
 31
31 -
 32
32 -
 33
33 -
 34
34 -
 35
35 -
 36
36 -
 37
37 -
38
-
39
-
40
-
41
-
42
-
43
-
44
-
45
-
46
-
47
-
48
-
49
-
50
-
51
-
52
-
53
-
54
-
55
-
56
-
57
-
58
-
59
-
60
-
61
-
62
-
63
-
64
-
65
-
66
-
67
-
68
-
69
 |
 |