Cisco PVC300 Administration Guide - Page 27
The Camera’s Home Menu, Camera Control Panel - pan tilt
 |
UPC - 745883584505
View all Cisco PVC300 manuals
Add to My Manuals
Save this manual to your list of manuals |
Page 27 highlights
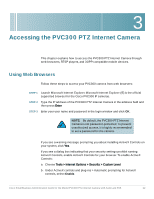
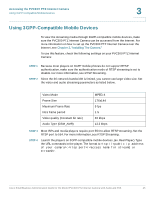
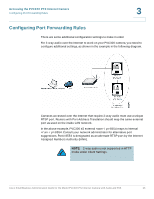
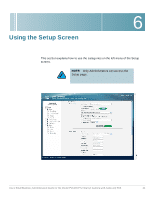
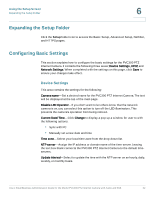
4 The Camera's Home Page This chapter explains the Home page of the PVC300 camera. Menu Home-Click to go to the main page view. Client Settings-Click to access the Client Settings page. Setup-Click to access the PVC300 PTZ Internet Camera configuration page. Language-Click to choose a language for the displayed interface. Camera Control Panel Snapshot-Click to capture and save still images. The captured images will be displayed in a pop-up window. Right-click the image and choose Save Picture As to save it in JPEG (*.jpg) or BMP (*.bmp) format. Output-Two buttons toggle the I/O ports Off and On. Zoom-Click + to zoom in. Click - to increase the field of view (wide angle). Pan-Click to start the auto pan. The camera starts by panning from the current position to the leftmost position, then pans in the opposite direction to the rightmost position, then pans back to the original position. Patrol-Click to move the camera between the preset positions on the Patrol List. After one patrol cycle, the camera returns to the original position. Stop-Click to stop the auto Pan and auto Patrol function. Pan /tilt control buttons-The direction buttons are for Left, Right, Up, Down, and Home functions. The Home button centers the camera. Cisco Small Business Administration Guide for the Model PVC300 PTZ Internet Camera with Audio and PoE 27
-
 1
1 -
2
-
3
-
4
-
5
-
6
-
7
-
8
-
9
-
10
-
11
-
12
-
13
-
14
-
15
-
16
-
17
-
18
-
19
-
20
-
21
-
 22
22 -
 23
23 -
 24
24 -
 25
25 -
 26
26 -
 27
27 -
 28
28 -
 29
29 -
 30
30 -
 31
31 -
 32
32 -
33
-
34
-
35
-
36
-
37
-
38
-
39
-
40
-
41
-
42
-
43
-
44
-
45
-
46
-
47
-
48
-
49
-
50
-
51
-
52
-
53
-
54
-
55
-
56
-
57
-
58
-
59
-
60
-
61
-
62
-
63
-
64
-
65
-
66
-
67
-
68
-
69
 |
 |
