Creative EMU10K1 User Guide - Page 30
Creative Launcher, Options, Groups
 |
UPC - 724303383607
View all Creative EMU10K1 manuals
Add to My Manuals
Save this manual to your list of manuals |
Page 30 highlights
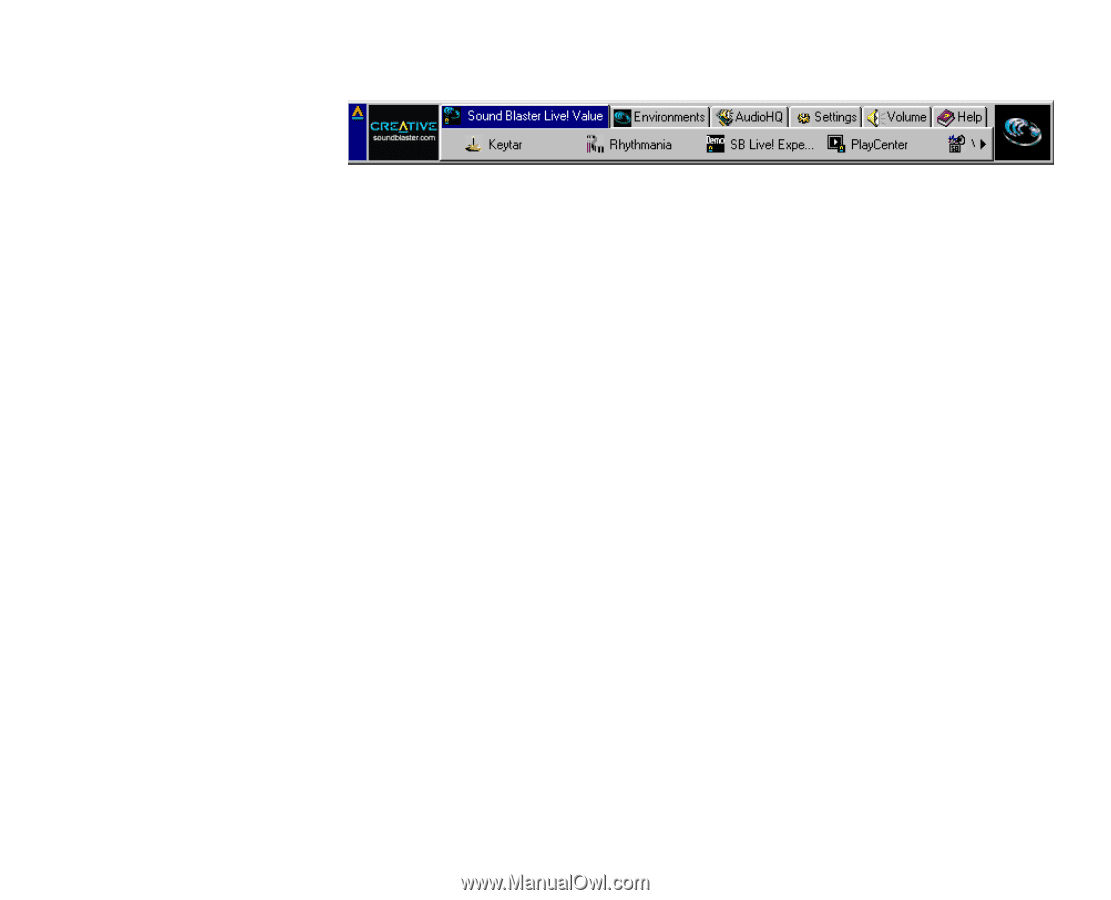
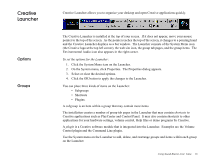
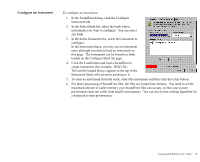
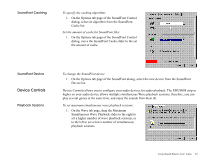
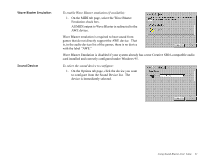
Creative Launcher Options Groups Creative Launcher allows you to organize your desktop and open Creative applications quickly. The Creative Launcher is installed at the top of your screen. If it does not appear, move your mouse pointer to the top of the screen. As the pointer reaches the top of the screen, it changes to a pointing hand and the Creative Launcher displays as a bar window. The Launcher consists of the System Menu icon (the Creative logo at the top left corner), the web site icon, the group tab pages, and the group items. The Environmental Audio icon also appears in the right corner. To set the options for the Launcher: 1. Click the System Menu icon on the Launcher. 2. On the System menu, click Properties. The Properties dialog appears. 3. Select or clear the desired options. 4. Click the OK button to apply the changes to the Launcher. You can place three kinds of items on the Launcher: • Subgroups • Shortcuts • Plugins. A subgroup is an item within a group that may contain more items. The installation creates a number of group tab pages in the Launcher that may contain shortcuts to Creative applications such as PlayCenter and Control Panel. It may also contain shortcuts to other applications for your hardware settings, volume control, Help files or demo programs by Creative. A plugin is a Creative software module that is integrated into the Launcher. Examples are the Volume Control plugin and the Command Line plugin. Use the System menu on the Launcher to add, delete, and rearrange groups and items within each group on the Launcher. Using Sound Blaster Live! Value 16
-
 1
1 -
2
-
3
-
4
-
5
-
6
-
7
-
8
-
9
-
10
-
11
-
12
-
13
-
14
-
15
-
16
-
17
-
18
-
19
-
20
-
21
-
22
-
23
-
24
-
 25
25 -
 26
26 -
 27
27 -
 28
28 -
 29
29 -
 30
30 -
 31
31 -
 32
32 -
 33
33 -
 34
34 -
 35
35 -
36
-
37
-
38
-
39
-
40
-
41
-
42
-
43
-
44
-
45
-
46
-
47
-
48
-
49
-
50
-
51
-
52
-
53
-
54
-
55
-
56
-
57
-
58
-
59
-
60
 |
 |