Creative EMU10K1 User Guide - Page 52
Using Volume Meter, Customizing Settings, Reset Indicator.
 |
UPC - 724303383607
View all Creative EMU10K1 manuals
Add to My Manuals
Save this manual to your list of manuals |
Page 52 highlights
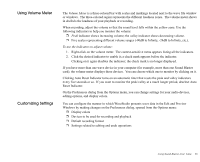
Using Volume Meter Customizing Settings The Volume Meter is a three-colored bar with scales and markings located next to the wave file window or windows. The three-colored region represents the different loudness zones. The volume meter shows in decibels the loudness of your playback or recording. When recording, adjust the volume so that the sound level falls within the yellow zone. Use the following indicators to help you monitor the volume: ❐ Peak indicator shows increasing volume; the valley indicator shows decreasing volume. ❐ Five scales representing different volume ranges (-90dB to Infinity, -24dB to Infinity, etc.). To use the indicators to adjust volume: 1. Right-click on the volume meter. The context-sensitive menu appears listing all the indicators. 2. Click the desired indicator to enable it; a check mark appears before the indicator. Clicking on it again disables the indicator; the check mark is no longer displayed. If you have more than one wave device in your computer (for example, more than one Sound Blaster card), the volume meter displays these devices. You can choose which one to monitor by clicking on it. Clicking Auto Reset Indicator turns on an automatic timer that resets the peak and valley indicators every five seconds or so. If you want to monitor the peak/valley at a much longer period, deselect Auto Reset Indicator. On the Preferences dialog from the Options menu, you can change settings for your audio devices, editing options, and display colors. You can configure the manner in which WaveStudio presents wave data in the Edit and Preview Windows by making changes on the Preferences dialog, opened from the Options menu: ❐ Display colors ❐ Devices to be used for recording and playback ❐ Default recording format ❐ Settings related to editing and undo operations Using Sound Blaster Live! Value 38
-
 1
1 -
2
-
3
-
4
-
5
-
6
-
7
-
8
-
9
-
10
-
11
-
12
-
13
-
14
-
15
-
16
-
17
-
18
-
19
-
20
-
21
-
22
-
23
-
24
-
25
-
26
-
27
-
28
-
29
-
30
-
31
-
32
-
33
-
34
-
35
-
36
-
37
-
38
-
39
-
40
-
41
-
42
-
43
-
44
-
45
-
46
-
 47
47 -
 48
48 -
 49
49 -
 50
50 -
 51
51 -
 52
52 -
 53
53 -
 54
54 -
 55
55 -
 56
56 -
 57
57 -
58
-
59
-
60
 |
 |
