Dell 5330dn User Guide - Page 138
Printing and Deleting Held jobs, Proof Print, Print Schedule, Stored Print, Stored Job Press, Select
 |
UPC - 884116002406
View all Dell 5330dn manuals
Add to My Manuals
Save this manual to your list of manuals |
Page 138 highlights
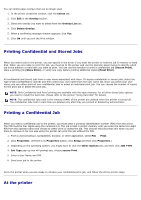
When a printer receives a confidential or stored Jobs, it displays "Stored Job Press Select ( )" on the operator panel. 1. Press Select ( ) to access the confidential and stored Job at the printer. 2. Press Scroll ( to ) to highlight your user name, and then press Select ( ). 3. Press Scroll ( to ) to highlight Confidential jobs, and then press Select ( ). 4. Enter your PIN by pressing Scroll ( to for each number. ) until you see the number you want and press Select ( ). Repeat 5. Press Scroll ( to ) to highlight the job you want to print, and then Select ( ). 6. Press Scroll ( to Select ( ). ) to highlight the option you want (Print 1 copy, Print copies, or Delete), and then press NOTE: After your job prints, it is deleted from printer memory. Printing and Deleting Held jobs Stored jobs (Proof Print, Delayed Print, or Public Mailbox) are printed or deleted from the printer operator panel and do not require a PIN number. Proof Print If you send a Proof Print job, the printer prints one copy and holds the remaining copies you requested in printer memory. Use Proof Print to examine the first copy to ensure it is satisfactory before printing the remaining copies. Once all copies are printed, the Proof Print job is automatically deleted from printer memory. Print Schedule If you send a Delayed Print job, the printer does not print the job immediately, but prints it at the specified time and date chosen. The job is held in the hard disk until you delete it from the stored Jobs menu Stored Print If you send a Stored Print job, the printer does not print the job immediately. It stores the job in hard disk so you can print the job later. The job is held in the hard disk until you delete it from the stored Jobs menu. The Stored Print jobs can be with a PIN (Private Job) or without a PIN (Public) which you can choose from the driver. NOTE: Delayed and Stored Print are supported only with Hard disk options.
-
 1
1 -
2
-
3
-
4
-
5
-
6
-
7
-
8
-
9
-
10
-
11
-
12
-
13
-
14
-
15
-
16
-
17
-
18
-
19
-
20
-
21
-
22
-
23
-
24
-
25
-
26
-
27
-
28
-
29
-
30
-
31
-
32
-
33
-
34
-
35
-
36
-
37
-
38
-
39
-
40
-
41
-
42
-
43
-
44
-
45
-
46
-
47
-
48
-
49
-
50
-
51
-
52
-
53
-
54
-
55
-
56
-
57
-
58
-
59
-
60
-
61
-
62
-
63
-
64
-
65
-
66
-
67
-
68
-
69
-
70
-
71
-
72
-
73
-
74
-
75
-
76
-
77
-
78
-
79
-
80
-
81
-
82
-
83
-
84
-
85
-
86
-
87
-
88
-
89
-
90
-
91
-
92
-
93
-
94
-
95
-
96
-
97
-
98
-
99
-
100
-
101
-
102
-
103
-
104
-
105
-
106
-
107
-
108
-
109
-
110
-
111
-
112
-
113
-
114
-
115
-
116
-
117
-
118
-
119
-
120
-
121
-
122
-
123
-
124
-
125
-
126
-
127
-
128
-
129
-
130
-
131
-
132
-
 133
133 -
 134
134 -
 135
135 -
 136
136 -
 137
137 -
 138
138 -
 139
139 -
 140
140 -
 141
141 -
 142
142 -
 143
143 -
144
-
145
-
146
-
147
-
148
-
149
-
150
-
151
-
152
-
153
-
154
-
155
-
156
-
157
-
158
-
159
-
160
-
161
-
162
-
163
-
164
-
165
-
166
-
167
-
168
-
169
-
170
-
171
-
172
-
173
-
174
-
175
-
176
-
177
-
178
-
179
-
180
 |
 |
