Epson PowerLite 84 User's Guide - Page 64
for details on each setting., uses. You can save a different setting for each source. See - 3 lcd projector
 |
View all Epson PowerLite 84 manuals
Add to My Manuals
Save this manual to your list of manuals |
Page 64 highlights
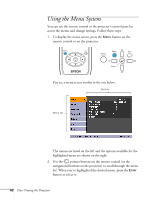
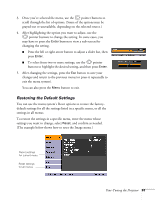
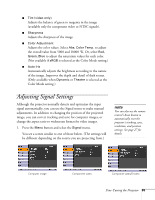
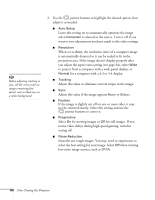
note When you select Reset All in the Reset menu, it does not reset the Computer Input, Video Signal, User's Logo, Language, or Lamp settings. To restore all the projector settings to their factory-default values, select the Reset menu, highlight Reset All, and press Enter. Adjusting the Image You can use the Image menu to adjust the brightness, sharpness, color, tint, and contrast. 1. Press the Menu button on the projector or remote control and select the Image menu. You see the Image menu screen. note The Brightness setting changes the opacity of the projector's LCD panels. You can also change the lamp's brightness (see page 68). 2. Use the pointer buttons to highlight the desired option, then adjust it as needed: ■ Color Mode Lets you quickly adjust the color and brightness for various uses. You can save a different setting for each source. See page 35 for details on each setting. You can also change the color mode by pressing the Color Mode button on the remote control. ■ Brightness Lightens or darkens the overall image. ■ Contrast Adjusts the difference between light and dark areas. ■ Color Saturation (video only) Adjusts the color depth of the image. 64 Fine-Tuning the Projector
-
 1
1 -
2
-
3
-
4
-
5
-
6
-
7
-
8
-
9
-
10
-
11
-
12
-
13
-
14
-
15
-
16
-
17
-
18
-
19
-
20
-
21
-
22
-
23
-
24
-
25
-
26
-
27
-
28
-
29
-
30
-
31
-
32
-
33
-
34
-
35
-
36
-
37
-
38
-
39
-
40
-
41
-
42
-
43
-
44
-
45
-
46
-
47
-
48
-
49
-
50
-
51
-
52
-
53
-
54
-
55
-
56
-
57
-
58
-
 59
59 -
 60
60 -
 61
61 -
 62
62 -
 63
63 -
 64
64 -
 65
65 -
 66
66 -
 67
67 -
 68
68 -
 69
69 -
70
-
71
-
72
-
73
-
74
-
75
-
76
-
77
-
78
-
79
-
80
-
81
-
82
-
83
-
84
-
85
-
86
-
87
-
88
-
89
-
90
-
91
-
92
-
93
-
94
-
95
-
96
-
97
-
98
-
99
-
100
-
101
-
102
-
103
-
104
-
105
-
106
-
107
-
108
-
109
-
110
-
111
-
112
-
113
-
114
-
115
-
116
-
117
-
118
-
119
-
120
-
121
-
122
-
123
 |
 |
