HP 2420 Service Manual - Page 224
Vertical white lines, Tire tracks, Media, specifications, Fuser, Laser/scanner, Formatter, Repeating
 |
UPC - 829160289205
View all HP 2420 manuals
Add to My Manuals
Save this manual to your list of manuals |
Page 224 highlights
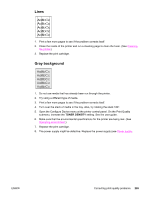
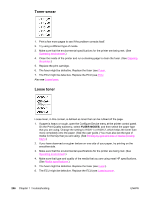
Vertical white lines NOTE 1. Print a few more pages to see if the problem corrects itself. 2. Make sure that the type and quality of the media that you are using meet HP specifications. (See Media specifications.) 3. Replace the print cartridge. 4. Remove the laser/scanner and check for dirt or other obstructions in the beam path. 5. The fuser might be defective. Replace the fuser (see Fuser). 6. If the image defect persists, the mirror in the laser/scanner might be dirty. Replace the laser/scanner (see Laser/scanner). 7. If the image defect persists, replace the ECU (see ECU). 8. If the image defect persists, replace the formatter (see Formatter). Tire tracks AaBbCc AaBbCc AaBbCc AaBbCc AaBbCc This defect typically occurs when the print cartridge has far exceeded its rated life of 6,000 (Q6511A) or 12,000 (Q6511X) pages. For example, if you are printing a very large quantity of pages with very little toner coverage. 1. Perform a half self-test functional check. If the drum is damaged, replace the print cartridge. 2. Run a cleaning page. If the image defect persists, replace the fuser (see Fuser). 3. If the image defect persists, check the printer for other sources of contamination or damage in the paper path and clean or replace parts as necessary. This type of image defect might also be a repetitive defect. See Repeating defects. 210 Chapter 7 Troubleshooting ENWW
-
 1
1 -
2
-
3
-
4
-
5
-
6
-
7
-
8
-
9
-
10
-
11
-
12
-
13
-
14
-
15
-
16
-
17
-
18
-
19
-
20
-
21
-
22
-
23
-
24
-
25
-
26
-
27
-
28
-
29
-
30
-
31
-
32
-
33
-
34
-
35
-
36
-
37
-
38
-
39
-
40
-
41
-
42
-
43
-
44
-
45
-
46
-
47
-
48
-
49
-
50
-
51
-
52
-
53
-
54
-
55
-
56
-
57
-
58
-
59
-
60
-
61
-
62
-
63
-
64
-
65
-
66
-
67
-
68
-
69
-
70
-
71
-
72
-
73
-
74
-
75
-
76
-
77
-
78
-
79
-
80
-
81
-
82
-
83
-
84
-
85
-
86
-
87
-
88
-
89
-
90
-
91
-
92
-
93
-
94
-
95
-
96
-
97
-
98
-
99
-
100
-
101
-
102
-
103
-
104
-
105
-
106
-
107
-
108
-
109
-
110
-
111
-
112
-
113
-
114
-
115
-
116
-
117
-
118
-
119
-
120
-
121
-
122
-
123
-
124
-
125
-
126
-
127
-
128
-
129
-
130
-
131
-
132
-
133
-
134
-
135
-
136
-
137
-
138
-
139
-
140
-
141
-
142
-
143
-
144
-
145
-
146
-
147
-
148
-
149
-
150
-
151
-
152
-
153
-
154
-
155
-
156
-
157
-
158
-
159
-
160
-
161
-
162
-
163
-
164
-
165
-
166
-
167
-
168
-
169
-
170
-
171
-
172
-
173
-
174
-
175
-
176
-
177
-
178
-
179
-
180
-
181
-
182
-
183
-
184
-
185
-
186
-
187
-
188
-
189
-
190
-
191
-
192
-
193
-
194
-
195
-
196
-
197
-
198
-
199
-
200
-
201
-
202
-
203
-
204
-
205
-
206
-
207
-
208
-
209
-
210
-
211
-
212
-
213
-
214
-
215
-
216
-
217
-
218
-
 219
219 -
 220
220 -
 221
221 -
 222
222 -
 223
223 -
 224
224 -
 225
225 -
 226
226 -
 227
227 -
 228
228 -
 229
229 -
230
-
231
-
232
-
233
-
234
-
235
-
236
-
237
-
238
-
239
-
240
-
241
-
242
-
243
-
244
-
245
-
246
-
247
-
248
-
249
-
250
-
251
-
252
-
253
-
254
-
255
-
256
-
257
-
258
-
259
-
260
-
261
-
262
-
263
-
264
-
265
-
266
-
267
-
268
-
269
-
270
-
271
-
272
-
273
-
274
-
275
-
276
-
277
-
278
-
279
-
280
-
281
-
282
-
283
-
284
-
285
-
286
-
287
-
288
-
289
-
290
-
291
-
292
-
293
-
294
 |
 |
