HP 5200tn HP LaserJet 5200 Series Printer - User Guide - Page 91
Loading custom-size media in tray 2 or optional tray 3
 |
UPC - 882780123762
View all HP 5200tn manuals
Add to My Manuals
Save this manual to your list of manuals |
Page 91 highlights
Release Loading custom-size media in tray 2 or optional tray 3 1. Pull the tray out of the printer and remove any media. ● If you are printing on longer media from tray 2, slide the lock lever on the tray into the unlocked position, and then extend the rear section of the tray to fit the media that you are loading. B5 A3 11x17 Legal 8.5x13 2. Place the media in the tray and make sure that it is flat at all four corners. Keep the stack below the height tabs on the paper-length guide in the rear of the tray. 3. On the rear paper-length guide, press the tab and slide it up against the edge of the stack. Lock Lock ENWW Printing on special media 77
-
 1
1 -
2
-
3
-
4
-
5
-
6
-
7
-
8
-
9
-
10
-
11
-
12
-
13
-
14
-
15
-
16
-
17
-
18
-
19
-
20
-
21
-
22
-
23
-
24
-
25
-
26
-
27
-
28
-
29
-
30
-
31
-
32
-
33
-
34
-
35
-
36
-
37
-
38
-
39
-
40
-
41
-
42
-
43
-
44
-
45
-
46
-
47
-
48
-
49
-
50
-
51
-
52
-
53
-
54
-
55
-
56
-
57
-
58
-
59
-
60
-
61
-
62
-
63
-
64
-
65
-
66
-
67
-
68
-
69
-
70
-
71
-
72
-
73
-
74
-
75
-
76
-
77
-
78
-
79
-
80
-
81
-
82
-
83
-
84
-
85
-
 86
86 -
 87
87 -
 88
88 -
 89
89 -
 90
90 -
 91
91 -
 92
92 -
 93
93 -
 94
94 -
 95
95 -
 96
96 -
97
-
98
-
99
-
100
-
101
-
102
-
103
-
104
-
105
-
106
-
107
-
108
-
109
-
110
-
111
-
112
-
113
-
114
-
115
-
116
-
117
-
118
-
119
-
120
-
121
-
122
-
123
-
124
-
125
-
126
-
127
-
128
-
129
-
130
-
131
-
132
-
133
-
134
-
135
-
136
-
137
-
138
-
139
-
140
-
141
-
142
-
143
-
144
-
145
-
146
-
147
-
148
-
149
-
150
-
151
-
152
-
153
-
154
-
155
-
156
-
157
-
158
-
159
-
160
-
161
-
162
-
163
-
164
-
165
-
166
-
167
-
168
-
169
-
170
-
171
-
172
-
173
-
174
-
175
-
176
-
177
-
178
-
179
-
180
-
181
-
182
-
183
-
184
-
185
-
186
-
187
-
188
-
189
-
190
-
191
-
192
-
193
-
194
-
195
-
196
-
197
-
198
-
199
-
200
-
201
-
202
-
203
-
204
-
205
-
206
-
207
-
208
-
209
-
210
-
211
-
212
-
213
-
214
-
215
-
216
-
217
-
218
-
219
-
220
-
221
-
222
-
223
-
224
-
225
-
226
-
227
-
228
-
229
-
230
-
231
-
232
-
233
-
234
-
235
-
236
-
237
-
238
-
239
-
240
-
241
-
242
-
243
-
244
-
245
-
246
-
247
-
248
 |
 |
Loading custom-size media in tray 2 or optional tray 3
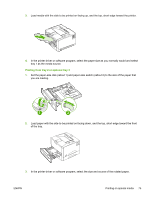
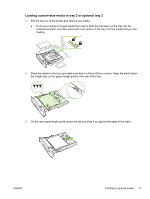
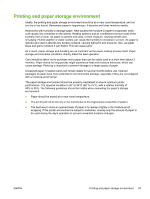
1.
Pull the tray out of the printer and remove any media.
●
If you are printing on longer media from tray 2, slide the lock lever on the tray into the
unlocked position, and then extend the rear section of the tray to fit the media that you are
loading.
Release
B5
A3
11x17
Legal
8.5x13
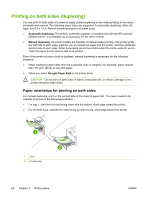
2.
Place the media in the tray and make sure that it is flat at all four corners. Keep the stack below
the height tabs on the paper-length guide in the rear of the tray.
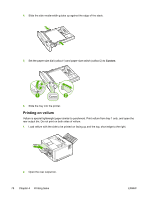
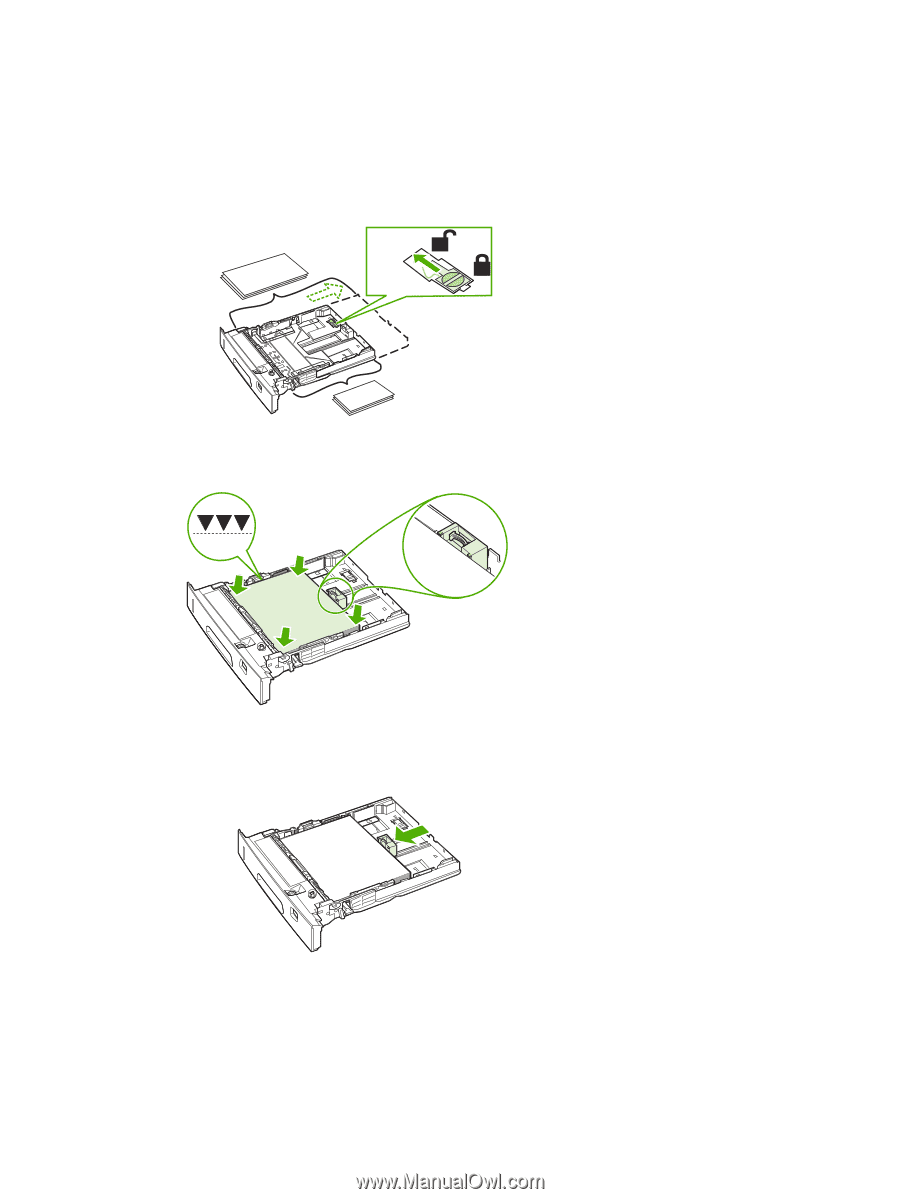
Lock
3.
On the rear paper-length guide, press the tab and slide it up against the edge of the stack.
Lock
ENWW
Printing on special media
77