HP NetServer AA 4000 HP Netserver AA Solution Installation Guide v4.0 SP1 - Page 34
After, connect the cables, 0 Gigabit Fiber or Twisted Pair.
 |
View all HP NetServer AA 4000 manuals
Add to My Manuals
Save this manual to your list of manuals |
Page 34 highlights
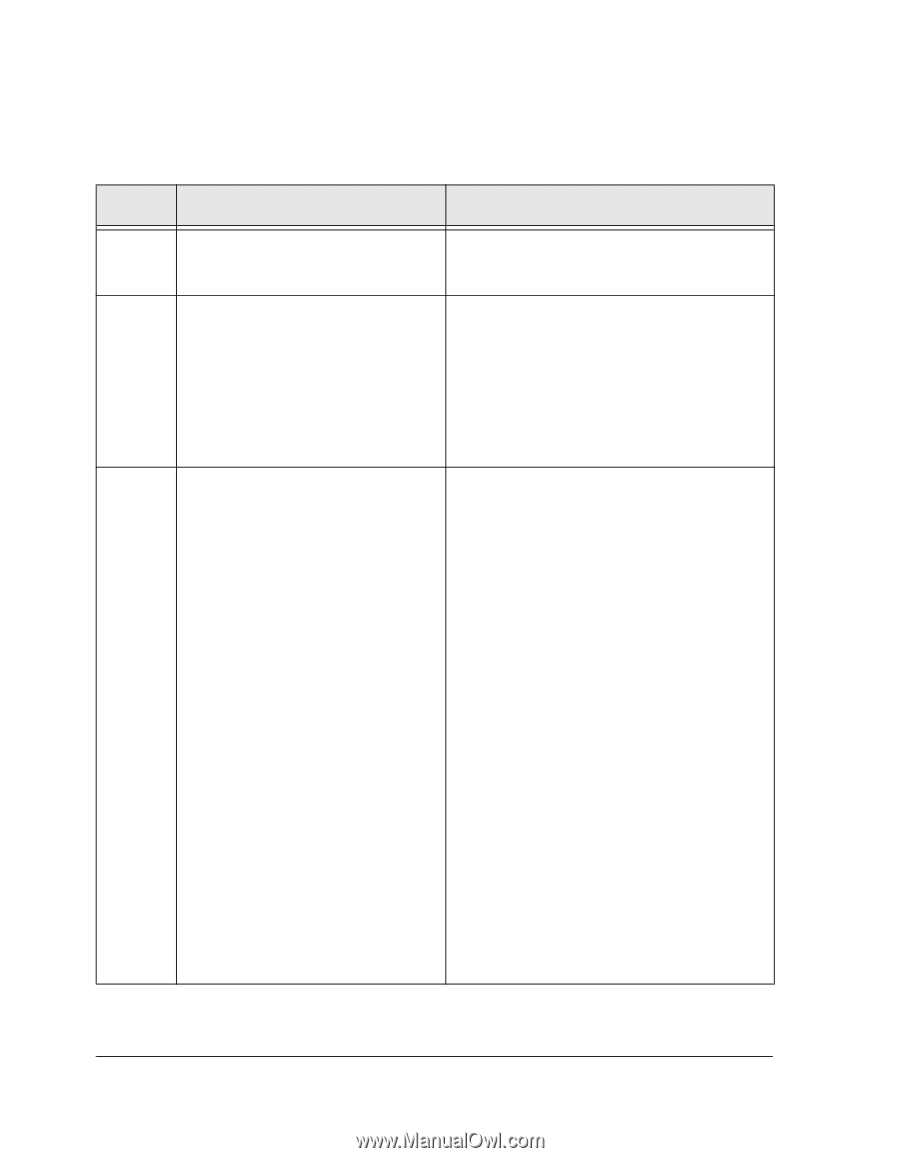
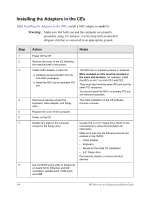
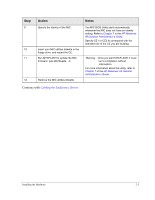
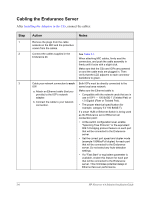
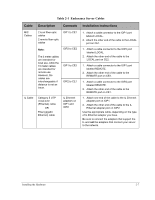
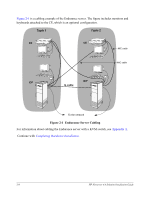
Cabling the Endurance Server After Installing the Adapters in the CEs, connect the cables: Step 1 2 3 Action Notes Remove the plugs from the cable sockets on the MIC and the protective covers from the cables. Connect the cables supplied in the Endurance kit. Cable your network connection to each IOP: a. Attach an Ethernet cable (that you provide) to the IOP's network adapter. b. Connect the cable to your network connection. See Table 2-1. When attaching MIC cables, firmly seat the connectors, and push the cable assembly in firmly until it locks with a slight click. Make sure that the CEs and IOPs are powered on and the cable ends are plugged in. Then verify that the LED adjacent to each connector transitions to green. Both IOPs must be directly connected to the same local area network. Make sure the Ethernet cable is: • Compatible with the network cards that are in use in IOP1 - 100 BASE-T (Twisted Pair) or 1.0 Gigabit (Fiber or Twisted Pair). • The proper electrical specification (for example, category 5 if 100 BASE-T). If a smart HUB or Ethernet Switch is being used as the Endurance server Ethernet rail connection point: • At the switch configuration level, enable "Spanning Tree Protocol," or the equivalent 802.1d bridging protocol feature on each port that will be connected to the Endurance server. • Set the correct port speed and duplex mode (example 100Mbs/Full duplex) for each port that will be connected to the Endurance server. Do not select any Auto-detection settings. • If a "Fast Start" or equivalent parameter is available, enable this feature for each port that will be connected to the Endurance server. This minimizes potential delays in Ethernet fail-over performance. 2-6 HP Netserver AA Solution Installation Guide
-
 1
1 -
2
-
3
-
4
-
5
-
6
-
7
-
8
-
9
-
10
-
11
-
12
-
13
-
14
-
15
-
16
-
17
-
18
-
19
-
20
-
21
-
22
-
23
-
24
-
25
-
26
-
27
-
28
-
 29
29 -
 30
30 -
 31
31 -
 32
32 -
 33
33 -
 34
34 -
 35
35 -
 36
36 -
 37
37 -
 38
38 -
 39
39 -
40
-
41
-
42
-
43
-
44
-
45
-
46
-
47
-
48
-
49
-
50
-
51
-
52
-
53
-
54
-
55
-
56
-
57
-
58
-
59
-
60
-
61
-
62
-
63
-
64
-
65
-
66
-
67
-
68
-
69
-
70
-
71
-
72
-
73
-
74
-
75
-
76
-
77
-
78
-
79
-
80
-
81
-
82
 |
 |