HP NetServer AA 4000 HP Netserver AA Solution Installation Guide v4.0 SP1 - Page 57
Creating an Emergency Repair Diskette, Partitioning and Formatting the CE Boot Disk, Start, Programs
 |
View all HP NetServer AA 4000 manuals
Add to My Manuals
Save this manual to your list of manuals |
Page 57 highlights
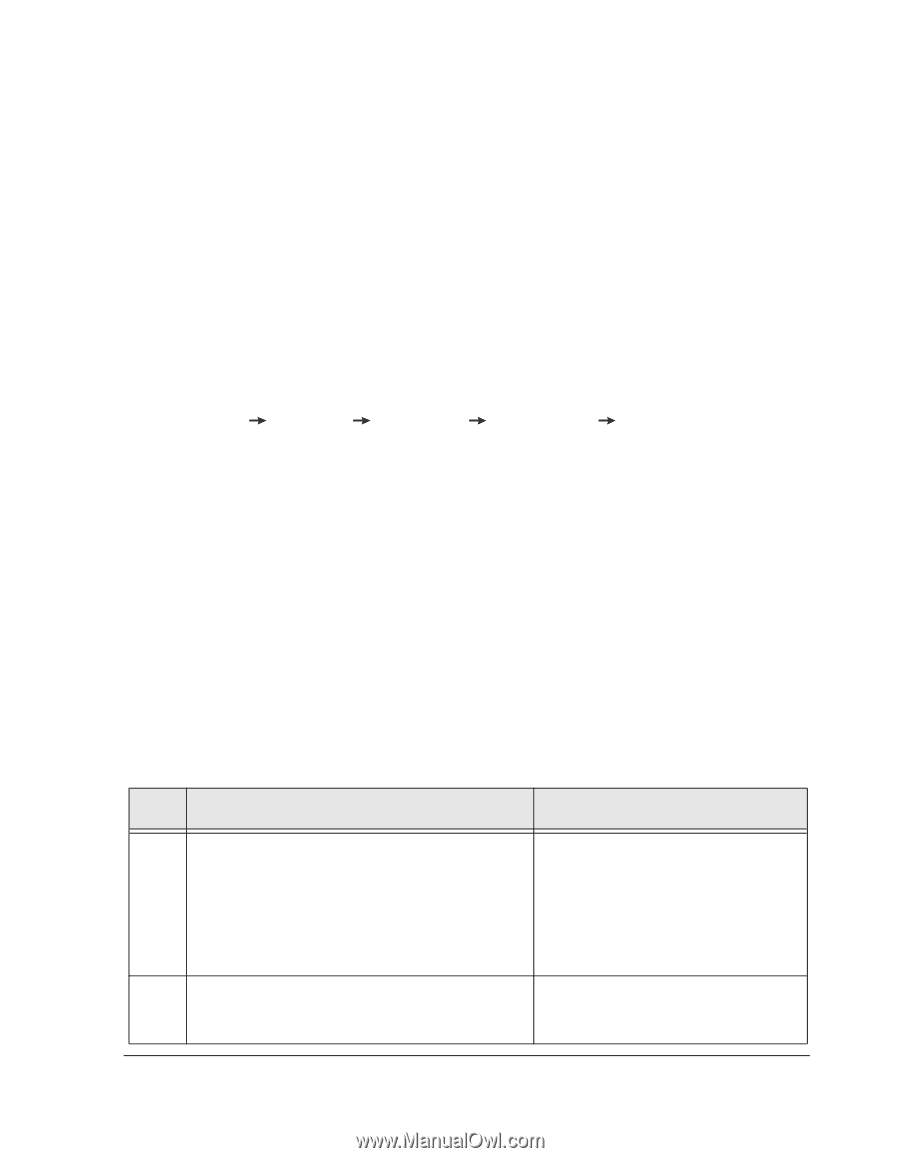
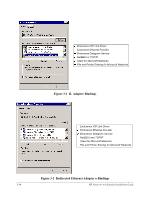
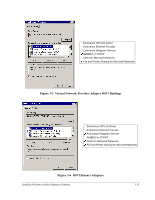
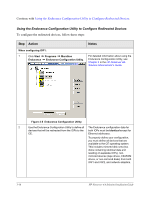
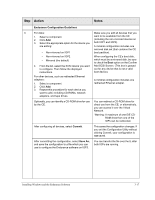
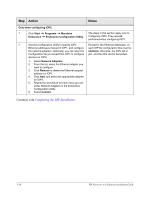
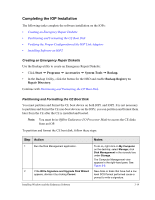
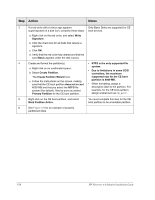
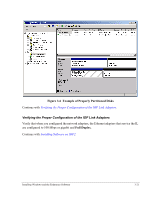
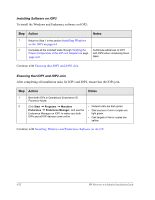
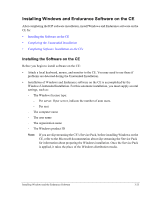
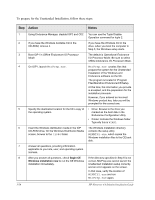
Completing the IOP Installation The following tasks complete the software installation on the IOPs: • Creating an Emergency Repair Diskette • Partitioning and Formatting the CE Boot Disk • Verifying the Proper Configuration of the IOP Link Adapters • Installing Software on IOP2 Creating an Emergency Repair Diskette Use the Backup utility to create an Emergency Repair Diskette: • Click Start Programs Accessories System Tools Backup. • In the Backup Utility, click the button for the ERD and enable Backup Registry to Repair Directory. Continue with Partitioning and Formatting the CE Boot Disk. Partitioning and Formatting the CE Boot Disk You must partition and format the CE boot device on both IOP1 and IOP2. It is not necessary to partition and format the CE non-boot devices on the IOPs; you can partition and format them later from the CE after the CE is installed and booted. Note: You must be in Offline Endurance I/O Processor Mode to access the CE disks from an IOP. To partition and format the CE boot disk, follow these steps: Step Action 1 Run the Disk Management application. 2 If the Write Signature and Upgrade Disk Wizard appears, dismiss it by clicking Cancel. Notes To do so, right click on My Computer on the desktop; select Manage; click Disk Management in the console tree under Storage. The Computer Management view appears in the right-hand pane. See Figure 3-6. New disks or disks that have had a low level SCSI format performed cause a prompt to write a signature. Installing Windows and the Endurance Software 3-19
-
 1
1 -
2
-
3
-
4
-
5
-
6
-
7
-
8
-
9
-
10
-
11
-
12
-
13
-
14
-
15
-
16
-
17
-
18
-
19
-
20
-
21
-
22
-
23
-
24
-
25
-
26
-
27
-
28
-
29
-
30
-
31
-
32
-
33
-
34
-
35
-
36
-
37
-
38
-
39
-
40
-
41
-
42
-
43
-
44
-
45
-
46
-
47
-
48
-
49
-
50
-
51
-
 52
52 -
 53
53 -
 54
54 -
 55
55 -
 56
56 -
 57
57 -
 58
58 -
 59
59 -
 60
60 -
 61
61 -
 62
62 -
63
-
64
-
65
-
66
-
67
-
68
-
69
-
70
-
71
-
72
-
73
-
74
-
75
-
76
-
77
-
78
-
79
-
80
-
81
-
82
 |
 |