HP Photosmart 945 HP Photosmart 945 Digital Camera with HP Instant Share User - Page 27
Taking Still Pictures - reviews
 |
View all HP Photosmart 945 manuals
Add to My Manuals
Save this manual to your list of manuals |
Page 27 highlights
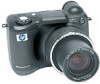
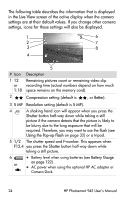
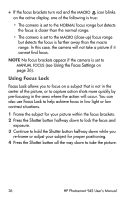
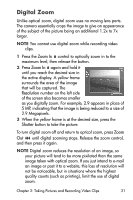
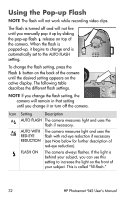
Taking Still Pictures You can take a picture almost any time the camera is on, regardless of what is being shown on the active display. 1 Rotate the Mode selector to AUTO or another of the exposure modes (see Setting the Exposure Mode on page 38). OFF 2 Pop up the flash assembly (see page 32). 3 Frame the subject for your picture in the active display. Av 1 AUTO Tv 2 4 Hold the camera steady (especially if using zoom) and press the Shutter button halfway down. The camera measures and then locks the focus and exposure (the focus brackets will turn green if the camera is able to focus, see page 25). If an icon of a shaking hand ( ) appears in the active display, you may want to either use the pop-up flash or set the camera on a tripod or stable surface, otherwise the picture might be blurry. 5 Press the Shutter button all the way down to take the picture. You will hear a shutter click when the camera takes the picture. After a picture is taken, the image appears for several seconds in the active display. This is called Instant Review. You can delete the image during Instant Review by pressing the OK button. If you prefer, you can turn off Instant Review in the Setup menu (see Instant Review on page 86). To review the pictures you have taken, press the Playback button (see Using Playback on page 57). Chapter 2: Taking Pictures and Recording Video Clips 27
-
 1
1 -
2
-
3
-
4
-
5
-
6
-
7
-
8
-
9
-
10
-
11
-
12
-
13
-
14
-
15
-
16
-
17
-
18
-
19
-
20
-
21
-
 22
22 -
 23
23 -
 24
24 -
 25
25 -
 26
26 -
 27
27 -
 28
28 -
 29
29 -
 30
30 -
 31
31 -
 32
32 -
33
-
34
-
35
-
36
-
37
-
38
-
39
-
40
-
41
-
42
-
43
-
44
-
45
-
46
-
47
-
48
-
49
-
50
-
51
-
52
-
53
-
54
-
55
-
56
-
57
-
58
-
59
-
60
-
61
-
62
-
63
-
64
-
65
-
66
-
67
-
68
-
69
-
70
-
71
-
72
-
73
-
74
-
75
-
76
-
77
-
78
-
79
-
80
-
81
-
82
-
83
-
84
-
85
-
86
-
87
-
88
-
89
-
90
-
91
-
92
-
93
-
94
-
95
-
96
-
97
-
98
-
99
-
100
-
101
-
102
-
103
-
104
-
105
-
106
-
107
-
108
-
109
-
110
-
111
-
112
-
113
-
114
-
115
-
116
-
117
-
118
-
119
-
120
-
121
-
122
-
123
-
124
-
125
-
126
-
127
-
128
-
129
-
130
-
131
-
132
-
133
-
134
-
135
-
136
-
137
-
138
-
139
-
140
-
141
-
142
-
143
-
144
-
145
-
146
-
147
-
148
-
149
-
150
 |
 |
