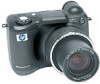
HP Photosmart 945 HP Photosmart 945 Digital Camera with HP Instant Share User - Page 71
Select the, program to launch for this action, Cancel, Save/Print, Retrieve from Camera - usb cable
 |
View all HP Photosmart 945 manuals
Add to My Manuals
Save this manual to your list of manuals |
Page 71 highlights
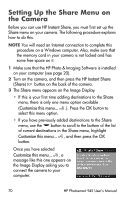
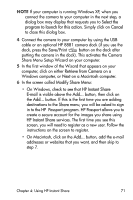
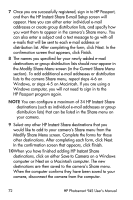
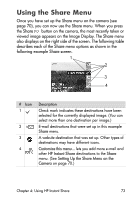
NOTE If your computer is running Windows XP, when you connect the camera to your computer in the next step, a dialog box may display that requests you to Select the program to launch for this action. Simply click on Cancel to close this dialog box. 4 Connect the camera to your computer by using the USB cable or an optional HP 8881 camera dock (if you use the dock, press the Save/Print button on the dock after putting the camera in the dock). This activates the Camera Share Menu Setup Wizard on your computer. 5 In the first window of the Wizard that appears on your computer, click on either Retrieve from Camera on a Windows computer, or Next on a Macintosh computer. 6 In the screen called Modify Share Menu: • On Windows, check to see that HP Instant Share E-mail is visible above the Add... button, then click on the Add... button. If this is the first time you are adding destinations to the Share menu, you will be asked to sign in to the HP Passport program. HP Passport allows you to create a secure account for the images you share using HP Instant Share services. The first time you see this screen, you will need to register as a new user. Follow the instructions on the screen to register. • On Macintosh, click on the Add... button, add the e-mail addresses or websites that you want, and then skip to step 7. Chapter 4: Using HP Instant Share 71
-
 1
1 -
2
-
3
-
4
-
5
-
6
-
7
-
8
-
9
-
10
-
11
-
12
-
13
-
14
-
15
-
16
-
17
-
18
-
19
-
20
-
21
-
22
-
23
-
24
-
25
-
26
-
27
-
28
-
29
-
30
-
31
-
32
-
33
-
34
-
35
-
36
-
37
-
38
-
39
-
40
-
41
-
42
-
43
-
44
-
45
-
46
-
47
-
48
-
49
-
50
-
51
-
52
-
53
-
54
-
55
-
56
-
57
-
58
-
59
-
60
-
61
-
62
-
63
-
64
-
65
-
 66
66 -
 67
67 -
 68
68 -
 69
69 -
 70
70 -
 71
71 -
 72
72 -
 73
73 -
 74
74 -
 75
75 -
 76
76 -
77
-
78
-
79
-
80
-
81
-
82
-
83
-
84
-
85
-
86
-
87
-
88
-
89
-
90
-
91
-
92
-
93
-
94
-
95
-
96
-
97
-
98
-
99
-
100
-
101
-
102
-
103
-
104
-
105
-
106
-
107
-
108
-
109
-
110
-
111
-
112
-
113
-
114
-
115
-
116
-
117
-
118
-
119
-
120
-
121
-
122
-
123
-
124
-
125
-
126
-
127
-
128
-
129
-
130
-
131
-
132
-
133
-
134
-
135
-
136
-
137
-
138
-
139
-
140
-
141
-
142
-
143
-
144
-
145
-
146
-
147
-
148
-
149
-
150
 |
 |
