HP Photosmart 945 HP Photosmart 945 Digital Camera with HP Instant Share User - Page 51
Resolution, Capture, Pictures remaining, Memory Card, Capacity, Live View, Digital Zoom
 |
View all HP Photosmart 945 manuals
Add to My Manuals
Save this manual to your list of manuals |
Page 51 highlights
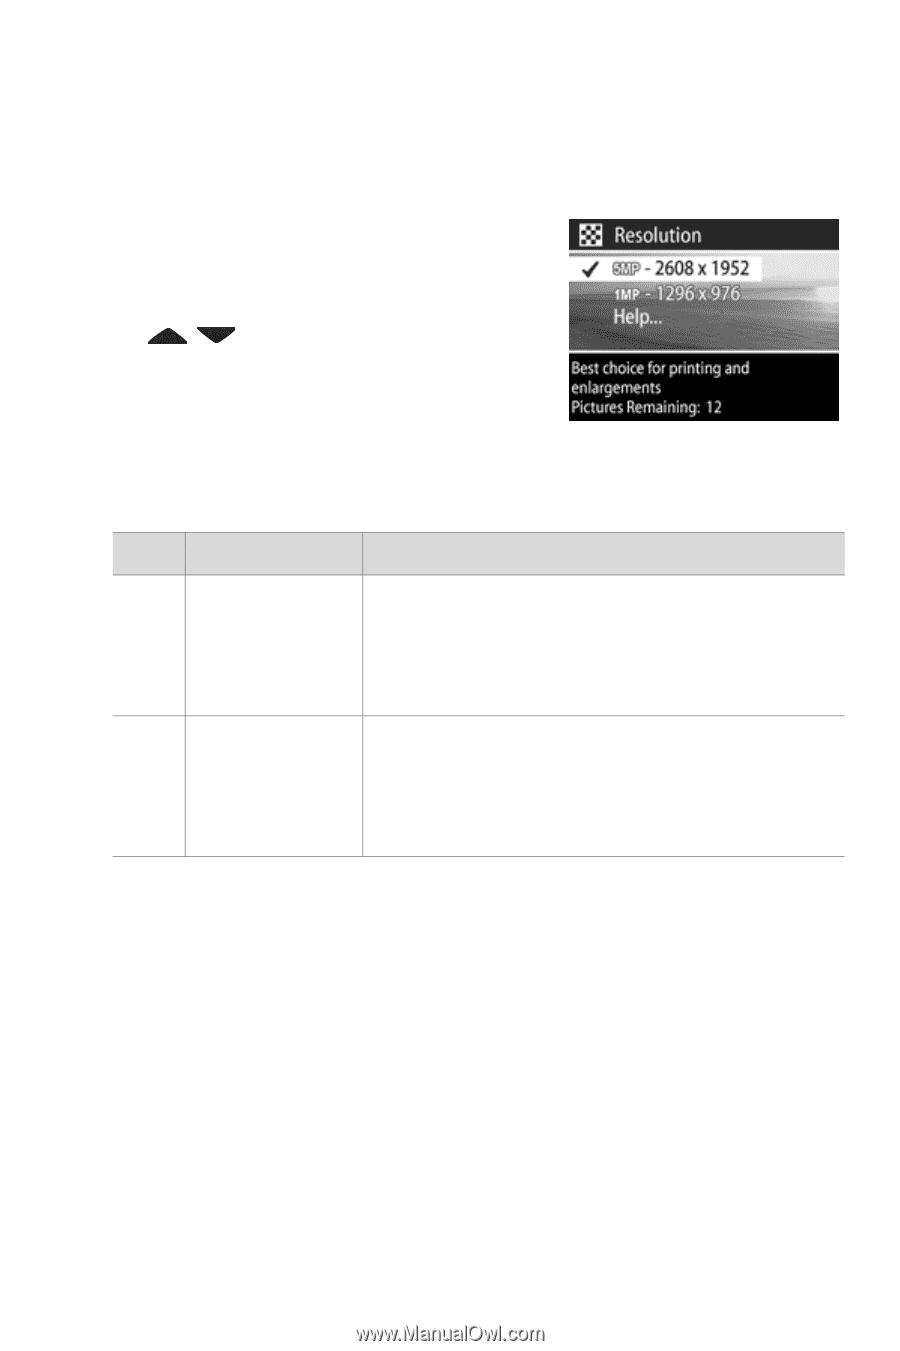
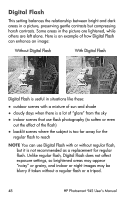
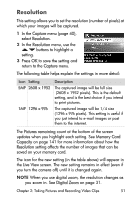
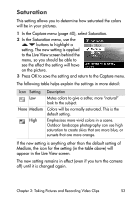
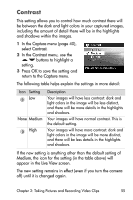
Resolution This setting allows you to set the resolution (number of pixels) at which your images will be captured. 1 In the Capture menu (page 40), select Resolution. 2 In the Resolution menu, use the buttons to highlight a setting. 3 Press OK to save the setting and return to the Capture menu. The following table helps explain the settings in more detail: Icon Setting 5MP 2608 x 1952 1MP 1296 x 976 Description The captured image will be full size (2608 x 1952 pixels). This is the default setting, and is the best choice if you intend to print pictures. The captured image will be 1/4 size (1296 x 976 pixels). This setting is useful if you just intend to e-mail images or post them to the internet. The Pictures remaining count at the bottom of the screen updates when you highlight each setting. See Memory Card Capacity on page 141 for more information about how the Resolution setting affects the number of images that can be saved on your memory card. The icon for the new setting (in the table above) will appear in the Live View screen. The new setting remains in effect (even if you turn the camera off) until it is changed again. NOTE When you use digital zoom, the resolution changes as you zoom in. See Digital Zoom on page 31. Chapter 2: Taking Pictures and Recording Video Clips 51
-
 1
1 -
2
-
3
-
4
-
5
-
6
-
7
-
8
-
9
-
10
-
11
-
12
-
13
-
14
-
15
-
16
-
17
-
18
-
19
-
20
-
21
-
22
-
23
-
24
-
25
-
26
-
27
-
28
-
29
-
30
-
31
-
32
-
33
-
34
-
35
-
36
-
37
-
38
-
39
-
40
-
41
-
42
-
43
-
44
-
45
-
 46
46 -
 47
47 -
 48
48 -
 49
49 -
 50
50 -
 51
51 -
 52
52 -
 53
53 -
 54
54 -
 55
55 -
 56
56 -
57
-
58
-
59
-
60
-
61
-
62
-
63
-
64
-
65
-
66
-
67
-
68
-
69
-
70
-
71
-
72
-
73
-
74
-
75
-
76
-
77
-
78
-
79
-
80
-
81
-
82
-
83
-
84
-
85
-
86
-
87
-
88
-
89
-
90
-
91
-
92
-
93
-
94
-
95
-
96
-
97
-
98
-
99
-
100
-
101
-
102
-
103
-
104
-
105
-
106
-
107
-
108
-
109
-
110
-
111
-
112
-
113
-
114
-
115
-
116
-
117
-
118
-
119
-
120
-
121
-
122
-
123
-
124
-
125
-
126
-
127
-
128
-
129
-
130
-
131
-
132
-
133
-
134
-
135
-
136
-
137
-
138
-
139
-
140
-
141
-
142
-
143
-
144
-
145
-
146
-
147
-
148
-
149
-
150
 |
 |