HP ProLiant DL280 Configuring Arrays on HP Smart Array Controllers Reference G - Page 20
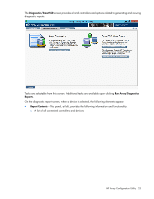
Configuration screen, Diagnostics/SmartSSD screen
 |
View all HP ProLiant DL280 manuals
Add to My Manuals
Save this manual to your list of manuals |
Page 20 highlights
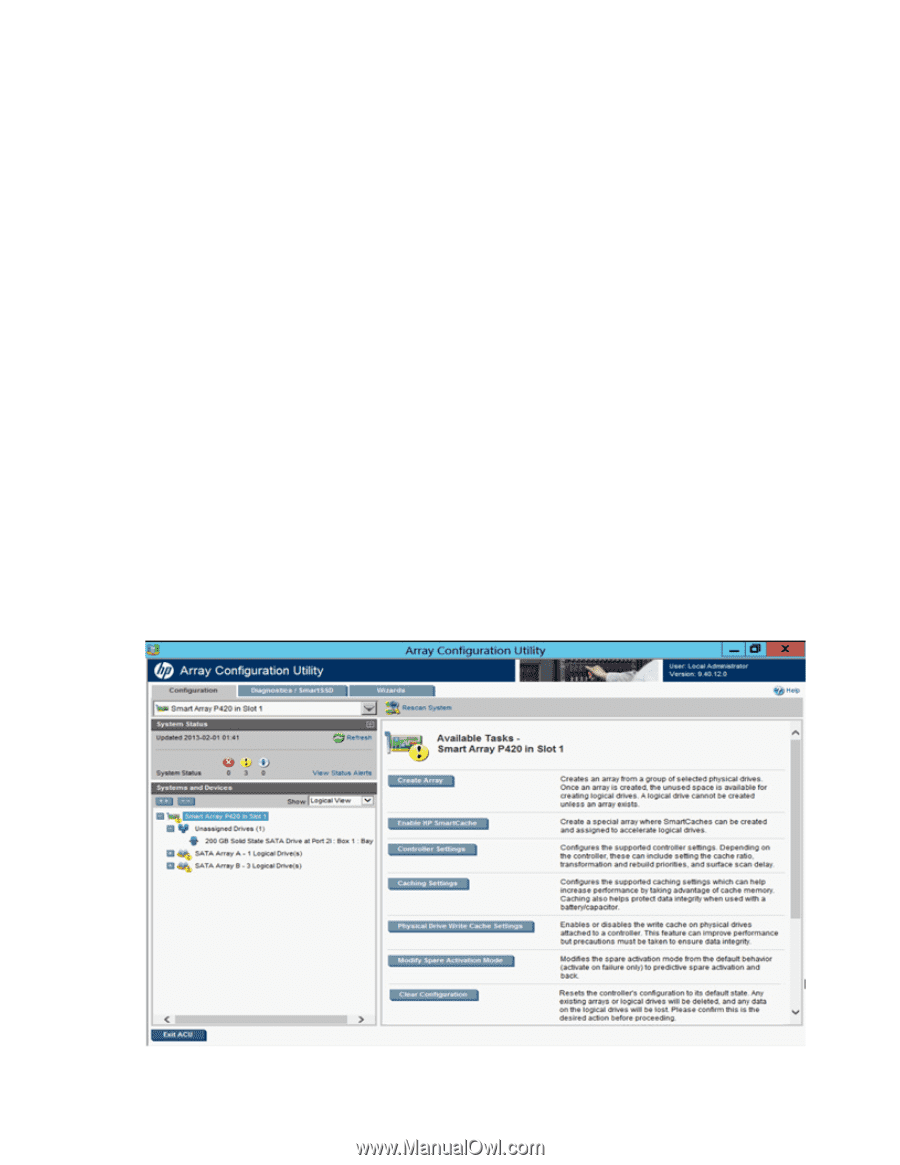
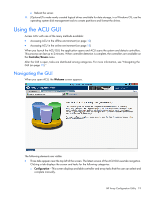
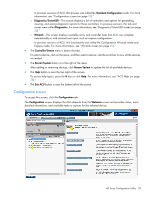
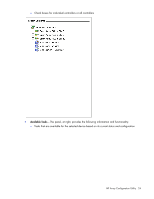
In previous versions of ACU, this process was called the Standard Configuration mode. For more information, see "Configuration screen (on page 20)." o Diagnostics/SmartSSD-This screen displays a list of controllers and options for generating, viewing, and saving diagnostic reports for those controllers. In previous versions, this tab and screen were called Diagnostics. For more information, see "Diagnostics/SmartSSD screen (on page 22)." o Wizards-This screen displays available array and controller tasks that ACU can complete automatically or with minimal user input, such as express configuration. In previous versions of ACU, this functionality was called the Configuration Wizards mode and Express mode. For more information, see "Wizards screen (on page 25)." • The Controller/Device menu is below the tabs. To select a device, click on the menu, and then select a device. Use the scroll bar to view all the devices, as needed. • The Rescan System button is to the right of the menu. After adding or removing devices, click Rescan System to update the list of available devices. • The Help button is near the top right of the screen. To access help topics, press the H key or click Help. For more information, see "ACU Help (on page 28)." • The Exit ACU button is near the bottom left of the screen. Configuration screen To access this screen, click the Configuration tab. The Configuration screen displays the GUI elements from the Welcome screen and provides status, more detailed information, and available tasks or options for the selected device. HP Array Configuration Utility 20
-
 1
1 -
2
-
3
-
4
-
5
-
6
-
7
-
8
-
9
-
10
-
11
-
12
-
13
-
14
-
 15
15 -
 16
16 -
 17
17 -
 18
18 -
 19
19 -
 20
20 -
 21
21 -
 22
22 -
 23
23 -
 24
24 -
 25
25 -
26
-
27
-
28
-
29
-
30
-
31
-
32
-
33
-
34
-
35
-
36
-
37
-
38
-
39
-
40
-
41
-
42
-
43
-
44
-
45
-
46
-
47
-
48
-
49
-
50
-
51
-
52
-
53
-
54
-
55
-
56
-
57
-
58
-
59
-
60
-
61
-
62
-
63
-
64
-
65
-
66
-
67
-
68
-
69
-
70
-
71
-
72
-
73
-
74
-
75
-
76
-
77
-
78
-
79
-
80
-
81
-
82
-
83
-
84
-
85
-
86
-
87
-
88
-
89
-
90
-
91
-
92
-
93
-
94
-
95
-
96
-
97
-
98
-
99
-
100
-
101
-
102
-
103
-
104
-
105
-
106
-
107
-
108
-
109
-
110
-
111
-
112
-
113
-
114
-
115
-
116
-
117
-
118
-
119
-
120
-
121
-
122
-
123
 |
 |