IBM 8651RM0 Hardware Maintenance Manual
IBM 8651RM0 - Netfinity 7000 - 8651 Manual
 |
UPC - 087944340508
View all IBM 8651RM0 manuals
Add to My Manuals
Save this manual to your list of manuals |
IBM 8651RM0 manual content summary:
- IBM 8651RM0 | Hardware Maintenance Manual - Page 1
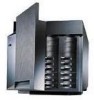
IBM Netfinity Servers IBM Netfinity 7000 - Type 8651 Models RH0, RM0, TH0, TM0 Hardware Maintenance Manual Supplement October 1997 We Want Your Comments! (Please see page 192) S06J-0791-00 - IBM 8651RM0 | Hardware Maintenance Manual - Page 2
- IBM 8651RM0 | Hardware Maintenance Manual - Page 3
IBM Netfinity Servers IBM Netfinity 7000 - Type 8651 Models RH0, RM0, TH0, TM0 Hardware Maintenance Manual Supplement October 1997 We Want Your Comments! (Please see page 192) S06J-0791-00 IBM - IBM 8651RM0 | Hardware Maintenance Manual - Page 4
Note Before using this information and the product it supports, be sure to read the general information under " . This publication was developed for products and services offered in the United States of America. IBM may not offer the products, services, or features discussed in this document in other - IBM 8651RM0 | Hardware Maintenance Manual - Page 5
configuration information for the Netfinity 7000 - Type 8651. Important This manual is intended for trained servicers who are familiar with IBM PC Server products. Before servicing an IBM product, be sure to review "Safety Information" on page 180. Online Support Use the World Wide Web (WWW) or the - IBM 8651RM0 | Hardware Maintenance Manual - Page 6
, contact IBM or an IBM Authorized Dealer. For Information About PC Servers PS/2 Computers PS/ValuePoint Computers Laptop, Notebook, Portable, and ThinkPad Computers (L40, CL57, N45, N51, P70/P75, ThinkPad 300, 350, 500, 510, 710T, Expansion Unit, Dock I, Dock II) ThinkPad Computers (ThinkPad 340 - IBM 8651RM0 | Hardware Maintenance Manual - Page 7
Contents About This Supplement iii Online Support iii Related Publications iv IBM Netfinity 7000 - Type 8651 1 General Checkout 5 Diagnostics 7 Features 23 Additional Service Information 25 Locations 51 Symptom-to-FRU Index 156 Undetermined Problems 168 Parts Listing (Models RH0, RM0, TH0 - IBM 8651RM0 | Hardware Maintenance Manual - Page 8
vi Netfinity Server HMM - IBM 8651RM0 | Hardware Maintenance Manual - Page 9
Sequence 19 Hot-Swap Drive Status Indicators 20 Using the File Editor 20 Features 23 Additional Service Information 25 Configuration Conflicts 26 Configuring EISA, ISA, and PCI Adapters . . . . Systems Management Adapter 29 Configuration Considerations 29 Copyright IBM Corp. 1996, 1997 1 - IBM 8651RM0 | Hardware Maintenance Manual - Page 10
Configuring System Resources 30 Configuring the Adapter 30 Device Driver Installation 32 Configuring the Server 32 External SCSI Devices 32 Cabling Requirements 32 Setting SCSI IDs for External Devices . . . . 33 Installation Procedure 33 Hardware Configuration Conflicts 33 Resolving - IBM 8651RM0 | Hardware Maintenance Manual - Page 11
98 Internal Drives 100 Internal Drive Bays 101 Considerations 101 LED Card Bracket Assembly 102 LED Light Guide with Icons 103 Media/Switch Panel Trim 104 Memory Board/Memory-Module Kits . . . . 114 J3 114 J5 115 J6 115 J7 116 J8 117 J9 117 J13 117 IBM Netfinity 7000 - Type 8651 3 - IBM 8651RM0 | Hardware Maintenance Manual - Page 12
-2) 151 Vacuum Florescent Display Panel 153 Video Memory 154 Symptom-to-FRU Index 156 Beep Codes 156 Error Codes 157 Error Symptoms 167 Undetermined Problems 168 Parts Listing (Models RH0, RM0, TH0, TM0 - Type 8651 169 Front View 169 Rear View 170 Rack Mounting FRUs (Models RH0, RM0 - Type - IBM 8651RM0 | Hardware Maintenance Manual - Page 13
General Checkout This general checkout procedure is for IBM Netfinity 7000 Type 8651 computers. Diagnostic error messages appear when a test program finds a problem with a hardware option. For the test programs to properly determine if a test Passed, Failed, or Aborted, the test programs check the - IBM 8651RM0 | Hardware Maintenance Manual - Page 14
to the middle position. - Power-on all external devices. - Power-on the computer. - Insert the System CD-ROM into the CD-ROM drive; then, press Ctrl+Alt+Del. - Check for the following responses: 1. One beep. 2. Readable instructions or the Main Menu. DID YOU RECEIVE THE CORRECT RESPONSES? Yes No 005 - IBM 8651RM0 | Hardware Maintenance Manual - Page 15
came with the ServerGuide package for instructions on installing an operating system. If POST detects a problem, an error message appears on the screen. A single problem can cause several error messages to indicate successful completion of the POST. If the server IBM Netfinity 7000 - Type 8651 7 - IBM 8651RM0 | Hardware Maintenance Manual - Page 16
on page 156. Test Programs Use the test (diagnostic) programs to test the IBM components of the system and some external devices. The amount of time required to system, the longer the testing takes. If you cannot determine whether a problem is caused by the hardware or by the software, you can run - IBM 8651RM0 | Hardware Maintenance Manual - Page 17
finds problems with finds a problem. One beep indicates the POST 156. Appear when a test program finds a problem with a hardware option. Normally, these messages are the test stopped. Appear if a problem or conflict is found by an on page 27 for instructions on installing the configuration files - IBM 8651RM0 | Hardware Maintenance Manual - Page 18
Run Netfinity 7000 Diagnostics When you select this choice from the Startup Menu, the Diagnostics Menu appears. The Diagnostics Menu contain the following selections: - Test allows you to specify an individual module (or device such as a diskette drive) for testing, or specify a group of tests for - IBM 8651RM0 | Hardware Maintenance Manual - Page 19
the first sub-test of the floppy test module, if enabled. Run all enabled sub-tests of the first 5 test modules in the .PKG file. IBM Netfinity 7000 - Type 8651 11 - IBM 8651RM0 | Hardware Maintenance Manual - Page 20
A command line option can contain the following flags: Option /? /AUTO (filename) /CF (filename) /DT (nn) /GROUP (chars) /HOURS (nn.n) /N (n) /OVER /PC (product code) /PKG (filename) /Q /SAVE (filename) /SELF (filename) /SHUFFLE (nn) Description Prints the contents of the help file. Configures the - IBM 8651RM0 | Hardware Maintenance Manual - Page 21
Ctrl+Alt+Del. The system begins the power-on self-test (POST). If a user password has been set, the system prompts you to enter it. IBM Netfinity 7000 - Type 8651 13 - IBM 8651RM0 | Hardware Maintenance Manual - Page 22
Notes 1. If a user password is set, you must enter it to access the test programs. If you have set user and administrative passwords, you can enter either one. 2. If a configuration error occurs, a prompt appears before the operating system starts (see "Configuration Conflicts" on page 26). 4. Use - IBM 8651RM0 | Hardware Maintenance Manual - Page 23
of all global run-time flags. Automatically enables all tests. Allows you to specify a sequence of tests and loops. Allows you to enter a DOS command. IBM Netfinity 7000 - Type 8651 15 - IBM 8651RM0 | Hardware Maintenance Manual - Page 24
the first error to occur causes additional errors. In this case, the system displays more than one error message. Always follow the suggested action instructions for the first error message that appears. POST error codes are also written to the error log in the Extended BIOS Data Area and can - IBM 8651RM0 | Hardware Maintenance Manual - Page 25
installed. SCSI Messages All Description One or more of the following might be causing the problem. A failing SCSI device (adapter, drive, controller) An improper SCSI configuration Duplicate SCSI diagnostics for additional information about the failing device. IBM Netfinity 7000 - Type 8651 17 - IBM 8651RM0 | Hardware Maintenance Manual - Page 26
Status Indicators Status indicators on the server can help to identify problems with some system components such as power supplies and hot-swap drives. Cooling-Failure Status Indicators: The cooling-failure light on the front of the - IBM 8651RM0 | Hardware Maintenance Manual - Page 27
power supply are green. Note If any of the two power supply LEDs are off in any of the preceding steps, replace the power supply. IBM Netfinity 7000 - Type 8651 19 - IBM 8651RM0 | Hardware Maintenance Manual - Page 28
slowly Hot-swap drive is present. Hot-swap drive is present; power to the drive is on. The drive is in use. The drive has a problem, and can be replaced. Disk-array models only: The drive should not be replaced at this time. The drive has just been replaced, and the - IBM 8651RM0 | Hardware Maintenance Manual - Page 29
Editor. To toggle between replace and insert modes, press Insert. To access the File Editor: 1. Select File Editor from the Utilities Menu; then, press Enter. IBM Netfinity 7000 - Type 8651 21 - IBM 8651RM0 | Hardware Maintenance Manual - Page 30
2. Insert a diskette into drive A or drive B before selecting the file that you want to edit; then, select the file from the Files Selection box. 3. Press Enter. 4. Make your changes. 5. When you are done, press F10 to update the file with the changes that you made, or press Esc to quit the editing - IBM 8651RM0 | Hardware Maintenance Manual - Page 31
The following is a summary of the features that are available with the IBM Netfinity 7000 - Type 8651. Microprocessors Intel Pentium Pro with: - Level-1 , 60 ns Sixteen memory sockets Four-way interleaved Error correcting code support Diskette Drive Standard: One 3.5-inch, 1.44 MB CD-ROM Drive - IBM 8651RM0 | Hardware Maintenance Manual - Page 32
Two serial connectors Parallel connector Mouse connector Keyboard connector Battery-backed clock and time/date calendar Two UltraSCSI connectors Hot-Swap Power Supplies Two 400-watt supplies standard with: - Automatic range voltage selection (115-230 V ac) - Built-in overload and surge protection - IBM 8651RM0 | Hardware Maintenance Manual - Page 33
Information The following additional service information supports Netfinity 7000 - Type 8651 servers. "Configuration Conflicts" on page 26. "Configuring EISA, ISA, and " on page 42. "System Configuration Utility Program" on page 44. "Specifications" on page 49. IBM Netfinity 7000 - Type 8651 25 - IBM 8651RM0 | Hardware Maintenance Manual - Page 34
Configuration Conflicts The resources used by the server consist of IRQs, DMA channels, I/O ports (for example, serial and parallel), and memory. This information is useful when a resource configuration conflict occurs. Conflicts in the configuration occur if: An installed device requires the same - IBM 8651RM0 | Hardware Maintenance Manual - Page 35
Set jumpers or switches on the system board. 3. Set jumpers or switches on the device. See the instructions that come with the adapter. 4. Install the adapter in the server. See "Adapters" on page 60. that the adapter needs to function properly. Some ISA adapters IBM Netfinity 7000 - Type 8651 27 - IBM 8651RM0 | Hardware Maintenance Manual - Page 36
screen, type in the adapter manufacturer and description (for example, IBM Token Ring). Refer to the adapter documentation for information about specific Device drivers are programs designed to support a specific type of hardware device. They provide instructions that enable the server to - IBM 8651RM0 | Hardware Maintenance Manual - Page 37
The Advanced Systems Management Adapter comes completely installed and configured. Use these instructions only if you need to change the default parameters to meet your specific and interrupts. The adapter comes configured with I/O address 200-205 and interrupt 5. IBM Netfinity 7000 - Type 8651 29 - IBM 8651RM0 | Hardware Maintenance Manual - Page 38
Use the ServerGuide package to create the Advanced Systems Management Adapter configuration diskette. Refer to the information that came with ServerGuide for instructions. 2. Press the Power On/Off Button to power-off the server. 3. Remove the server top cover. 4. Make sure the adapter configuration - IBM 8651RM0 | Hardware Maintenance Manual - Page 39
CR2 Table 2. Adapter LED Indicators CR1 Dot On CR1 Dot Off Problem indication. Normal. Check CR2 Dot. CR2 Dot Blinking CR2 Dot loaded. Go to step 8. Microcode is not loaded. Select Update Service Processor on the Flash Utility menu and follow the prompts. Then IBM Netfinity 7000 - Type 8651 31 - IBM 8651RM0 | Hardware Maintenance Manual - Page 40
Refer to the information provided with your adapter to determine the number of internal and external connectors, channels, and SCSI devices that the adapter supports. For information about the maximum length of SCSI cable between the terminated ends of the cable, see ANSI SCSI Standards: X3.131-1986 - IBM 8651RM0 | Hardware Maintenance Manual - Page 41
IDs" on page 130 and to the instructions that come with the SCSI devices for attached devices. 2. Follow the instructions that come with the option to 48 for instructions.) 3. Change " on page 48 for instructions.) 4. Change adapter jumpers or supported (for example, you cannot operate the server - IBM 8651RM0 | Hardware Maintenance Manual - Page 42
Resolving Software Configuration Conflicts: The memory-address space and IRQs used by some hardware options might conflict with addresses defined for use through application programs. If there is a conflict, one or more of the following conditions might exist: The system cannot load the operating - IBM 8651RM0 | Hardware Maintenance Manual - Page 43
change the settings of the displayed items, follow the instructions on the screen. SCSISelect Utility Program Options: The settings for advanced configuration options. These options include enabling support for large hard disk drives and drives with UltraSCSI . IBM Netfinity 7000 - Type 8651 35 - IBM 8651RM0 | Hardware Maintenance Manual - Page 44
Note If the following screen displays, you might have pressed Ctrl+A before the selected drives were ready. Restart the server and watch the SCSISelect messages as each drive spins up. After the drive that you want to view or format spins up, press Ctrl+A. Unexpected SCSI Command Failure Target - IBM 8651RM0 | Hardware Maintenance Manual - Page 45
of all the files and programs on the hard disk. 2. Select Format Disk; then, follow the instructions on the screen. Note Hard disk drives normally contain more tracks than their stated capacity (to allow for the ServerGuide documentation that comes with the server. IBM Netfinity 7000 - Type 8651 37 - IBM 8651RM0 | Hardware Maintenance Manual - Page 46
Security To control access to your server, you can implement several security measures, including password protection. Password Overview: Two types of passwords are available with the server: administrator and user. You can set both passwords using the Setup program and the System Configuration - IBM 8651RM0 | Hardware Maintenance Manual - Page 47
some System Configuration Utility program functions. See "Administrator Password" on page 40 for instructions for setting the administrator password. User Password: A user password is not required, . Write-protecting the boot sector is a form of virus protection. IBM Netfinity 7000 - Type 8651 39 - IBM 8651RM0 | Hardware Maintenance Manual - Page 48
If a user password is set and then forgotten, you can clear the password from memory using a system-board configuration switch. To set a user password in the Setup program: 1. Start the Setup program. 2. Select Set User Password on the Security Menu screen. The Set User Password screen appears. 3. - IBM 8651RM0 | Hardware Maintenance Manual - Page 49
the System Configuration Utility program. Refer to "Defining the Startup Device" on page 44 for instructions on using the Setup program. To change the startup sequence using the System Configuration Utility: must set a user password before you can enable secure mode. IBM Netfinity 7000 - Type 8651 41 - IBM 8651RM0 | Hardware Maintenance Manual - Page 50
Refer to the following for information on the options available for the secure mode. Options Hot Key Option Lockout Timer Secure Boot Mode Video Blanking Floppy Writes Reset/Power Switch Locking Description Specifies a set of keyboard commands that will place the system immediately into secure - IBM 8651RM0 | Hardware Maintenance Manual - Page 51
key to advance through the items on the screen. Press Enter to select an item. 2. Follow the instructions on the screen to view or change the configuration. You must correctly exit from the Setup program to save . To restore default settings: 1. Power-on the server. IBM Netfinity 7000 - Type 8651 43 - IBM 8651RM0 | Hardware Maintenance Manual - Page 52
2. Press F1 to enter the Setup program. 3. Press F5 to restore the default configuration values. 4. Press F10 to save the configuration values and exit from the Setup program. 5. Press Enter to confirm. Disabling the Diskette Drive and CD-ROM Drive: After configuring the system, it can be secured - IBM 8651RM0 | Hardware Maintenance Manual - Page 53
passwords, you can enter either one. If you have set an administrator password, you must enter the administrator password to change and save configuration data. IBM Netfinity 7000 - Type 8651 45 - IBM 8651RM0 | Hardware Maintenance Manual - Page 54
choice controls some aspects of how the system generates configuration data. For example, the System Configuration Utility program can prompt the user to manually add boards. Press the Spacebar to select an option. Refer to the following table for information on the choices on this menu. 46 - IBM 8651RM0 | Hardware Maintenance Manual - Page 55
Configuration Load .CFG Files Manually Specifies Name for .CMS, the system uses the existing configuration settings. Prompts you to add adapters manually. Prompts you for the base file name to use when creating these one. Follow the instructions on the screen to set an administrator password or press - IBM 8651RM0 | Hardware Maintenance Manual - Page 56
Step 3: Change Configuration Settings: Select this choice to change the configuration, if necessary. If you change a setting in this step, you might need to change a switch or jumper setting on the system board or on a device. All settings will remain in the default position if you do not use this - IBM 8651RM0 | Hardware Maintenance Manual - Page 57
. The settings are helpful when you install additional options, or if the system requires service. Also, record the new settings each time you make changes. Specifications Size (Tower Model ° C (73.4° F) - System off: 8% to 80%; maximum wetbulb 27° C (80.6° F) IBM Netfinity 7000 - Type 8651 49 - IBM 8651RM0 | Hardware Maintenance Manual - Page 58
Altitude: 0 to 2133 m (0 to 7000 ft.) Electrostatic Discharge Tested to 20 KV Immunity Verified to comply with EN 50082-2 Sound Sound Power, idling: - - 6.2 bel for open bay system (no hard drives installed) - - 6.3 bel for typical system configuration (1 bay filled with hard drives) Sound Power, - IBM 8651RM0 | Hardware Maintenance Manual - Page 59
Locations The following information supports the IBM Netfinity 7000 Type 8651 server. "1 MB Processor Card page 93. "Internal Drives" on page 100. "LED Card Bracket Assembly" on page 102. "LED Light Guide with Icons" on page 103. "Media/Switch Panel Trim" on page 104. "Memory Board/Memory-Module Kits - IBM 8651RM0 | Hardware Maintenance Manual - Page 60
1 MB Processor Card (FRU No. 12J3352) Note To remove the processor card, see "Processor or Memory Board" on page 121. E C D A F B G H J SCAN Jumpers Note The default settings for the scan jumpers is skip. These settings do not affect the the normal operation and there is no need to change - IBM 8651RM0 | Hardware Maintenance Manual - Page 61
3 1 J9B1 Active/Passive Jumper Note The default setting for the active/passive jumper is passive and should not be changed. F Active 3 1 Passive Passive/Active J4B1 IBM Netfinity 7000 - Type 8651 53 - IBM 8651RM0 | Hardware Maintenance Manual - Page 62
Processor Speed Jumper SEL0 SEL1 SEL2 Park Park Park G 12 1 200/66 MHz Jumper Setting SEL 0=Jumper SEL 1=No Jumper SEL 2=Jumper Park 0=Jumper J4D1 L2 Cache Jumper Note 512 KB jumper setting = 1 and 2, 3 and 4 1 MB jumper setting = 5 and 6, 7 and 8 H 512KB 1MB 2 8 1 J1C1 Fan Fail Harness - IBM 8651RM0 | Hardware Maintenance Manual - Page 63
following: 1. Power-off the server and all power supplies. 2. Remove the 2 voltage regulator card screws 1 and pull the 5-volt regulator card 2 out of the server. IBM Netfinity 7000 - Type 8651 55 - IBM 8651RM0 | Hardware Maintenance Manual - Page 64
5.25-Inch Removable-Media Drive Note The server's EMI integrity and cooling are both protected by having the left front bays covered or occupied. When you install a drive, save the filler panel from the bay, in case you later remove the drive and do not replace it with another. 1 Screws 2 Filler - IBM 8651RM0 | Hardware Maintenance Manual - Page 65
so that the slide rails engage in the bay guide rails. Push the drive into the bay and attach it with the two screws 1 from the filler panel. 1 Air baffle 2 Shuttle-support rail 3 Drive 4 Opening in shuttle 5 port A is connected to the hot-swap backplane for the IBM Netfinity 7000 - Type 8651 57 - IBM 8651RM0 | Hardware Maintenance Manual - Page 66
not installed correctly, the server will overheat. 15. Install the air baffle 1 . Make certain that the edges of the air baffle fit inside the shuttle-support rails 2 . 16. Push the shuttle 8 toward the front of the server and tighten the four screws 7 at the back of the shuttle. 17. Install the - IBM 8651RM0 | Hardware Maintenance Manual - Page 67
AC Power Assembly Attention There are no serviceable parts inside the AC Power Assembly FRU. 1 AC Power Assembly Screws Remove the 5-volt regulator card, see "5-Volt Regulator Card" on page 55. 3. Support the power assembly while removing the 4 screws 1 ; then, pull the assembly 2 out of the server - IBM 8651RM0 | Hardware Maintenance Manual - Page 68
comes with the adapter and follow those instructions in addition to the instructions in this manual. If you need to change the switch as network adapters, install them in PCI slots 4-6. The server supports 5.0 V PCI adapters; it does not support 3.3 V PCI adapters. For ease of cabling, install any - IBM 8651RM0 | Hardware Maintenance Manual - Page 69
a RAID adapter, follow the instructions in the RAID adapter documentation for configuring the adapter. If you install a RAID adapter that comes with a backup battery pack, you must enable the backup battery pack before you can use the RAID adapter. 1 Captive screw 2 Adapter-support panel 3 Adapter - IBM 8651RM0 | Hardware Maintenance Manual - Page 70
adapter manufacturer. 7. Refer to the documentation that comes with the adapter for any cabling instructions. It might be easier for you to route any cables before you install the adapter to the adapter. 9. Reinstall the adapter-support bracket 2 and tighten the screw 1 . 62 Netfinity Server HMM - IBM 8651RM0 | Hardware Maintenance Manual - Page 71
. If you are having trouble with the installation or operation of a network adapter or network operating system, ensure that the network-adapter device driver supports dual processors. Refer to be easier for you to route the cables before you install the adapter. IBM Netfinity 7000 - Type 8651 63 - IBM 8651RM0 | Hardware Maintenance Manual - Page 72
1 Air baffle 2 Shuttle-support rails 3 Opening in shuttle 4 SCSI port A 5 SCSI port B 6 Captive screws 7 the back of the server. 3. Observe the way the edges of the air baffle 1 fits inside the shuttle-support rails 2 ; then, slide the air baffle toward the rear of the server and lift it out of the - IBM 8651RM0 | Hardware Maintenance Manual - Page 73
1 Channel 2 2 Channel 1 3 Air baffle 4 Shuttle-support rails 5 SCSI port A 6 SCSI port B 7 Captive screws 7. If you air baffle 3 . Make certain that the edges of the air baffle fit inside the shuttle support rails 4 . 10. Push the shuttle toward the front of the server and tighten the four screws 7 - IBM 8651RM0 | Hardware Maintenance Manual - Page 74
danger. If you replace the battery, you must adhere to the following instructions and the requirements in the "Battery Notice (Lithium)" on page 185. burn risk if handled incorrectly. When replacing the battery, use only IBM FRU Number 33F8354 or an equivalent type lithium battery recommended by the - IBM 8651RM0 | Hardware Maintenance Manual - Page 75
the system board. 8. Loosen the 4 central electronics complex (CEC) screws 3 . 9. While lifting up on the CEC 4 slide the CEC out the back of the server. IBM Netfinity 7000 - Type 8651 67 - IBM 8651RM0 | Hardware Maintenance Manual - Page 76
Door Lock: You can lock the door on the server to deter tampering with the internal components. Power On/Off Button: Press this button to manually power the server on or off. The server is designed to automatically restart after a power disruption. The Power On/Off button does not power-off - IBM 8651RM0 | Hardware Maintenance Manual - Page 77
Diskette-Eject Button: Press this button to eject a diskette from the drive. CD-ROM Eject Button: Press this button to eject the CD-ROM tray from its drive so that you can insert or remove a CD. IBM Netfinity 7000 - Type 8651 69 - IBM 8651RM0 | Hardware Maintenance Manual - Page 78
NMI Reset Power ON/OFF CR1: Power-On Light Green: Server Powered On CR2: Power Failure Light Amber Blinking: Power Subsystem Failure (Refer to trouble shooting the Power Supply section) CR3: Cooling Failure Light Amber Blinking: - One or more fans have failed - Ambient temperature is outside normal - IBM 8651RM0 | Hardware Maintenance Manual - Page 79
chassis under the side cover (one on each side of the chassis). The access door must be in place during normal operation of the server. IBM Netfinity 7000 - Type 8651 71 - IBM 8651RM0 | Hardware Maintenance Manual - Page 80
Cover (Top) D3jk1003 1 Top Cover Screws 2 Top Cover To remove the server top cover: 1. Power-off the server and all attached devices and disconnect all external cables and power cords. 2. Loosen the two screws 1 on the back edge of the top cover. 3. Slide the top cover 2 slightly toward the rear of - IBM 8651RM0 | Hardware Maintenance Manual - Page 81
Diskette Drive 1 Tab 1 Diskette Drive To remove the diskette drive, to the following: 1. Press and release the tab 1 . 2. Pull the drive out of the system 2 . 3. Diskette the diskette drive cables. IBM Netfinity 7000 - Type 8651 73 - IBM 8651RM0 | Hardware Maintenance Manual - Page 82
Door 1 Door To remove the door, do the following; 1. Unlock and open the door 1 . 2. List the door 1 up and away from the server. 74 Netfinity Server HMM - IBM 8651RM0 | Hardware Maintenance Manual - Page 83
Bay 6 Removable Media Bays Hot-Swap Bays Bank B, Bay 6 Hot-Swap Bays: The hot-swap drive bays support up to 12 UltraSCSI hard disk drives. The hot-swap feature enables you to remove and replace hard disk drives to 720 KB and format 2 MB diskettes to 1.44 MB. IBM Netfinity 7000 - Type 8651 75 - IBM 8651RM0 | Hardware Maintenance Manual - Page 84
Front Bezel 1 Flat Blade Screwdriver 2 Front Bezel Snaps 3 Front Bezel To remove the front bezel, do the following: 1. Using flat blade screwdriver 1 , pry the snaps 2 away from the side of server. 2. Pivot the front bezel 1 away from the server. 76 Netfinity Server HMM - IBM 8651RM0 | Hardware Maintenance Manual - Page 85
the front bezel cap 1 out and away from the server (releasing the front bezel cap molded tab 2 ). 2. Pivot the front bezel cap 1 from the server. IBM Netfinity 7000 - Type 8651 77 - IBM 8651RM0 | Hardware Maintenance Manual - Page 86
right front of the server support hot-swap drives only. Attention You do not have to power-off the server to install hot-swap drives in these bays. However, you must power-off the server when performing any steps that involve installing or removing cables, except where instructed to do so when - IBM 8651RM0 | Hardware Maintenance Manual - Page 87
(that is, perpendicular to the drive). b. Align the drive/tray assembly so that it engages the guide rails in the bay. c. Gently push the drive assembly into the bay until the drive connects to RAID adapter documentation for details about configuration requirements. IBM Netfinity 7000 - Type 8651 79 - IBM 8651RM0 | Hardware Maintenance Manual - Page 88
Hot-Swap Drive Replacement Note You do not have to power-off the server to remove a drive from the hot-swap bays. If the amber Hard Disk Status light for a drive is lit continuously, that individual drive is faulty and needs to be replaced. Attention Before you hot-swap a drive, make sure it is - IBM 8651RM0 | Hardware Maintenance Manual - Page 89
. c. If the drive is a half-high drive, plug the connector 5 to the back of the drive and secure the connector to the drive with screws 6. IBM Netfinity 7000 - Type 8651 81 - IBM 8651RM0 | Hardware Maintenance Manual - Page 90
hot-swap bay: a. Ensure the tray handle is open (that is, perpendicular to the drive). b. Align the drive/tray assembly so that it engages the guide rails in the bay. c. Push the drive assembly into the bay until the drive connects to the backplane. d. Push the tray handle to the right - IBM 8651RM0 | Hardware Maintenance Manual - Page 91
replacement of a hot-swap fan. Refer to this illustration while performing the steps in this procedure. 1 Screws 2 Power cord 3 Power connector 4 Hot-swap fan assembly IBM Netfinity 7000 - Type 8651 83 - IBM 8651RM0 | Hardware Maintenance Manual - Page 92
To replace a hot-swap fan, do the following: 1. Remove the top cover (see "Cover (Top)" on page 72). Attention To ensure proper system cooling, the top cover should be removed for no more than 30 minutes during this procedure. 2. Determine which fan assembly 4 needs to be replaced. 3. Disconnect the - IBM 8651RM0 | Hardware Maintenance Manual - Page 93
installed. You can install a third hot-swap power supply to provide redundant power. (See "Hot-Swap Power Supply Installation" on page 86 for instructions.) Power Switch: This switch turns the power supply on and off. Attention Do not remove or install a power supply without first turning the Power - IBM 8651RM0 | Hardware Maintenance Manual - Page 94
AC and DC Power Lights: These green lights provide status information about the power supply. AC Power Light DC Power Light Description On On The power supply is on and operating correctly. On Off Either the Power On/Off button is in the Off position (the DC Power lights on all the - IBM 8651RM0 | Hardware Maintenance Manual - Page 95
properly. See "Power Supply Status Indicators" on page 18 for details. Caution Never remove the cover on a power supply. Hazardous voltage, current, and energy levels are present inside the power supplies. There are no serviceable parts inside the power supplies. IBM Netfinity 7000 - Type 8651 87 - IBM 8651RM0 | Hardware Maintenance Manual - Page 96
Refer to the following illustration while performing the steps in this procedure. Note You do not need to power-off the server to install hot-swap power supplies. 1 Power supply 2 Bottom screw 3 Power switch on power supply 4 DC Power light 5 AC Power light 6 Top screw To add a power supply, do the - IBM 8651RM0 | Hardware Maintenance Manual - Page 97
from the power-supply bay and save it and the two screws you removed for future use. 5. Support the power supply 1 by the handle on the back. 6. Slide the power supply into the chassis. power supply are lit, indicating that the power supply is operating correctly. IBM Netfinity 7000 - Type 8651 89 - IBM 8651RM0 | Hardware Maintenance Manual - Page 98
6. Caution Never remove the cover on a power supply. Hazardous voltage, current, and energy levels are present inside the power supplies. There are no serviceable parts inside the power supplies. 4. Grasp the handle on the power supply; then, slide the power supply out of the chassis. 5. If you - IBM 8651RM0 | Hardware Maintenance Manual - Page 99
the Off position. a. Set the Power switch on the power supply to the Off position. b. Support the power supply by the handle on the back. c. Slide the power supply into the chassis. Attention When 4 are lit, indicating that the power supply is operating correctly. IBM Netfinity 7000 - Type 8651 91 - IBM 8651RM0 | Hardware Maintenance Manual - Page 100
Input/Output Connectors and Expansion Slots External SCSI Connector Knockouts Parallel Connector Serial Connector (COM1) Mouse Connector Keyboard Connector Serial Connector (COM2) Video Connector Power Connector Serial Connector (Reserved) Systems Management Serial Connector EISA/ISA Expansion - IBM 8651RM0 | Hardware Maintenance Manual - Page 101
modems, scanners, and auxiliary terminals. These ports also enable you to transfer data between computers. Serial ports can transfer data asynchronously, which means that they can transmit any number of at 345 600 bits per second, you need a special shielded cable. IBM Netfinity 7000 - Type 8651 93 - IBM 8651RM0 | Hardware Maintenance Manual - Page 102
Each serial port has a 9-pin, male D-shell connector on the back of the server. The pin-number assignments of this connector conform to the industry standard. 1 5 6 9 The following table shows the pin-number assignments for the serial-port connectors. Table 3. Serial Port Pin-Number - IBM 8651RM0 | Hardware Maintenance Manual - Page 103
server, the POST routine assigns the parallel port a specific port address. You can change the parallel-port assignment by using the System Configuration Utility programs. IBM Netfinity 7000 - Type 8651 95 - IBM 8651RM0 | Hardware Maintenance Manual - Page 104
Video Port: The system board in the server has one SVGA video port. This port is used to attach a video monitor. The video port has a 15-pin analog connector on the back of the server. (Refer to "Input/Output Connectors and Expansion Slots" on page 92 for the location of the connector.) 6 1 - IBM 8651RM0 | Hardware Maintenance Manual - Page 105
Auxiliary-Device Ports: The system board has one keyboard port and one auxiliary-device port that supports a mouse or other pointing device. (Refer to "Input/Output Connectors and Expansion Slots" 2 Not connected 3 Ground 4 +5 V dc 5 Clock 6 Not connected IBM Netfinity 7000 - Type 8651 97 - IBM 8651RM0 | Hardware Maintenance Manual - Page 106
UltraSCSI Ports: The server has two UltraSCSI bus-master controllers on the system board. Each controller supports up to 15 SCSI devices. You can use the 68-pin, SCSI connectors for these controllers to expand the capabilities of the server by attaching - IBM 8651RM0 | Hardware Maintenance Manual - Page 107
63 -Request 30 Ground 64 -Input/Output 31 Ground 65 Data 8 32 Ground 66 Data 9 33 Ground 67 Data 10 34 Ground 68 Data 11 IBM Netfinity 7000 - Type 8651 99 - IBM 8651RM0 | Hardware Maintenance Manual - Page 108
Internal Drives If you add different types of drives, the system can read multiple types of media and store more data. Several types of drives are available, such as: Diskette Hard disk CD-ROM Tape The server contains hardware that lets you replace a failed hard disk drive without powering off the - IBM 8651RM0 | Hardware Maintenance Manual - Page 109
server comes with one CD-ROM drive and one 3.5-inch, 1.44 MB diskette drive. The left front bays support 5.25-inch, half-high, removable-media drives. Any two adjacent 5.25-inch, half-high bays can the bays. Each backplane supports up to six hard disk drives. IBM Netfinity 7000 - Type 8651 101 - IBM 8651RM0 | Hardware Maintenance Manual - Page 110
, lift the LED card bracket assembly 2 out of the top of the server. Note To remove the LED light guide with icons from the LED card bracket assembly, see "LED Light Guide with Icons" on page 103. To remove the vacuum florescent display panel from the the LED card bracket assembly, see - IBM 8651RM0 | Hardware Maintenance Manual - Page 111
LED Light Guide with Icons 1 Latch 2 LED Light Guide with Icons To remove the LED light guide, do the following: 1. Remove the front bezel cap, see "Front Bezel Cap" on page 77. 2. Release the latch 1 and remove the LED light guide 2 from the LED Card Bracket Assembly. IBM Netfinity 7000 - Type 8651 - IBM 8651RM0 | Hardware Maintenance Manual - Page 112
Media/Switch Panel Trim 1 Media/Switch Panel Trim 1 Media/Switch Panel Trim Latches To remove the media/switch panel trim, do the following: 1. Press and release the media/switch panel trim latches 1. 2. Pivot the bottom of the media/switch panel trim 2 away from the server. 104 Netfinity Server HMM - IBM 8651RM0 | Hardware Maintenance Manual - Page 113
dual inline memory modules (DIMMs). The memory board contains four banks (0-3), arranged in 16 DIMM connectors and supports 4-way memory interleaving. You can install a maximum of 4 GB of memory in the server, with the 256 MB DIMMs in bank 3, connectors J14-J17. IBM Netfinity 7000 - Type 8651 105 - IBM 8651RM0 | Hardware Maintenance Manual - Page 114
Notes 1. Use DIMMs that are compatible with Joint Electron Device Engineering Council (JEDEC) standards. 2. The server does not support memory expansion adapters. 1 Memory module (DIMM) 2 Retaining clip 3 Memory-module connector To install the memory module: 1. Place the memory board, component-side - IBM 8651RM0 | Hardware Maintenance Manual - Page 115
but different banks can have different sized memory modules installed. 5. Reinstall the memory board and board-support panel. Attention When you install the memory board in the server, be sure that it is completely damage to the system board or the memory board. IBM Netfinity 7000 - Type 8651 107 - IBM 8651RM0 | Hardware Maintenance Manual - Page 116
system (BIOS). The latest level of BIOS for the server is available through the World Wide Web and the IBM PC Company Bulletin Board System (BBS). See "Online Support" on page iii for the appropriate World Wide Web addresses and bulletin-board telephone numbers. Obtained an SMP-capable operating - IBM 8651RM0 | Hardware Maintenance Manual - Page 117
hot. Let the components cool for 10 minutes before continuing with the procedures. 2. Determine the processor board on which you want to install the microprocessor. IBM Netfinity 7000 - Type 8651 109 - IBM 8651RM0 | Hardware Maintenance Manual - Page 118
Note The server comes with a microprocessor preinstalled in the primary socket 6 of the primary processor board. If you are installing a second microprocessor in the server, install it in the primary socket on the secondary processor board. If you are installing a third microprocessor, install it in - IBM 8651RM0 | Hardware Maintenance Manual - Page 119
so now; otherwise, continue with this procedure. 10. Reinstall the processor board and the board-support panel. Attention When you install processor boards in the server, be sure that they are completely and the processor board or the connector on the system board. IBM Netfinity 7000 - Type 8651 111 - IBM 8651RM0 | Hardware Maintenance Manual - Page 120
and the system will hang. This button is for low-level debug purposes only, and should not be used during the course of normal hardware troubleshooting. 112 Netfinity Server HMM - IBM 8651RM0 | Hardware Maintenance Manual - Page 121
Power Backplane to DASD Interface Power Backplane to DASD Interface Power Backplane to Media Devices Power Backplane to 5V SB Interface Power Backplane to Fan IBM Netfinity 7000 - Type 8651 113 - IBM 8651RM0 | Hardware Maintenance Manual - Page 122
power backplane voltages are incorrect, replace the power backplane. If the voltages are correct, and the Symptom-to-FRU index does not solve the problem, go to "Undetermined Problems" on page 168. J1, J2 Connection +5V DC Return +5V DC Return +5V DC Return +5V DC Return +5V DC Return +12V DC - IBM 8651RM0 | Hardware Maintenance Manual - Page 123
1A - IBM 8651RM0 | Hardware Maintenance Manual - Page 124
Connection +12V B DC Return +5V SB SYS EPOW# +5V B DC Return +5V B DC Return +5V B DC Return A0 DASD 3 A1 DASD 3 A2 DASD 3 Spare 1 I C CLK DASD DC Return I C SDA DASD I C INT DASD# J7 Connection +12V C DC Return 12V C DC Return +12V C DC Return +12V C DC Return +5V SB SYS EPOW# +5V B DC Return +5V B - IBM 8651RM0 | Hardware Maintenance Manual - Page 125
5A - IBM 8651RM0 | Hardware Maintenance Manual - Page 126
Power Backplane Removal Caution Hazardous voltage, current, and energy levels are present inside the power backplane. To remove the power backplane assembly, do the following: 1. Power-off the server and all attached devices and disconnect all external cables and power cords. 2. Loosen the 4 screws - IBM 8651RM0 | Hardware Maintenance Manual - Page 127
screws 1 and remove the power backplane cover 2 . 9. Slide the CEC back into position. 10. Remove the 10 power backplane screws 3 and remove the power backplane 4 . IBM Netfinity 7000 - Type 8651 119 - IBM 8651RM0 | Hardware Maintenance Manual - Page 128
the steps are required only during the initial installation of an option. 1. Choose the bay in which you want to install the drive. 2. Check the instructions that come with the drive to see if you need to set any switches or jumpers on the drive. 3. To install the drive, go to - IBM 8651RM0 | Hardware Maintenance Manual - Page 129
2 and remove the board-support panel by lifting it and pulling the edge away from the three slots at the back of the chassis. b. Store the panel until you are ready to reinstall it. 3. Select the processor board 4 or 5 or memory board 3 that you want to remove. IBM Netfinity 7000 - Type 8651 - IBM 8651RM0 | Hardware Maintenance Manual - Page 130
by the two corner latches 6 . 3. Slide the board into the appropriate slot guides. Note Be sure the component side of the primary processor board 4 is facing toward installing. 5. Reinstall the board-support panel 2 : a. Align the board-support panel so that the tabs on the rear edge of the panel - IBM 8651RM0 | Hardware Maintenance Manual - Page 131
b. Close the panel. Check to make sure that the boards in the slots under the panel are aligned with the scribe marks 7 on either side of the holes in the center of the panel. c. Tighten the screws 1 on the board-support panel. IBM Netfinity 7000 - Type 8651 123 - IBM 8651RM0 | Hardware Maintenance Manual - Page 132
SCSI Backplane 1 Wide (16-bit) SCSI connector 2 J10 Option jumper block 3 SCSI hot-swap drive connectors (on opposite side of backplane) 4 Repeater card connector 5 Power connector 124 Netfinity Server HMM - IBM 8651RM0 | Hardware Maintenance Manual - Page 133
jumper1 No jumper Jumper 543210 Jumper No jumper 13 12 11 10 9 8 Jumper2 Jumper2 - - - - - - Notes: 1. This is the default jumper setting. 2. This combination is not supported. IBM Netfinity 7000 - Type 8651 125 - IBM 8651RM0 | Hardware Maintenance Manual - Page 134
Removal: To remove the SCSI Backplane, do the following: 1. Power-off the server. 2. Remove the top cover, see "Cover (Top)" on page 72. 3. Remove the side cover, see "Cover (Sides)" on page 71. Note If the air baffle is not installed correctly, the server will overheat. 4. Remove the air baffle 1 . - IBM 8651RM0 | Hardware Maintenance Manual - Page 135
Drive Cage Screws 2 Hot-Swap Drive Cage 7. Remove the 4 hot-swap drive cage screws 1 and pull the hot-swap drive cage 2 out of the server. IBM Netfinity 7000 - Type 8651 127 - IBM 8651RM0 | Hardware Maintenance Manual - Page 136
1 Hot-Swap Backplane Screws 2 Hot-Swap Backplane 8. Remove the 8 hot-swap backplane screws 1 and remove the hot-swap backplane 2 . 128 Netfinity Server HMM - IBM 8651RM0 | Hardware Maintenance Manual - Page 137
SCSI Drives Some drives have a special design called small computer system interface, or SCSI. This design allows you to attach multiple drives to a SCSI cable and use the other SCSI controller on the system board to support the SCSI devices in the left front bays. IBM Netfinity 7000 - Type 8651 129 - IBM 8651RM0 | Hardware Maintenance Manual - Page 138
.) If you need to set IDs for SCSI devices, refer to the instructions that come with those devices. The server automatically sets SCSI IDs for hot above each hot-swap bay. Each of the two SCSI backplanes in the server supports one bank (six) of hot-swap bays. Table 8 shows the default SCSI - IBM 8651RM0 | Hardware Maintenance Manual - Page 139
you install additional SCSI devices in removable-media bays 1, 2, and 3, set their termination to Disable. Refer to the information that come with the SCSI device for instructions about setting device jumpers or switches that control termination. IBM Netfinity 7000 - Type 8651 131 - IBM 8651RM0 | Hardware Maintenance Manual - Page 140
rack Preparing the Rack Caution Four people are required to move or lift the server. In this section, you will use the following parts: IBM Installation Template Two slide-bracket nut bar assemblies One cable-management arm Eight M4x8 pan head screws Eight M6x16 screws One cable management arm One - IBM 8651RM0 | Hardware Maintenance Manual - Page 141
hardware to the rack: 1. Remove the rack front door. Refer to the rack documentation for instructions. 2. Mark the positions of the slide-bracket assemblies, bezel brackets, and the cable-management for the slide-bracket assemblies and cable-management arm. IBM Netfinity 7000 - Type 8651 133 - IBM 8651RM0 | Hardware Maintenance Manual - Page 142
3. Attach a slide-bracket assembly to the front of the rack: Notes: Get another person to help you attach the slide-bracket assemblies to the rack. The slide-bracket assemblies can be installed on either the left or right side of the rack. Refer to the illustrations for examples of the proper - IBM 8651RM0 | Hardware Maintenance Manual - Page 143
. b. Position a nut bar behind the slide-bracket assembly. c. Insert screws through the mounting rail, slide-bracket assembly, and nut bar. Do not tighten the screws. IBM Netfinity 7000 - Type 8651 135 - IBM 8651RM0 | Hardware Maintenance Manual - Page 144
5. Attach the other slide-bracket assembly to the front and rear of the rack. 6. Push the slide-bracket assemblies to the outermost positions on the rack. 7. Tighten all screws to secure both slide-bracket assemblies. If you are using a torque screwdriver, use the following torque setting: 8-11 Nm ( - IBM 8651RM0 | Hardware Maintenance Manual - Page 145
server side. Tighten the screws. Repeat this step for the other slide-bracket assembly on the opposite side of the server. This secures the server. IBM Netfinity 7000 - Type 8651 137 - IBM 8651RM0 | Hardware Maintenance Manual - Page 146
6. Install the side access doors on the server. Attention For proper cooling and airflow, replace the side access doors before powering on the server. Operating the server with the side access doors removed might damage server components. Note When the drawer is fully extended, safety latches on the - IBM 8651RM0 | Hardware Maintenance Manual - Page 147
server using the captive screws. 9. Attach the monitor, keyboard, and power cables to the corresponding connectors on the server. Refer to the rack documentation for instructions. 10. Attach the cables to the cable-management arm using cable ties. IBM Netfinity 7000 - Type 8651 139 - IBM 8651RM0 | Hardware Maintenance Manual - Page 148
11. Secure the drawer in the rack: a. Attach two cage nuts to the front mounting rail. b. Slide the drawer into the rack. c. Secure the server to both sides of the rack by inserting screws (M6 by 16 mm) through the bezel brackets, mounting rails, and cage nuts. 12. Install the rack front door. 13. - IBM 8651RM0 | Hardware Maintenance Manual - Page 149
slide rail to the front mounting brackets. 4. Remove the screws that attach the slide rail and cable-management arm to the rear of the rack. IBM Netfinity 7000 - Type 8651 141 - IBM 8651RM0 | Hardware Maintenance Manual - Page 150
documentation that comes with the rack for additional instructions. Status Indicators Cooling-Failure Light Power-Failure for more information. Cooling-Failure Light: When this amber light flashes, a fan problem has occurred or the server has overheated. Refer to "Status Indicators" on page - IBM 8651RM0 | Hardware Maintenance Manual - Page 151
), the controller is identifying the drive. Hard Disk Activity Light: When the green light for a hard disk drive is flashing, the drive is being accessed. IBM Netfinity 7000 - Type 8651 143 - IBM 8651RM0 | Hardware Maintenance Manual - Page 152
System Board 1 Power control and status cable 2 +5V, +12V, and 3.3V power connectors (identical) 3 Diskette-drive connector 4 Front-panel connector 5 IDE connector 6 Memory-board connector 7 Not used 8 Secondary processor-board connector 9 Primary processor-board connector 1 Fan - IBM 8651RM0 | Hardware Maintenance Manual - Page 153
" on page 60. 4. Remove the CEC, see "Central Electronics Complex (CEC)" on page 67. 5. Remove the 14 system board screws 1 and remove the system board 2 . IBM Netfinity 7000 - Type 8651 145 - IBM 8651RM0 | Hardware Maintenance Manual - Page 154
System-Board Configuration Jumpers Jumper Pins Description J6A1, BIOS Recovery 1-21 Sets BIOS boot block to normal startup mode. J6A1, BIOS Boot Block 2-3 1-21 Enables the BIOS flash memory recovery mode. Sets the BIOS boot block as write-protected. J6A2, Video Sleep 2-3 1-21 Sets the - IBM 8651RM0 | Hardware Maintenance Manual - Page 155
: 1. Power-off the server and peripheral devices and remove the top cover (see "Cover (Top)" on page 72). 2. Identify the BIOS boot block jumper, J6A1. IBM Netfinity 7000 - Type 8651 147 - IBM 8651RM0 | Hardware Maintenance Manual - Page 156
J6A1 Unprotect Protect 1 Boot Block 1 23 3. If the primary processor board blocks access to the jumper, remove it (see "Processor or Memory Board" on page 121). 4. Set the BIOS boot block jumper: a. To remove the write-protection from the BIOS boot block, move the jumper to pins 2 and 3. b. To set - IBM 8651RM0 | Hardware Maintenance Manual - Page 157
leaves this function enabled so that you can update the BIOS from a startable diskette without having to open the server covers and change the jumper. IBM Netfinity 7000 - Type 8651 149 - IBM 8651RM0 | Hardware Maintenance Manual - Page 158
System-Board Configuration Switch Settings: Some configuration actions are controlled through switches on the system board. Table 9 summarizes the switch settings that correspond to these actions. Table 9. Configuration Switch Settings Switch Position Function S6A1-1 On Resets NVRAM and the - IBM 8651RM0 | Hardware Maintenance Manual - Page 159
-1 to Off. 15. If you removed the primary processor board, replace it. 16. If you removed the ISA cards, do the following. a. Boot the IBM Netfinity 7000 System CD-ROM and select System Configuration. b. Add the ISA cards to the configuration. c. Save the configuration. d. Install the ISA cards you - IBM 8651RM0 | Hardware Maintenance Manual - Page 160
3. Locate the configuration switches on the system board. OFF ON S6A1-1 S6A1-2 CLEAR CMOS OFF CLEAR PASSWORD OFF RESERVED OFF S6A1 1 23 4. Slide switch S6A1-2 to On. 5. If you removed the primary processor board, replace it. 6. Connect the power cords to the server and the monitor. 7. - IBM 8651RM0 | Hardware Maintenance Manual - Page 161
the front bezel cap, see "Front Bezel Cap" on page 77. 2. Gently pull the mounting studs out of the back of the florescent display panel 1 . IBM Netfinity 7000 - Type 8651 153 - IBM 8651RM0 | Hardware Maintenance Manual - Page 162
system board comes with either 512 KB or 1 MB of preinstalled video memory. If the server has a 1 MB memory buffer, the server controller will support high-resolution graphics and text modes with 132 columns. If the server has 512 KB of preinstalled video memory, you can increase the memory buffer - IBM 8651RM0 | Hardware Maintenance Manual - Page 163
do so now; otherwise, continue with this procedure. 4. Reinstall the processor boards and the board-support panel. Attention When you install processor boards in the server, be sure that they are completely the processor board or the connector on the system board. IBM Netfinity 7000 - Type 8651 155 - IBM 8651RM0 | Hardware Maintenance Manual - Page 164
-to-FRU Index to help you decide which FRUs to have available when servicing the computer. The POST BIOS displaying POST error codes and messages on the screen. Note For IBM devices not supported by index, refer to the manual for that device. Beep Codes Beep Code 1 Beep (Refresh failure) 2 Beeps - IBM 8651RM0 | Hardware Maintenance Manual - Page 165
4. System Board 1. Reseat EISA Adapter 2. Run System Configuration Utility program 1. Reseat EISA Adapter 2. Run System Configuration Utility program 1. Reseat EISA Adapter 2. EISA Adapter 3. System Board IBM Netfinity 7000 - Type 8651 157 - IBM 8651RM0 | Hardware Maintenance Manual - Page 166
Error Code 0047 (EISA CMOS configuration not set) 0048 (EISA CMOS checksum failure) 0049 (EISA NVRAM invalid) 0050 (Plug and Play Memory Conflict) 0051 (Plug and Play 32 bit Memory Conflict) 0052 (Plug and Play IRQ Conflict) 0053 (Plug and Play DMA Conflict) 0054 (Plug and Play Error Log is Full) - IBM 8651RM0 | Hardware Maintenance Manual - Page 167
(BIOS does not support current stepping for Slot 1 Processor 1) 0167 (BIOS does not support current stepping for Slot 1 Processor 2) 0168 (BIOS does not support current stepping for Slot 1 1. Check for correct processor level 2. Processor 1 on Processor Board 2 IBM Netfinity 7000 - Type 8651 159 - IBM 8651RM0 | Hardware Maintenance Manual - Page 168
Error Code 0169 (BIOS does not support current stepping for Slot 2 Processor 2) 0170 (Disable CPU slot) 0171 (CPU Failure - Slot 1 CPU 1) 0172 (CPU Failure - Slot 1 CPU 2) 0173 (CPU Failure - Slot 2 CPU 1) 0174 ( - IBM 8651RM0 | Hardware Maintenance Manual - Page 169
only 1. Processor 1 on Processor Board 1 1. Processor 2 on Processor Board 1 1. Processor 1 on Processor Board 2 1. Processor 2 on Processor Board 2 1. Fan Heat Sink on Processor 1 on Processor Board 1 IBM Netfinity 7000 - Type 8651 161 - IBM 8651RM0 | Hardware Maintenance Manual - Page 170
Error Code 0221 (Fan Failure Slot 1 Processor 2) 0222 (Fan Failure Slot 2 Processor 1) 0223 (Fan Failure Slot 2 Processor 2) 0230 (Invalid processor for module in Slot 1 Processor 1) 0231 (Invalid processor for module in Slot 1 Processor 2) 0232 (Invalid processor for module in Slot 2 Processor 1) - IBM 8651RM0 | Hardware Maintenance Manual - Page 171
with this error code to determine the failing DIMM 1. Refer to the 04XX error codes displayed with this error code to determine the failing DIMM IBM Netfinity 7000 - Type 8651 163 - IBM 8651RM0 | Hardware Maintenance Manual - Page 172
Error Code 0317 (ECC Memory Size Changes Bank 3 0320 (Adding/removing PCI adapters has changed available memory) 0322 (An error has caused the memory resizing to fail, insufficient memory to continue.) 0370 (Keyboard controller error) 0373 (Keyboard stuck key detected) 0375 (Keyboard and mouse - IBM 8651RM0 | Hardware Maintenance Manual - Page 173
Board 1. PCI device 2. System Board 1. PCI Adapter 2. System Board 1. Run System Configuration Utility program 1. Run System Configuration Utility program 1. PCI Adapter 1. PCI Adapter 1. PCI Adapter IBM Netfinity 7000 - Type 8651 165 - IBM 8651RM0 | Hardware Maintenance Manual - Page 174
Error Code 0783 (PCI memory request exceeds amount available 0784 (Illegal bus for memory request below 1 MB) 0785 (Memory request below 1 MB exceeds 1 MB) 0800 (PCI I/O port conflict) 0801 (PCI memory conflict) 0802 (PCI IRQ conflict) 0803 (PCI error log is full, the log will be cleared - IBM 8651RM0 | Hardware Maintenance Manual - Page 175
Card 4. 1. Fan(s) 1. Hot-Swap Drive 2. Hot-Swap Backplane 1. Reseat Advanced Systems Management Adapter Cable 2. Advanced Systems Management Adapter Cable 3. Advanced Systems Management Adapter 4. System Board IBM Netfinity 7000 - Type 8651 167 - IBM 8651RM0 | Hardware Maintenance Manual - Page 176
, or non-IBM devices Each adapter Drives Memory-Module Kits (Minimum requirement = 1 bank of 64 MB DIMMs) Note Minimum operating requirements vary for each computer. For example, an IML drive in the drive startup sequence (IML systems only). 3. Power-on the computer. If the problem remains, suspect - IBM 8651RM0 | Hardware Maintenance Manual - Page 177
Parts Listing (Models RH0, RM0, TH0, TM0 - Type 8651) Note For Models RH0 and RM0 rack mounting FRUs, see "Rack Mounting FRUs (Models RH0, RM0 - Type 8651)" on page 175. Front View 1 2 35 4 24 23 22 6 7 21 8 9 10 11 12 13 18 17 15 14 16 19 20 IBM Netfinity 7000 - Type 8651 169 - IBM 8651RM0 | Hardware Maintenance Manual - Page 178
Rear View 25 46 45 44 43 42 41 40 39 26 27 28 29 30 31 36 37 32 33 35 34 38 170 Netfinity Server HMM - IBM 8651RM0 | Hardware Maintenance Manual - Page 179
Mounting Bracket (Models TH0, TM0, RH0, RM0) Keylock with Keys and Pawl (Models TH0, TM0) LED Light Guide with Icons (Models TH0, TM0, RH0, RM0) Vacuum Florescent Display Panel (Models TH0, TM0, RH0, RM0) Lock 01K6639 12J7036 12J3281 12J3091 12J3075 93H4961 IBM Netfinity 7000 - Type 8651 171 - IBM 8651RM0 | Hardware Maintenance Manual - Page 180
Index 27 27 28 29 30 31 32 33 34 35 36 37 38 ?? 39 40 41 42 43 44 44 45 System (Models RH0, RM0, TH0, TM0 - Type 8651) 512 KB Processor Card without Processor (Models TM0, RM0) 1 MB Processor Card without Processor (Models TH0, RH0) I/O Card Retaining Bracket (Models TH0, TM0, RH0, RM0) Advanced - IBM 8651RM0 | Hardware Maintenance Manual - Page 181
Rear Cover (Models TH0, TM0) Diskette Tray (Models TH0, TM0, RH0, RM0) EISA Card Guide (Models TH0, TM0, RH0, RM0) Half High Drive Extender (Models TH0, TM0, RH0, RM0 EMC Ground Contacts (4 each) I/O Blank (1 each) Planar Edge Support (1 each) Power Switch Bracket (1 each) EMC Contact (1 each) - IBM 8651RM0 | Hardware Maintenance Manual - Page 182
) Side Cover Lock Hole Plug (1 each) Mouse (Models TH0, TM0) Power Cord (Models TH0, TM0, RH0, RM0) See"Power Cords" on page 178 . PCI Card Guide (Models TH0, TM0, RH0, RM0) SCSI Adapter (Models TH0, TM0, RH0, RM0) FRU No. 76H0889 12J3077 76H3587 174 Netfinity Server HMM - IBM 8651RM0 | Hardware Maintenance Manual - Page 183
) #8 Lock-Washers (5 each) 10/32 Bar Nuts (5 each) Floating Nuts (3 each) Nut Bar (Models RH0, RM0) FRU No. 12J7038 12J7039 12J3086 12J3088 12J3089 12J3090 01K6662 IBM Netfinity 7000 - Type 8651 175 - IBM 8651RM0 | Hardware Maintenance Manual - Page 184
Power Cable (Models TH0, TM0, RH0, RM0) Power Backplane to Planar Cable Assembly (Models TH0, TM0, RH0, RM0) Rear Cover C2 Cable (Models TH0, TM0) Service Processor 34P/26P Interface Cable (Models TH0, TM0, RH0, RM0) SCSI Adaptor to Bulkhead Cable (Models TH0, TM0, RH0, RM0) SCSI Hard File Fast/Wide - IBM 8651RM0 | Hardware Maintenance Manual - Page 185
1391403 1399046 1391408 1399581 1391495 1393395 1391406 1391409 1399580 1391410 1399582 1399579 1399578 1399571 1393669 1396790 1391405 1391411 1391412 1391412 75H9538 75H9539 1391406 76H0896 1396790 IBM Netfinity 7000 - Type 8651 177 - IBM 8651RM0 | Hardware Maintenance Manual - Page 186
Ecuador, El Salvador, Guatemala, Guyana, Haiti, Honduras, Jamaica, Korea (South), Liberia, Mexico, Netherlands Antilles, Nicaragua, Panama, Peru, Philippines, Saudi Arabia, Suriname, Taiwan, Trinidad (West Indies), United States of America, Venezuela FRU No. 01K9851 01K9853 12J5120 12J5122 12J5124 - IBM 8651RM0 | Hardware Maintenance Manual - Page 187
help you isolate problems. They are written with the assumption that you have model-specific training on all computers, or that are familiar with the computers, functions, terminology, and service information provided in this supplement and the PS/2 Hardware Maintenance Manual (part number 83G8990 - IBM 8651RM0 | Hardware Maintenance Manual - Page 188
Safety Information The following section contains the safety information that you need to be familiar with before servicing an IBM mobile computer. General Safety Follow these rules to ensure general safety: Observe good housekeeping in the area of the machines during and after maintenance. When - IBM 8651RM0 | Hardware Maintenance Manual - Page 189
telecommunication systems, networks, and modems before you open the server covers, unless instructed otherwise in the installation and configuration procedures. Observe the following rules when working equipment; keep the other hand in your pocket or behind your back. Related Service Information 181 - IBM 8651RM0 | Hardware Maintenance Manual - Page 190
high voltages; these instructions are in the injury and machine damage. Do not service the following parts with the power on get medical aid. Safety Inspection Guide The intent of this inspection guide is to assist you in protect users and service personnel from injury. This guide addresses only those - IBM 8651RM0 | Hardware Maintenance Manual - Page 191
first correcting the problem. Consider these loose or missing hardware The guide consists of a series of or sharp edges). 2. Power-off the computer. Disconnect the power cord. 3. Check the non-IBM alterations. Use good judgment as to the safety of any non-IBM alterations Service Information 183 - IBM 8651RM0 | Hardware Maintenance Manual - Page 192
such as those listed below, to provide protection that meets the specific service requirement. Note: The use of a grounding system is desirable but prong of the AC plug on AC-operated computers. Grounding Requirements Electrical grounding of the computer is required for operator safety and correct - IBM 8651RM0 | Hardware Maintenance Manual - Page 193
pas le contenu à l'eau. Mettez la pile au rebut conformément à la réglementation en vigueur. Une pile inappropriée risque de prendre feu ou d'exploser. Related Service Information 185 - IBM 8651RM0 | Hardware Maintenance Manual - Page 194
Caution Continued Die Systembatterie ist eine Lithiumbatterie. Sie kann sich entzünden, explodieren oder schwere Verbrennungen hervorrufen. Batterien dieses Typs dürfen nicht aufgeladen, zerlegt, über 100 C erhitzt oder verbrannt werden. Auch darf ihr Inhalt nicht mit Wasser in Verbindung gebracht - IBM 8651RM0 | Hardware Maintenance Manual - Page 195
de los 100°C (212°F), ni la incinere ni exponga el contenido de sus celdas al agua. Deséchela tal como dispone la normativa local. Related Service Information 187 - IBM 8651RM0 | Hardware Maintenance Manual - Page 196
unter dem Diskettenlaufwerk befindet, kann geringe Mengen Nickel und Cadmium enthalten. Sie darf nur durch die Verkaufsstelle oder den IBM Kundendienst ausgetauscht werden. Sie darf nicht zerlegt, wiederaufgeladen, kurzgeschlossen, oder Feuer oder Wasser ausgesetzt werden. Die Batterie kann schwere - IBM 8651RM0 | Hardware Maintenance Manual - Page 197
ías que se encuentren en la lista de piezas. La utilización de una batería no apropiada puede provocar la ignición o explosión de la misma. Related Service Information 189 - IBM 8651RM0 | Hardware Maintenance Manual - Page 198
Some IBM Personal Computer models are equipped from the factory with a CD-ROM drive. CD-ROM drives are also sold separately as options. The CD-ROM drive is a laser product. The CD-ROM drive is certified in the U.S. to conform to the requirements of the Department of Health and Human Services 21 - IBM 8651RM0 | Hardware Maintenance Manual - Page 199
aquí especificados puede provocar la exposición a radiaciones peligrosas. Opening the CD-ROM drive could result in exposure to hazardous laser radiation. There are no serviceable parts inside the CD-ROM drive. Do not open. Some CD-ROM drives contain an embedded Class 3A or Class 3B laser diode. Note - IBM 8651RM0 | Hardware Maintenance Manual - Page 200
this survey, complete it, and then fax it to IBM HMM Survey at 919-543-8167 (USA). Name Phone Number 1. Do you like this manual? Yes No 2. What would you like to see added, changed, or deleted in this manual? 3. What is your service experience level? Less than five years More than five years - IBM 8651RM0 | Hardware Maintenance Manual - Page 201
software combinations that can be encountered, use the following information to assist you in problem determination. If possible, have this information available when requesting assistance from Service Support and Engineering functions. Machine type and model Processor or hard disk upgrades Failure - IBM 8651RM0 | Hardware Maintenance Manual - Page 202
Unit Customized Operational Services EduQuest (Educational Computers) End User HelpDesk Support IBM Anti-Virus Services IBM Authorized Dealer Referrals IBM Dealer Referral IBM Information Referral Service IBM Service IBM PC HelpCenter and HelpDesk IBM Technical Manuals Multimedia Information Center - IBM 8651RM0 | Hardware Maintenance Manual - Page 203
8343 800-487-7426 800-663-7662 800-IBM-9990 800-263-2769 416-443-5808 Service (DOAs) Publications Ordering Service Management Support Service Management Support Service (Warranty) Manager Service (Warranty) Manager Service Quality Programs Service Quality Programs Skill Dynamics (Education) ThinkPad - IBM 8651RM0 | Hardware Maintenance Manual - Page 204
IBM operates. Any reference to an IBM product, program, or service is not intended to state or imply that only that IBM product, program, or service may be used. Subject to IBM SystemXtra Business Partner HelpCenter HelpFax IBM Personal System/2 PS/2 ThinkPad SystemView XT The following terms are - IBM 8651RM0 | Hardware Maintenance Manual - Page 205
- IBM 8651RM0 | Hardware Maintenance Manual - Page 206
IBM Part Number: 06J0791 Printed in U.S.A. S 6J- 791-
-
 1
1 -
 2
2 -
 3
3 -
 4
4 -
 5
5 -
 6
6 -
 7
7 -
8
-
9
-
10
-
11
-
12
-
13
-
14
-
15
-
16
-
17
-
18
-
19
-
20
-
21
-
22
-
23
-
24
-
25
-
26
-
27
-
28
-
29
-
30
-
31
-
32
-
33
-
34
-
35
-
36
-
37
-
38
-
39
-
40
-
41
-
42
-
43
-
44
-
45
-
46
-
47
-
48
-
49
-
50
-
51
-
52
-
53
-
54
-
55
-
56
-
57
-
58
-
59
-
60
-
61
-
62
-
63
-
64
-
65
-
66
-
67
-
68
-
69
-
70
-
71
-
72
-
73
-
74
-
75
-
76
-
77
-
78
-
79
-
80
-
81
-
82
-
83
-
84
-
85
-
86
-
87
-
88
-
89
-
90
-
91
-
92
-
93
-
94
-
95
-
96
-
97
-
98
-
99
-
100
-
101
-
102
-
103
-
104
-
105
-
106
-
107
-
108
-
109
-
110
-
111
-
112
-
113
-
114
-
115
-
116
-
117
-
118
-
119
-
120
-
121
-
122
-
123
-
124
-
125
-
126
-
127
-
128
-
129
-
130
-
131
-
132
-
133
-
134
-
135
-
136
-
137
-
138
-
139
-
140
-
141
-
142
-
143
-
144
-
145
-
146
-
147
-
148
-
149
-
150
-
151
-
152
-
153
-
154
-
155
-
156
-
157
-
158
-
159
-
160
-
161
-
162
-
163
-
164
-
165
-
166
-
167
-
168
-
169
-
170
-
171
-
172
-
173
-
174
-
175
-
176
-
177
-
178
-
179
-
180
-
181
-
182
-
183
-
184
-
185
-
186
-
187
-
188
-
189
-
190
-
191
-
192
-
193
-
194
-
195
-
196
-
197
-
198
-
199
-
200
-
201
-
202
-
203
-
204
-
205
-
206
 |
 |

S06J-0791-00
IBM Netfinity Servers
IBM Netfinity 7000 - Type 8651
Models RH0, RM0, TH0, TM0
Hardware Maintenance
Manual Supplement
October 1997
We Want Your Comments!
(Please see page 192)